 ">
">
19 Helpful Packing Tips for Beginner Backpackers
Packing for a backpacking trip is an art form. The goal is to pack in such a way that the weight is effectively and comfortably distributed and that gear you need during the day is easy to access without resorting to a full pack explosion. Although it takes time and experience to discover your own preferred method of packing, these packing tips for beginner backpackers will help you get started.
19 Packing Tips for Beginner Backpackers

19 packing tips for beginner backpackers. Photo via Lyla Harrod.
The Basics
1. Buy your pack last.
Lest you end up with a pack that’s too big and end up tempted to fill all that empty space with superfluous gear. Or too small/lightweight for your gear, in which case you’re at risk of damaging the packs and your body by overloading it.
2. Invest in a kitchen scale.

Photo via Owen Eigenbrot.
Little things have a way of adding up when you’re not looking. Even if you’re not trying to go ultralight, it’s helpful to individually weigh and itemize everything you’re putting in your pack so you don’t get caught by surprise when your pack is significantly heavier than you expected it to be.
3. Limit pack weight to 20% or less of your body weight.
Your joints will thank you in the long run.
4. Shakedowns on shakedowns on shakedowns.
Go on practice hikes with your gear to get real-world experience. There’s no better way to figure out exactly what you need and don’t.
Also, get a pack shakedown from a professional or an experienced hiker. Let them go through your gear with a fine-tooth comb and point out areas where you may be carrying more than you need. Mountain Crossings Outfitter on the AT is famous for its pack shakedowns and even offers a virtual shakedown service these days so you can dial in your gear before you ever leave your house.
On a related note, it’s a good idea to get your pack fitted and adjusted by a professional. A badly-fitted pack can make even a reasonable load feel unbearable. Click here to read up on pack fitting.
Design by Claire Straus.
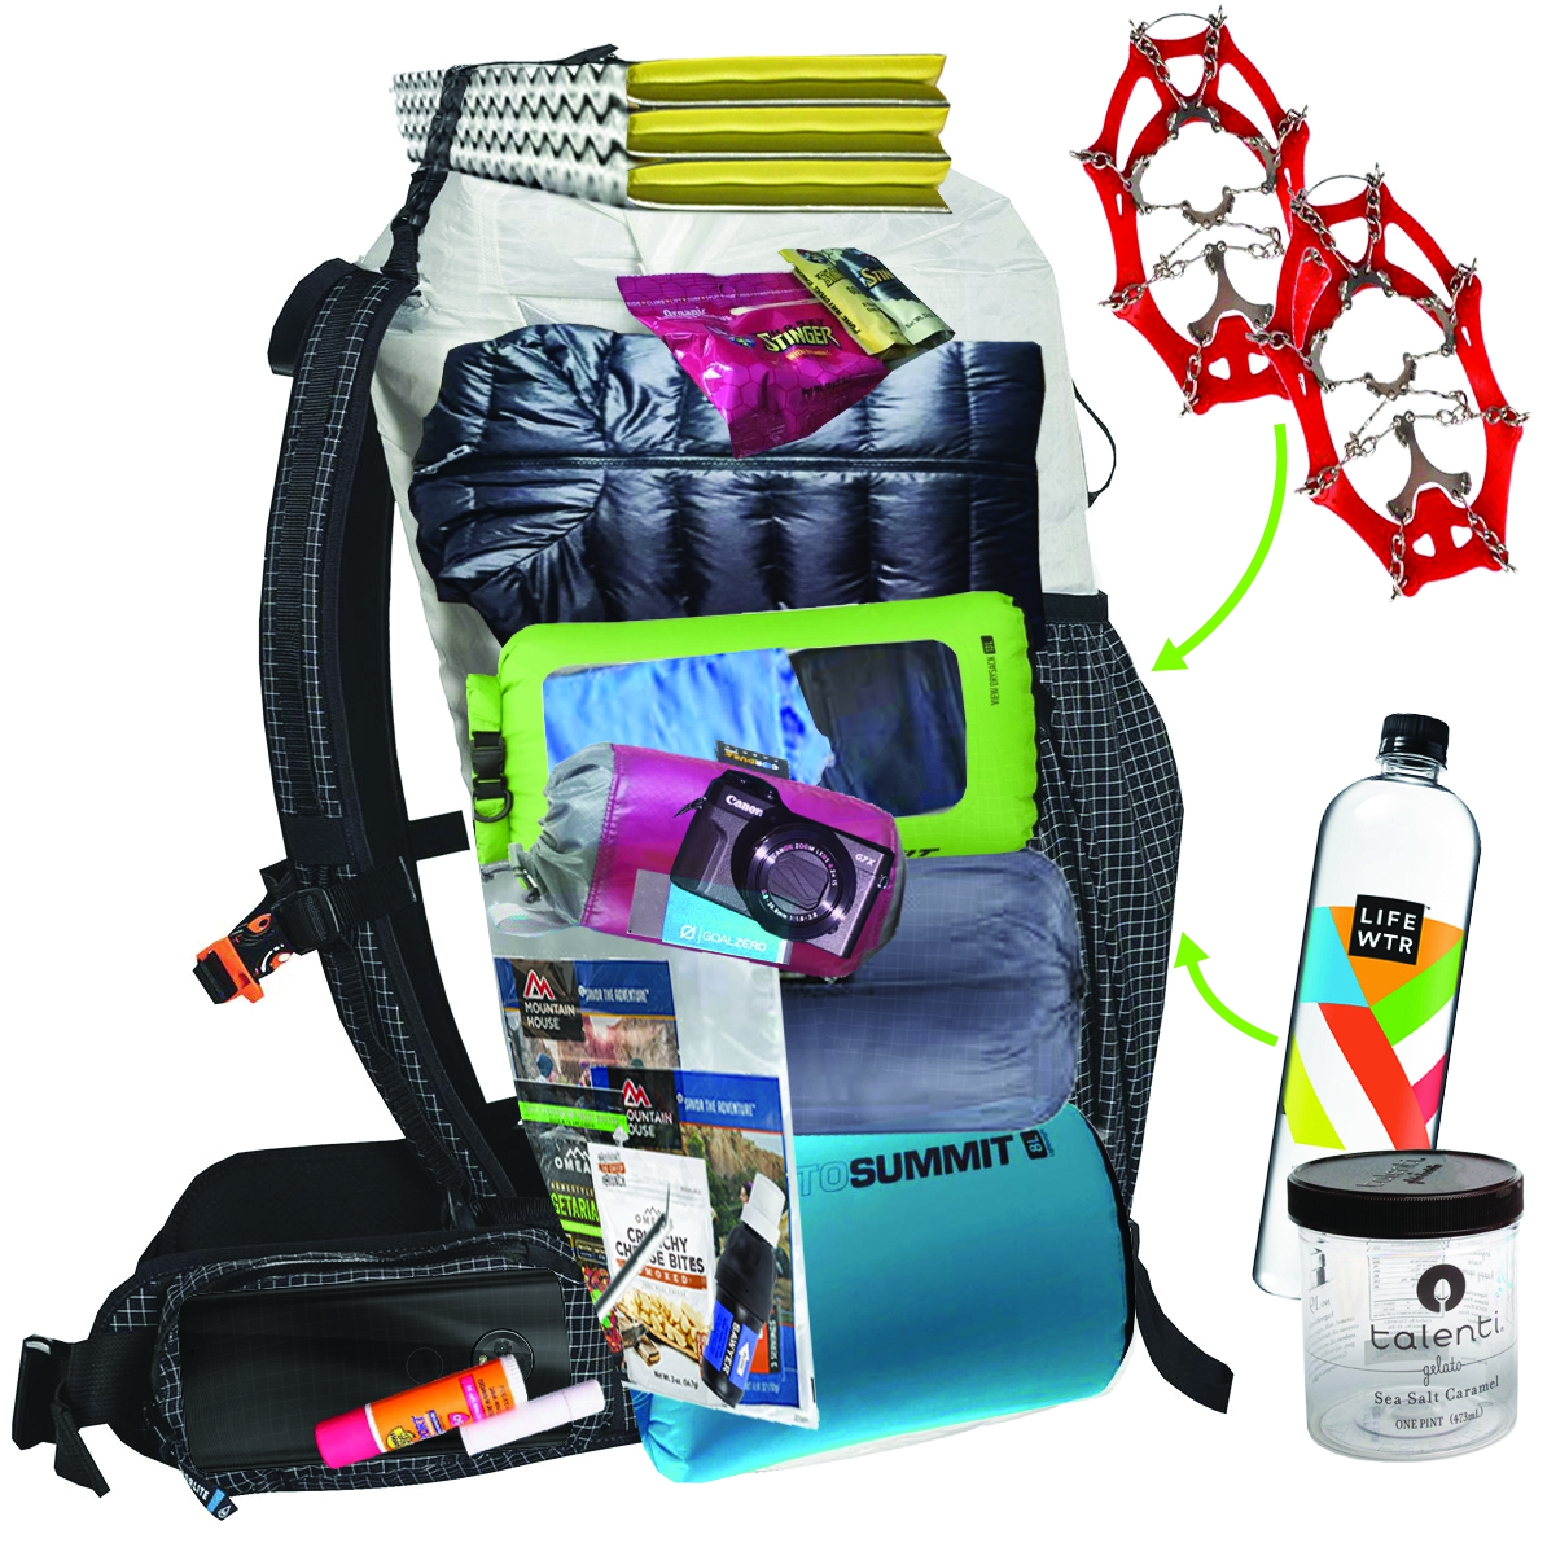
5. Softy/bulky camp goods go in the bottom of your pack, heavy items in the middle, light gear you’ll use during the day on top.
You don’t want your heaviest gear on the top of the pack throwing off your center of gravity, but you also don’t want it at the very bottom bouncing off your butt all day as you walk. Put your sleeping bag, pad, and camp clothes at the very bottom of your pack to form a cushioned, stable base, then put heavy items like your food bag and cooking setup in the middle. Lightweight items that you may want during the day but that are too bulky to go in outside pockets, like your puffy jacket, should go on top.
High-use items like snacks, sunglasses, trowel and TP, water filter, guidebook pages, and phone should go in an outside pocket where they will be easily accessible throughout the day.
READ NEXT – How to Pack a Backpack for Thru-Hiking
More Accessibility Tips

Photo via Owen Eigenbrot.
6. Store tape around your trekking pole
No backpacker wants to carry a giant roll of tape. Instead, you can bring just the amount you need by wrapping it around one of your trekking poles. If your trekking poles are hand-specific, this is also a useful way to quickly differentiate between the left- and right-hand poles. I always put Leuko on the left and duct tape on the right. That way if I have a blister or a piece of ripped gear that needs patching, I don’t need to go rooting around in my bag to find it.
7. Keep your tent footprint in an outside pocket too.
You can use your tent footprint like a picnic blanket during the day to keep yourself and your stuff out of the dirt on breaks. I used a piece of white Tyvek Homewrap as a tent footprint on the AT, and I particularly liked it for sitting down on breaks because the white color made it obvious if a tick or spider was trying to sneak up on me. Keep the footprint in an outside pocket along with your sit pad (if you have one) so you can whip them both out for a break at a moment’s notice.
8. GPS and pepper spray on your shoulder strap.
These are two items that you may not need every day (or hopefully ever), but they may not do you much good buried deep in your pack if the need does arise. Keep your pepper spray on a quick-release clip so you’re not fumbling with a carabiner if you need it.
9. Pee cloth on a coil keychain.

This kind of thing.
I keep my Kula cloth on the bottom of my shoulder strap where it connects to the main pack body. I connect it to the strap using a coil keychain so that when I have to pee during the day, I don’t have to reach far or detach the cloth from my pack. I’ve also seen people use retractable badge clips in this way, but I’ve found that the “retractable” feature of these clips is unreliable and prone to failure after just a few uses.
10. Guidebook pages for the day in their own ziplock.
I know most people just use FarOut these days, but I’ve always been a proponent of a good old fashioned guidebook for redundancy and saving battery life. You don’t need to carry the whole guidebook, just the relevant pages for a few hundred miles at a time. Each morning, I pull out just the pages I expect to cover during that day’s hiking and put them in a separate ziplock in my hip belt. They’re much less bulky that way and the remaining pages stay safe in my pack.
11. Wet gear in outside mesh pocket.
If you’re packing up in the rain, don’t inflict your sodden rain fly on the rest of the gear inside your pack. Most packs these days have a large, stretchy mesh pocket in the back that’s perfect for stuffing your wet gear. You can also keep your rain jacket here for easy access.
Tips for Making Everything Fit
That’s a lot of danglies. Photo by Edward Virvel on Unsplash
12. Limit dangly items.
It’s fine to use the lash points on the outside of your pack to store a few bulky or high-use items, like a foam sleeping pad, a bag of chips, or a pee rag. But if you have too much stuff dangling from the outside of your pack, it’s an indicator that either your pack is way too small or (more likely) you have too much stuff. Heavy things like Crocs will also tend to flop and bang against your pack with every step if not properly secured, which is incredibly annoying.
13. Repackage food before leaving the grocery store parking lot.
Remove any excess packaging, like cardboard boxes or plastic sleeves, before leaving the grocery store. Not only will you reduce the bulk of your resupply significantly, but you’ll also be able to get rid of that trash right away rather than hauling it all the way to your next town stop.
14. Color code your stuff sacks.

You don’t need stuff sacks for every single piece of gear, but it’s nice to have at least some organization in your pack so you can actually find something when you reach for it. It’s helpful if your sacks are all different colors—red for camp clothes, blue for food, green for electronics, for instance, so you know what’s inside each one without having to open it.
15. Consider packing your sleeping bag, rain jacket, and other bulky soft goods loose.
Wrestling your sleeping bag into a stuff sack every morning is a pain. Packing it and other bulky, soft stuff loose will not only save you time and effort but also make your pack load better. These items can fill in awkward cracks and empty spaces so your pack has a nice, stable base and isn’t lumpy. You are running a risk by foregoing the protection of a stuff sack, so make sure you don’t have any sharp items near your soft goods that could rip them, or any liquids that could leak. The following tip will also help ensure your gear stays safe from rain even if it’s not in its own bag.
16. Use a pack liner or trash compactor bag instead of a rain cover.
Rain covers are expensive, bulky, and heavy. You can waterproof your gear just as effectively by lining the main body of your pack with a heavy-duty trash bag or a Nylofume pack liner. As an added bonus, having the liner always in place will ensure you’re never caught off-guard by a sudden downpour and can skip the inconvenience of taking off your pack and putting the rain cover on.
Tips for Eliminating Redundancies

Photo via Katie Kommer.
17. Your pot can double as your cup and bowl.
I love those adorable little backpacking mugs and collapsible bowls as much as the next hiker, but they’re unnecessary weight and bulk. Leave them at home and just eat and drink straight from your cook pot.
18. Spare clothing in a stuff sack = camp pillow.
Inflatable camp pillows are very common luxury items and I have known thru-hikers to carry dedicated pillows the whole way. That said, many hikers find it just as comfortable to put their hiking clothes or any extra layers they aren’t sleeping in in a stuff sack and use that as a pillow.
19. Don’t pack your fears.
This common thru-hiker cliché is one of the most important guidelines to hang onto when developing your packing list. While you do want to carry a first aid kit and other minimum gear to be prepared for an emergency, try to resist the temptation to go overboard in these common areas:
- Limit your first aid kit to basic supplies that fit into a snack-size ziplock bag.
- It’s OK to bring a battery bank, but especially for populous trails like the AT, you don’t need a huge one. You might need to recharge your phone once or twice between towns, but not ten times.
- Likewise, you probably don’t need a 16-ounce fuel canister for one resupply run. Almost everyone (on the AT) makes it between towns comfortably with a four-ounce canister.
- Backup clothes, other than one set of dry camp clothes, are not a thing. You don’t need multiple sets of hiking clothes.
For peace of mind, consider a GPS beacon like the Garmin inReach Mini so you can stay in touch with your loved ones and call for help in an emergency.
Packing Tips for Beginner Backpackers: What Have We Learned?
I can’t stress enough the importance of practicing with your gear and taking your pack for a few trial runs before hitting the trail for a longer excursion. You will make mistakes on your first few trips: you’ll overpack, underpack, and pack the wrong stuff, and that’s a good thing. It’s how we learn. Get as many of those rookie packing mistakes out of your system before starting a major hike as you possibly can. Pretty soon, you’ll have your own long list of packing tips for beginner backpackers to add to the ones listed above.
Featured image: Graphic design by Zack Goldmann.

This website contains affiliate links, which means The Trek may receive a percentage of any product or service you purchase using the links in the articles or advertisements. The buyer pays the same price as they would otherwise, and your purchase helps to support The Trek's ongoing goal to serve you quality backpacking advice and information. Thanks for your support!
To learn more, please visit the About This Site page.

Comments 5
Stuff sacks are mostly useless. Camp clothes go in the bottom of your pack (technically, bottom of your trash compactor bag). You won’t need them until you get to camp and are completely set up. You don’t need a stuff sack for electronics – phone, headlamp, cord can all go in your hip belt (but at least have a Zip-loc to put them in when it rains). Anything more than that can just get tossed in the main compartment. You’re not using it until camp, anyway.
I would never, ever only rely on a trash compactor bag to keep your stuff dry. Always use in conjunction with a pack cover, because a wet pack – and they all get wet, no matter how “waterproof” – is a heavy pack. It will cost you, but you can get very light pack covers. I consider myself to be fairly ultralight and I still carry around the cheap Wal-Mart pack cover I bought when I started.
But the most important packing tip for beginners is this: Pack and unpack the same way every single time. Everything always goes in the same spot. You’ll never have to wonder where anything is (helpful when it’s getting dark and/or starting to rain) and makes both setting up and breaking down camp faster.
Very relevant and wise advise, even for those of us with more than a few miles on our packs. I also just took the plunge and purchased a Garmin InReach Mini 2 for an upcoming backpacking trip to Scotland. If I could add a number 20, it would be make a list of what’s in your pack. It helps to have an inventory when I need to cut weight, been doing it for years.
I weight 230
No way I’m limiting to 46lbs
I comfortable backpack at 30 and limit at 15%
Your body will thank you
I also don’t agree with the 20% bodyweight rule. I weigh 120 — which means I have to keep my pack under 24 pounds? I’m not much over it, but the rule of thumb clearly doesn’t work across the board.
I’ve been backpacking since the 1950s and have learned more aspects of the sport than most people. I’ve learned the evolution of all equipment and techniques of hiking, I don’t use hiking poles except for cross country skiing which is nothing more than Winter hiking. All of the novice hikers I’ve met go overboard with equipment and experience. Learn to slow down and select gear as you gain experience. Be smart about shopping and where to get used to hiking.