 ">
">
Hints for Planning, Prepping, and Resupplying Food on the AT

Christening the Poptart
Food is the fuel that keeps your hiking machine running and prevents you from cannibalizing your trail family. Nobody wants to under or over pack their food for obvious reasons. Back in 2015 as I prepared for my own thru-hike food was by far the thing I fretted over most. No matter how much research I did about preparing the exact amount of food I’d need, I still managed to overpack during my first few weeks out. I learned a few valuable lessons very quickly after resupplying four or five times, the most noticeable were that I didn’t eat any of the protein powder I brought along and that I hated cooking oatmeal in the mornings. I am going to attempt to quell some of the food fears that many aspiring thru-hikers have with hard earned tips and tricks that I learned on my 2015 thru-hike.
1.) The Live Action Food Spreadsheet
On the third day of my hike, the workers at Mountain Crossings, former thru-hikers themselves took a look at my food bag and the pile of Mountain House meals I had placed on the checkout counter, shook their heads and pulled me aside. They told me to dump my food out onto the floor and had me examine the pile. Once my 20 liter stuff sack was empty they asked, “How many days until you resupply?” I replied, “Three or four.” At this moment, they laid out some of the simplest and most helpful advice I received along the entirety of trail, which I will now relay to you!
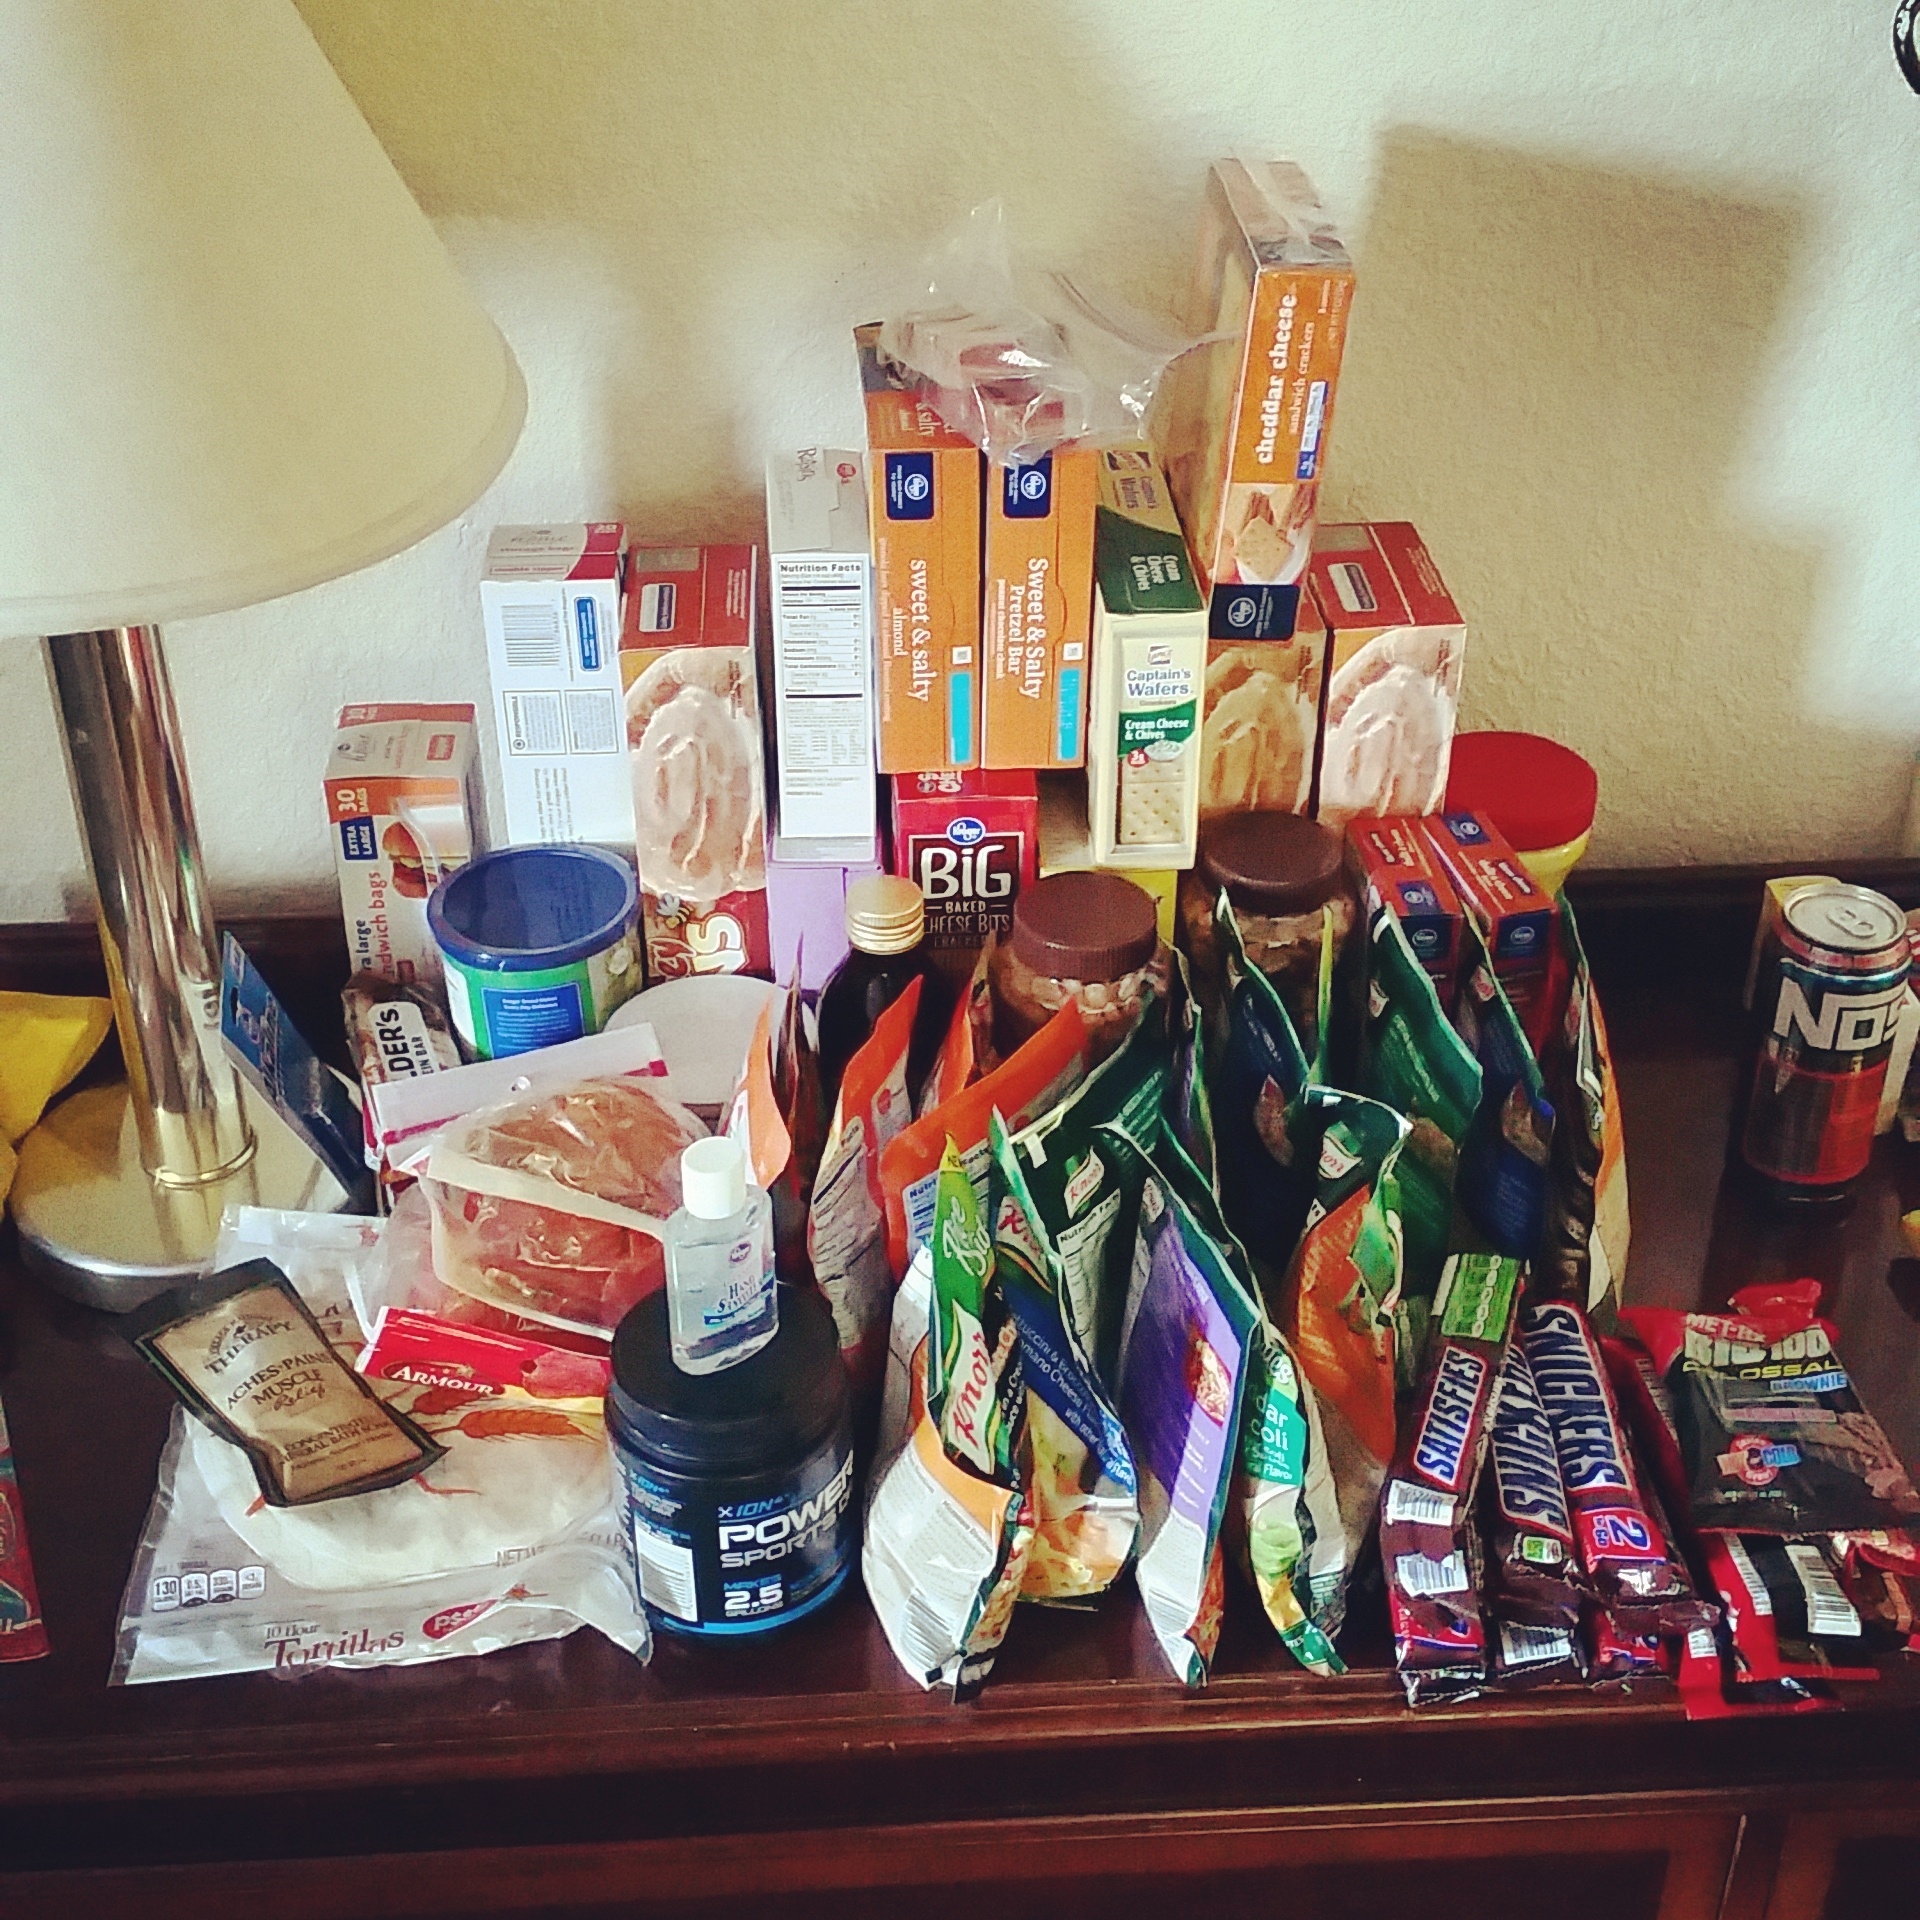
Imagine your food being laid out on a spreadsheet spanning the floor. In your first horizontal row you have your breakfast for each of the days you will be out on the trail. The second horizontal row is your lunch, the third your dinner, the fourth row miscellaneous snacks and the last row “everything else”, including things that you either add to your meals or drink powders and the like. The vertical columns are simply the days on the trail until your next resupply. With this layout you can easily map out almost exactly how much food you will need to make it to your next resupply point. Below is a literal spreadsheet to help visualize what I outlined above because I have no desire to go to the store, do a mock-up resupply and gain a bunch of weight from eating three bags of Doritos and a family pack of Oreos. That’s a lie, I totally have that desire.

The first three categorized horizontal rows show all the parts that make up each meal for each day you will be out on the trail (Breakfast, Lunch and Dinner). These meals are pretty straightforward and easy to plan out because they only make so many flavors of Ramen and Knorr pasta/rice sides. The fourth row is the general “snack” category. Snack foods usually come in bulk so you don’t really have to be as specific as with “meals”. I would generally buy two bags of chips, a box of Oreos a bag of beef jerky and a handful of Snickers bars to get me through a three or four day stretch. Assume about one snack session in-between each meal and you should be in good shape. The Final row is the “other” row which contains your powders and meal additives. These includes things like powdered milk, olive oil, parmesan cheese and coffee. These items generally last a few resupply cycles so you can refill as needed. The key to packing you food effectively and efficiently is preparation. If you follow these general guidelines you will be able to pack the right amount of food almost down to the last bite from your first day out on the trail rather than having to figure it out the hard way like I did.

2.) Resupplying.
The art of the resupply is intimidating at first because of the logistics involved simply to get to a town, store or hostel in the first place. Hitchhiking, calling a shuttle and figuring out which way town actually is are all formidable tasks right off the bat, especially if you have never hitchhiked before. Trust me it becomes easier over time. Once you have figured out how to actually get to a place where you can resupply, you then must enter the store and buy more food. The best method I’ve found is to repeat the aforementioned Live Action Food Spreadsheet method before entering the store as to prevent buying more than you need until your next scheduled resupply. During my 2015 thru-hike I could often be found performing this in the shade a little ways from the front entrance of the grocery store as onlookers rolled their eyes and hurried past in order to escape the smell of my reeking armpits. Once you have accounted for what you need, WRITE IT DOWN, go into the store with a mission, grab what you need and get out. Before long you will be so in tune with the habit of resupplying that you will able to look in your stuff sack, know what you have left, what you need to get, and get in and out of the store in the blink of an eye. Remember, the longer you stay in the store the more money you will spend. Also don’t go in there on an empty stomach, it’s a recipe for disaster. A hungry hiker makes bad decisions.
A Resupply Play by Play:
1. Get a ride to town (hitchhike).
2. Inventory leftover food (hopefully not much) and figure out how many days to next resupply.
3. Write down what you need.
(Example. I need 2 dinners, 3 breakfasts, 3 days of snacks and some more coffee to make it to the next resupply)
4. Empty everything out of boxes and containers then organize into your stuff sack.
5. Hitchhike back to the trailhead, hostel, motel.
6. Get moving, the trail isn’t going to hike itself.
3.) Organization.
For me, keeping my food bag organized was a must. There is nothing more frustrating than having to empty your entire food bag in order to find a snickers bar, which by the laws of trail physics always finds its way to the bottom of the bag. To keep organized, simply use a few gallon sized ziplock bags. I would typically dump out the contents of all of the boxes I acquired from the store, go through my Live Action Food Spreadsheet process and then add all breakfast food into one ziplock, my lunch foods into another and dinner foods into a third. This was followed by a ziplock or two of snacks and a drink mix (Gatorade powder) ziplock bag. When the time came where I needed something, all I had to do was pilfer out the right gallon ziplock and I was good to go. One less frustration to deal with throughout your day!
The Mom Bomb
4.) Nutrition.
Let me say, I am not in any way shape or form a nutritionist and the only training I have in nutrition is from the school of hard knocks. I have garnered a basic understating of what the body needs by simply researching and listening to my body while out on the trail. From what I understand the three major tenants of staying alive and being less miserable on a thru-hike are Protein, Carbohydrates and Fat. As long as you manage to get some semblance of these three throughout the day you won’t feel like a total bag of dog crap, at least most of the time. I personally supplemented all the other multitudes of depleted nutrients by taking a general multivitamin every morning with my breakfast and by gorging on salads, fresh fruits and veggies while in towns and on zero days. For a more inclusive look at nutrition on the trail, refer to Julieann Hartley’s article on the subject.
A Rundown of My typical Daily Meals:
Breakfast
- Protein Bar (Cooking in the morning is not my thing)
- Honey Bun/Donuts
- Coffee occasionally supplemented with Breakfast Essentials Powder
- Multivitamin
Lunch
- Bagel or Tortilla
- Peanut Butter and/or some type of protein like salami/tuna/chicken/pepperoni
- Mayo Packets if you can find them.
- Cheese
- Electrolyte drink (Gatorade/Powerade)
Dinner
- Knorr pasta side/Knorr Rice Side/Ramen
- Chicken/Tuna sealed pack
- Olive oil/Butter – These add some seriously flavor as well as much needed calories.
- Powdered Milk
- Put it in a tortilla which are around 250 calories each!
Snacks
- Beef Jerky
- Trail Mix or nuts of any sort
- Candy bars or Cookies
- Chips
- Anything my heart desired
5.) Cooking.
One tip I learned WAY late on the trail, like literally right before I start the Whites, was to add the contents of your meal to your cook pot, bring it all to a boil (make sure to stir so you don’t burn the living hell out of the bottom of the pot), shut the heat off as soon as it boils, set your cook set off to the side and let the food simultaneously rehydrate and cook all at once. This conserves some serious fuel and saves you some serious money at the same time. WHY DIDN’T I THINK IF THAT 1500 MILES AGO!!!!!!! Save yourself the shame and embrace this technique from the start.
In Closing
Hopefully these tips and tricks help. I wish someone would have explained these things to me back in 2015 before I started my thru-hike. These methods are by no means either the best or most effective I am sure, but they worked for me. There are thousands of other thru-hikers with thousands of other things that worked for them as well. I am confident though that as long as you apply the basic tenets I have outlined above you will have a few less things to worry about before setting out on the trail. Feel free to get ahold of me or comment if you have questions, concerns or other awesome tips and tricks to add to help out others. Happy hiking!

This website contains affiliate links, which means The Trek may receive a percentage of any product or service you purchase using the links in the articles or advertisements. The buyer pays the same price as they would otherwise, and your purchase helps to support The Trek's ongoing goal to serve you quality backpacking advice and information. Thanks for your support!
To learn more, please visit the About This Site page.

Comments 6
great advice, thanks for posting. On the cooking method, how much longer would it take for a pasta dish to be ready without a steady boil? Like 7 mins with a steady boil, how much longer would it take if shut off the fuel and let it sit?
Great question. I generally would give the food about 10 minutes or so and check on it. As long as the noodles are soft, you’re good to go. The process is kind of something you have to feel out, but after a few days you will be able to gauge it fairly accurately.
my husband and I are headed out NOBO on march 7th – this is all so incredibly helpful & useful information. thank you for posting it!
I’m glad it was helpful! Have the time of your life!
Thank you so much Paul! My NOBO starts March 26, like many people food and resupply are the things I worry about. The spreadsheet and examples of breakfast,lunch and dinner makes this gives me a ldea I have coconut and olive oil in my pack the butter is a great idea! Kyle aka the Mayor tells me not to worry, do your best to prepare,show up, the trail provides.
I was definitely worried about food more so than anything else before my thru-hike. It’s really not that scary once you get out there and resupply once or twice. The Mayor is correct, once you get out on the trail things start coming together and all the worries fade away. The hardest part is taking your first steps out on the trail, once you get past that the rest is just walking.