 ">
">
Stitching and Bitching: Building My Own Gear
Cut to my last big camping experience: in January, on the slopes of Mt. Kilimanjaro. Temperatures at night dipped into the high 20’s. Using a sleeping bag, foam pad and tent provided by the guide company, I dreaded my nightly attempt to sleep. Despite wearing every piece of clothing I had brought, I absolutely FROZE. And each morning I had to deal with a wet sleeping bag, thanks to all the condensation from our breath and bodies building up inside the tent.
Once home, I reconsidered the one-person Big Agnes Copper Spur tent I had bought for my 2017-18 AT flip-flop hike. Darling tent, but I didn’t want to have to deal with all that condensation again. I had read that the human body can release up to a liter of moisture per night. This all collects on the inner walls of the tent, making this human cold and her sleeping bag damp.

Poring over lightweight backpacking guru Ray Jardine’s website (www.rayjardine.com) and book, Trail Life, I realized that I had to think outside the traditional box. During a previous long distance trek, I had much success with a lightweight backpack I had made from one of his kits. I decided to go the “RayWay” 100%. Time to bite the bullet and put my trust in his form of shelter: the tarp. Tarps have a relative small following these days, but provide much better air circulation than enclosed tents. I was ready to give it a try.
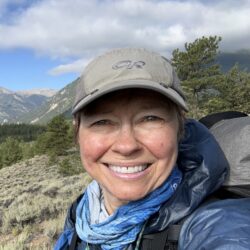
The order was placed and multiple items arrived just a couple of days later.
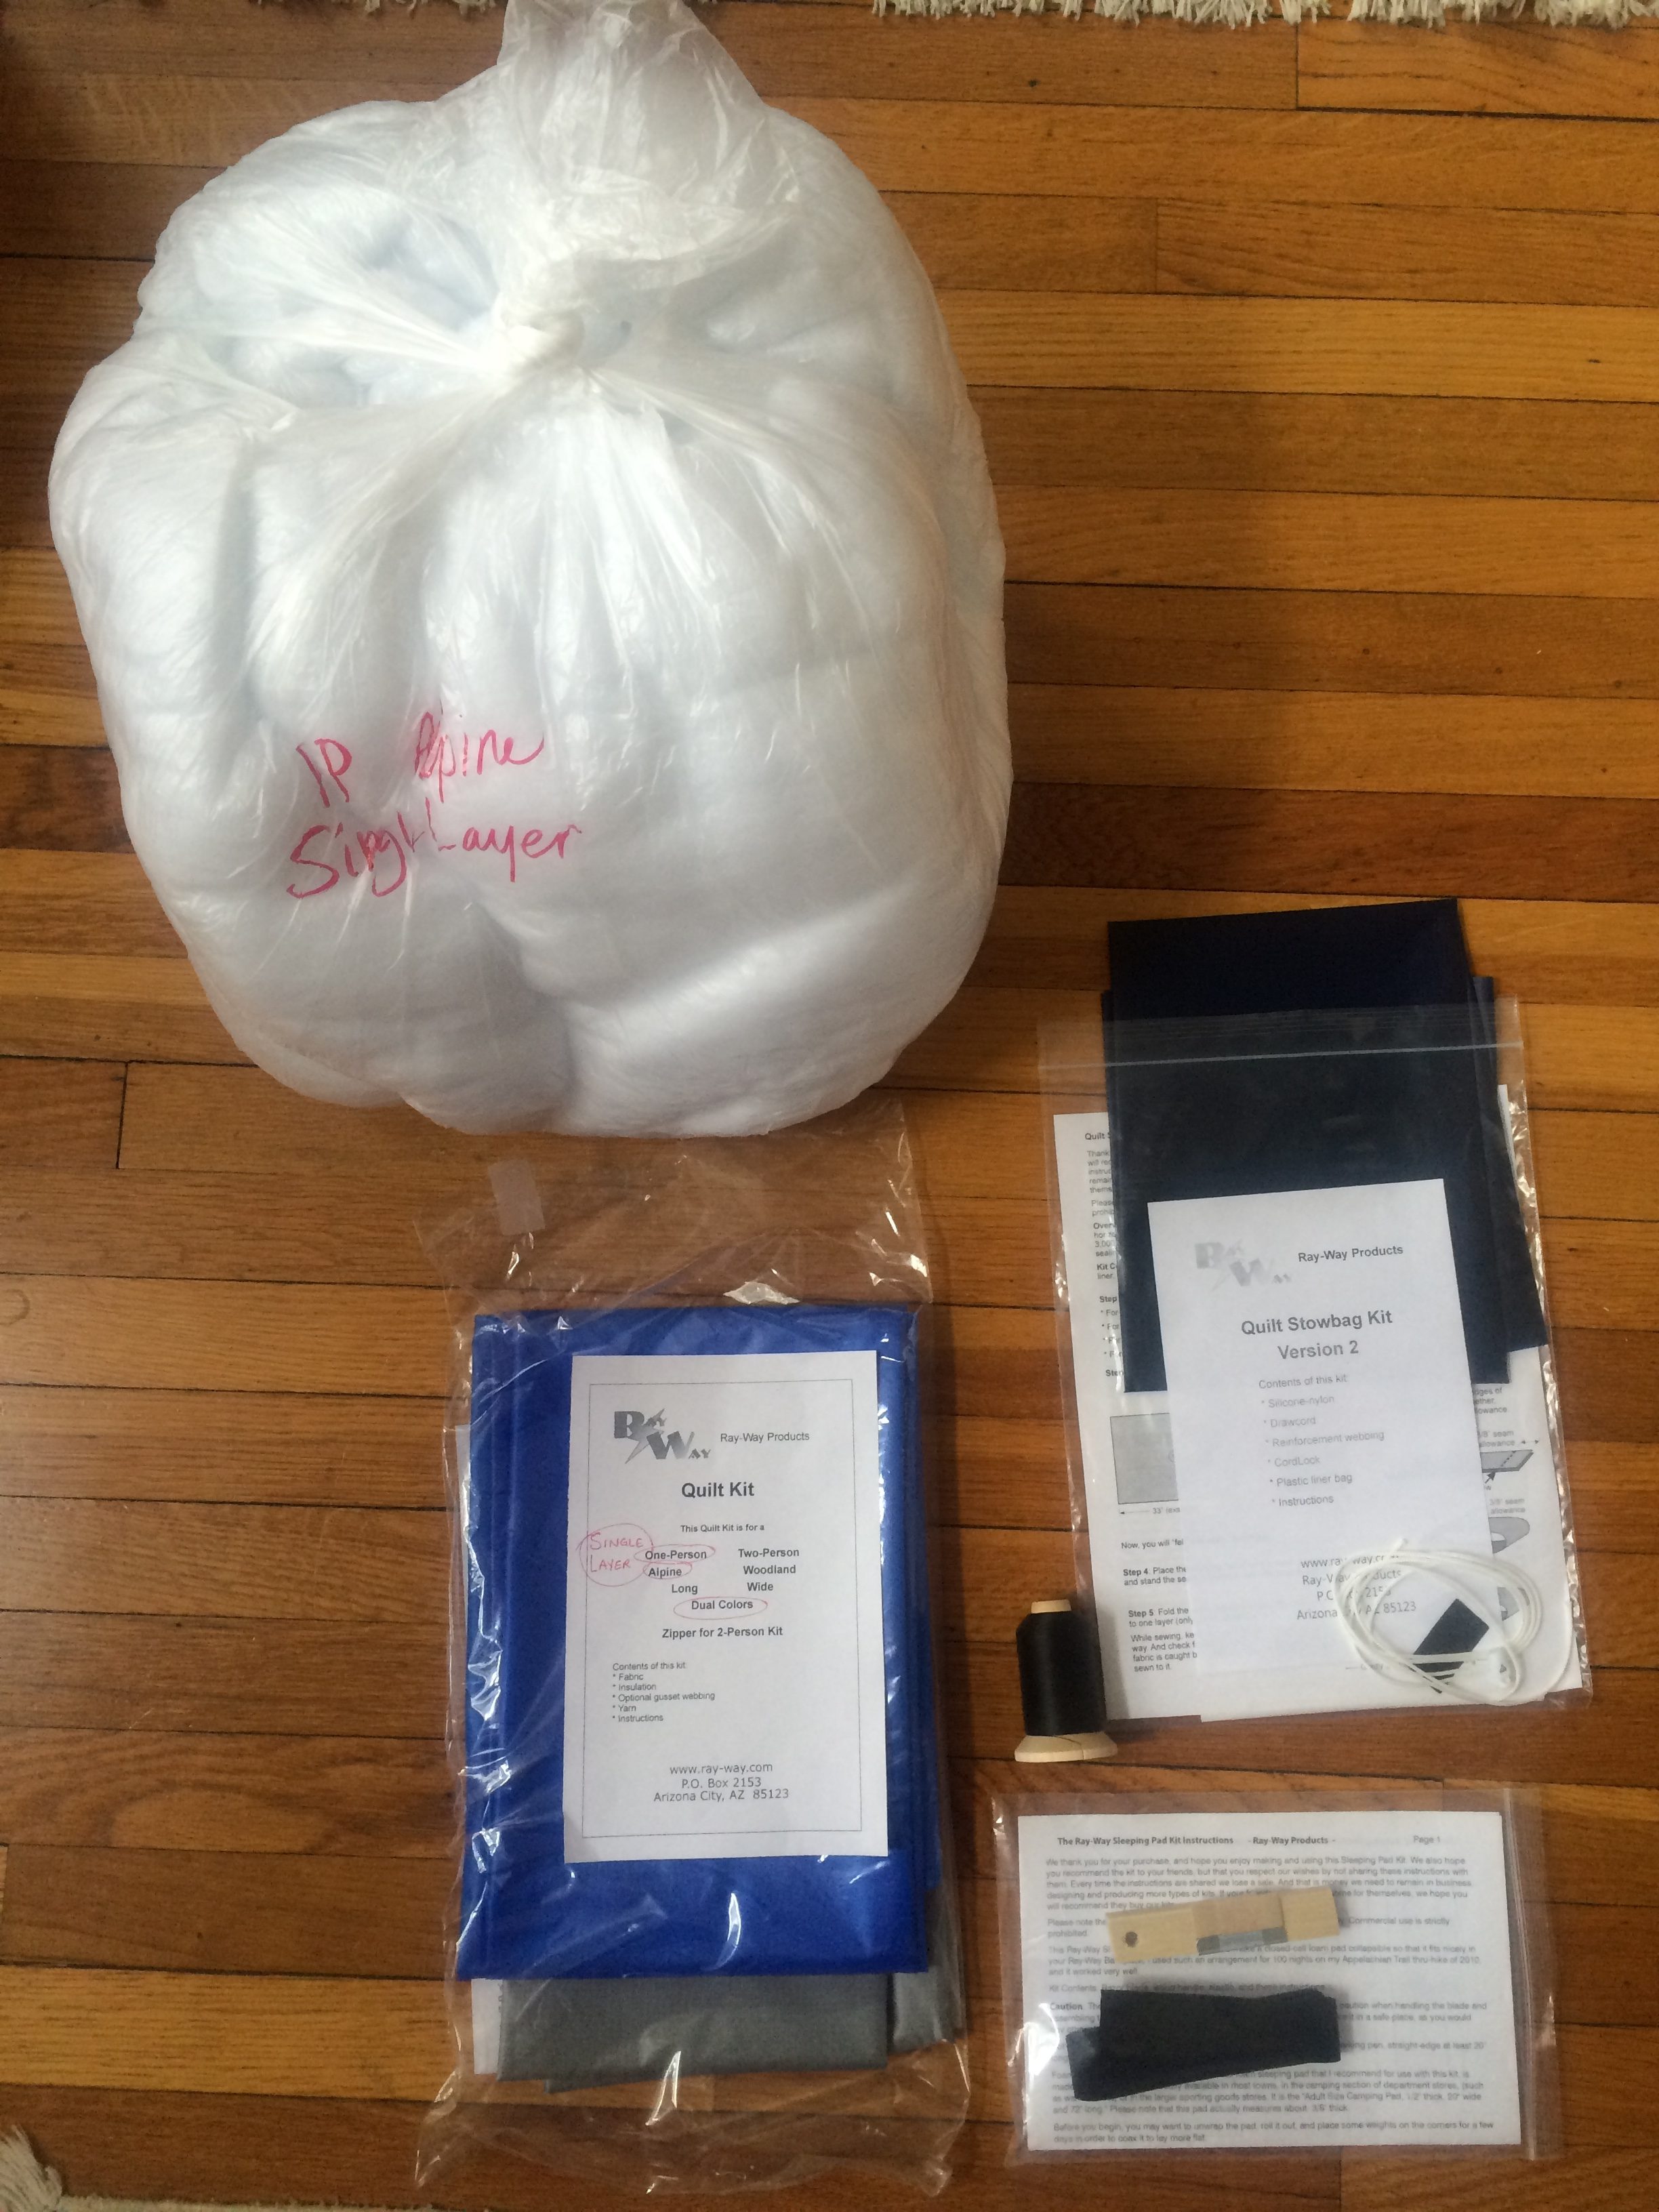
All of these slim packages would be made into a tarp, insect-resistant net tent (the “Spitfire”), several stowbags, a sleeping quilt and another, larger backpack. I was excited about getting back to sewing, after a hiatus of several years.
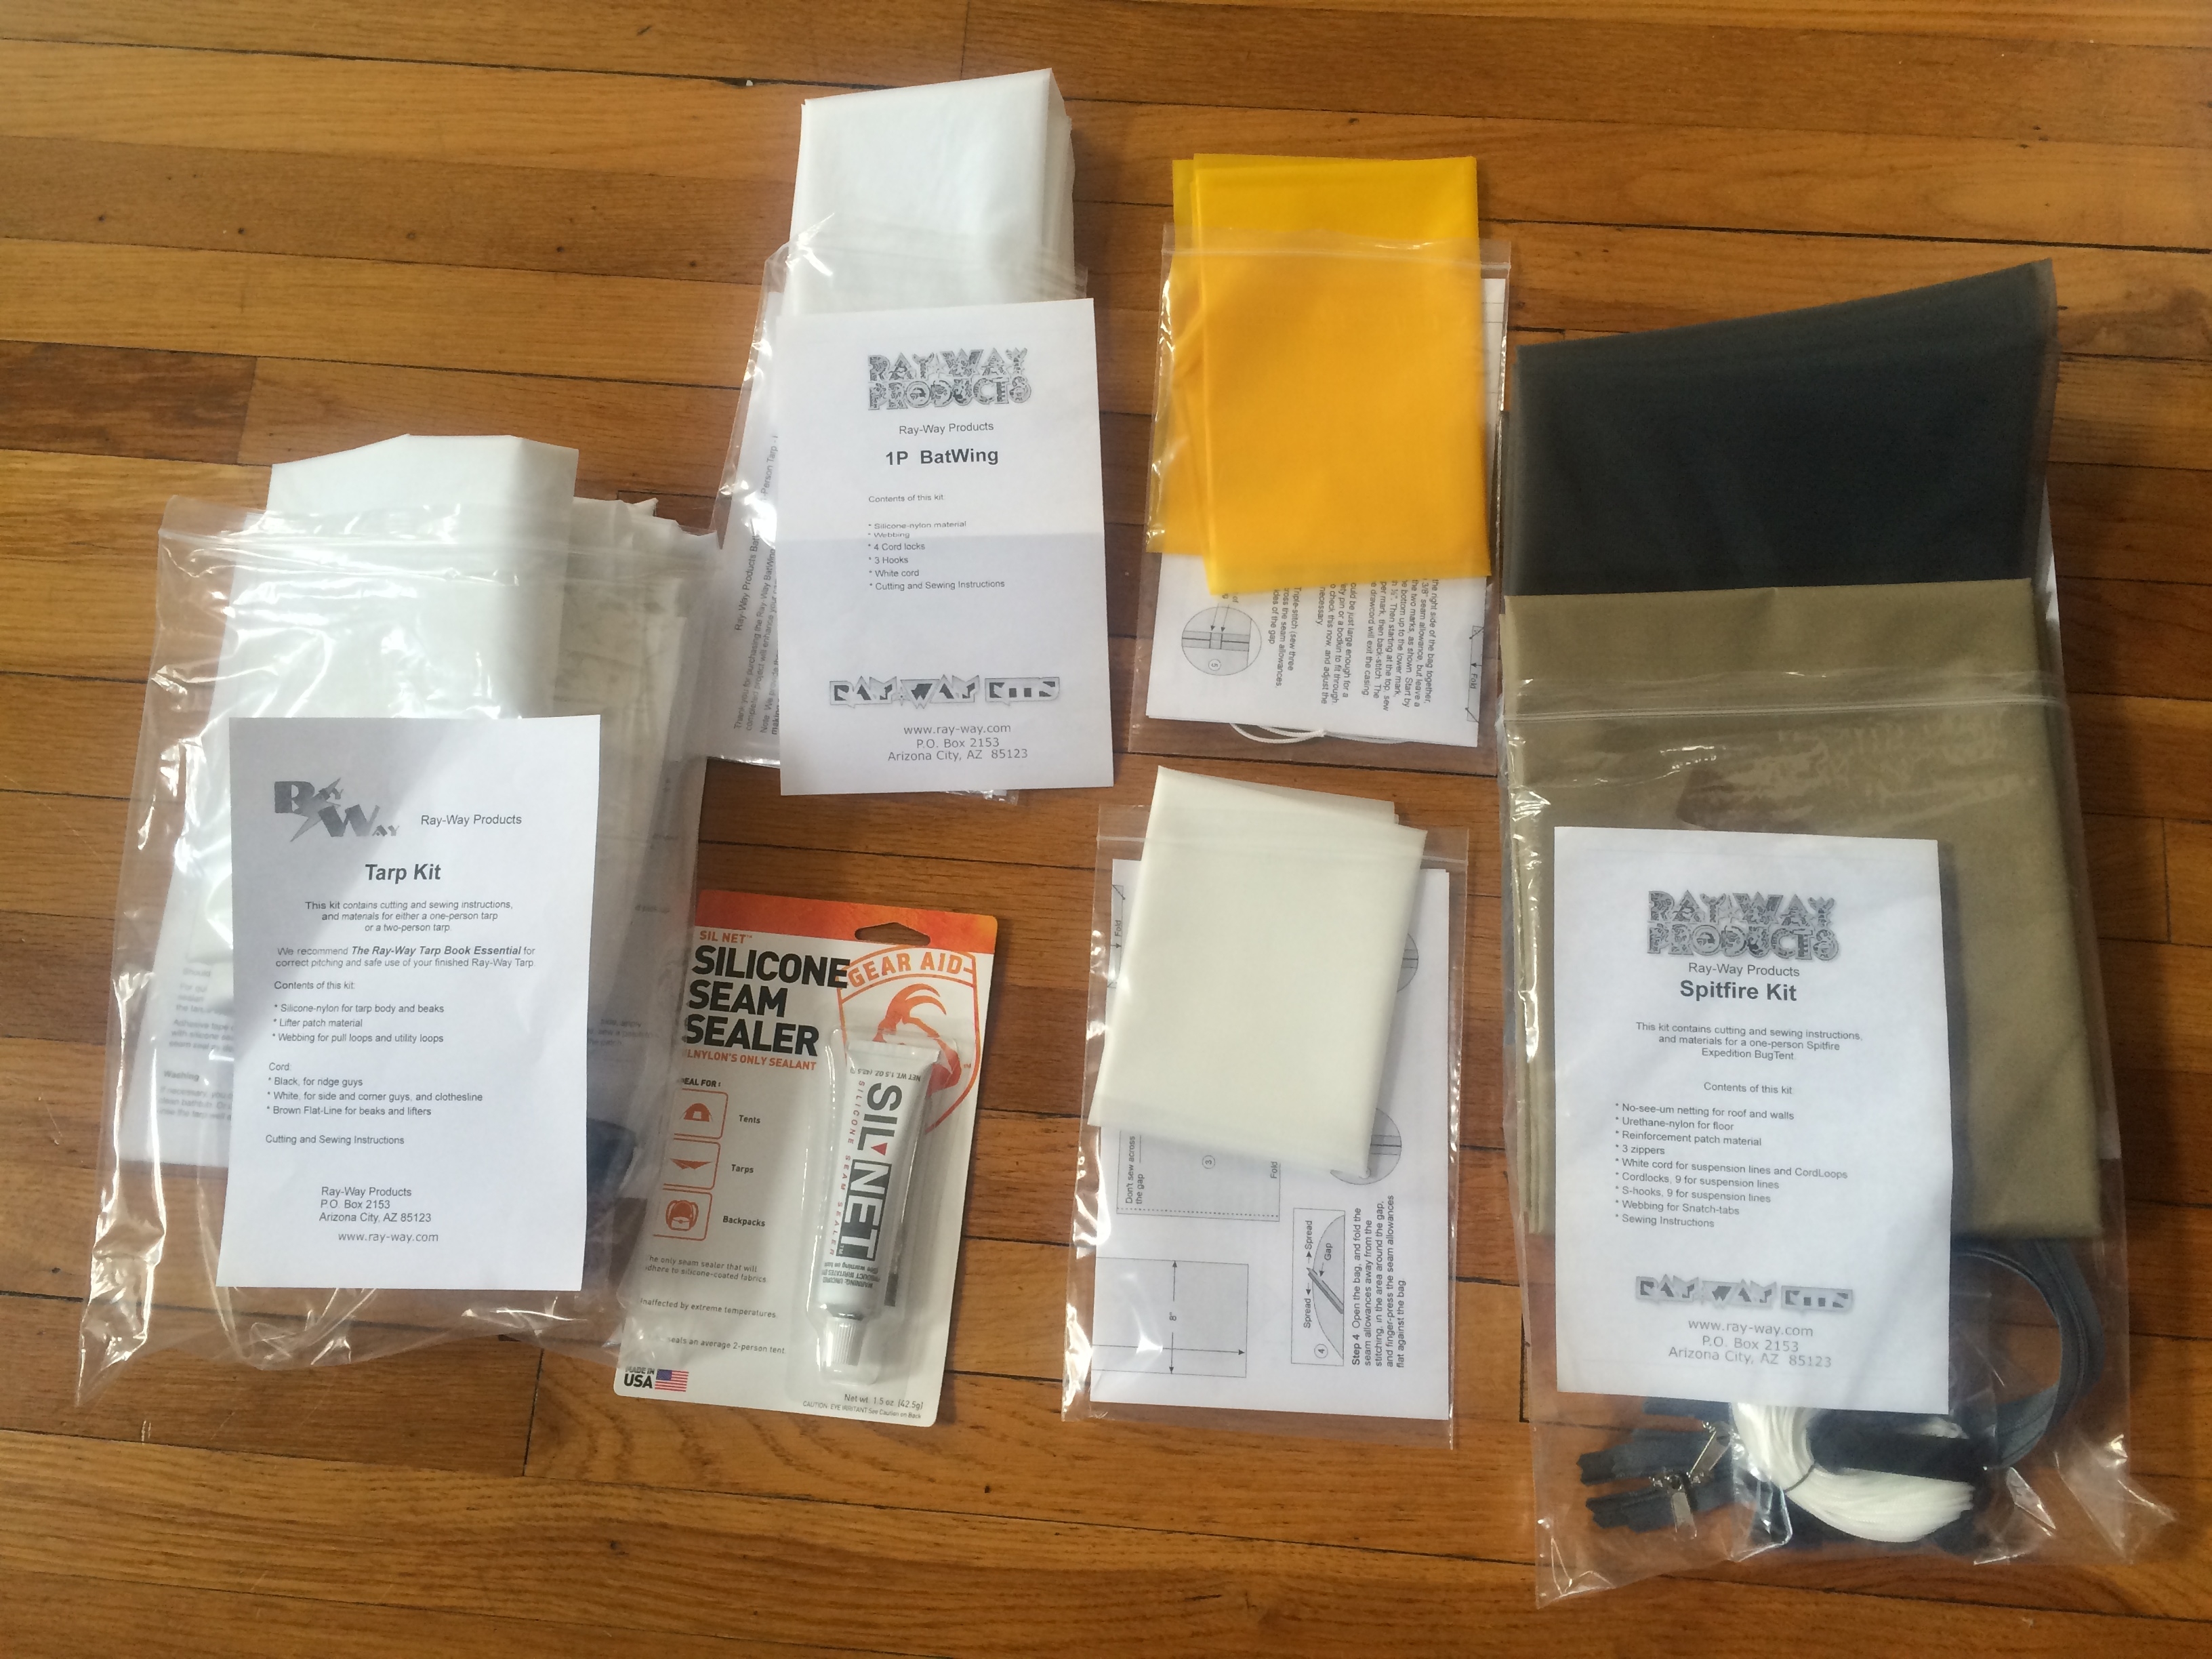
Let the stitching (and some bitching) begin
The room that I have called my sewing room for years once again earned its name. The tarp was first to tackle, with its yards of lightweight nylon to measure and sew together, using the easy-to-follow instructions. I learned the hard way, though, to measure FOUR TIMES and cut once, and to call it a day when fatigue set in.
Several evenings were spent watching Ray’s instructional DVD and reading his Tarp Book Essential. I needed to learn how to made this fluffy white mass into a reliable sleeping structure.
Just a few days later, my tarp was done! Guy lines were attached, essential knots were practiced and the tarp was unveiled and setup between two trees in our back yard. Victory!

It stayed up, thanks to the butterfly clove hitch knots used on the guy lines. Any slanting rain that might appear wouldn’t enter the open ends of the tarp thanks to the beaks that work sort of as triangular awnings. And I could be further protected from a storm by the adjustable “batwing” door that could be attached to close off one end. Very cool designs!

I wasn’t quite done yet. Practicing my knots again, I set up the tarp in the protective garage (don’t judge us by its condition) and sealed the seams with silicone. Not the most fun job, but I’ll appreciate it when it rains.
Don’t stop sewing yet!
The tarp would work perfectly fine as my future lodging on the AT, if it weren’t for the most annoying creatures on the trail: insects. Particularly ticks, which are a real problem, thanks to Lyme Disease.
Thus, the “Spitfire,” Ray’s best net-tent design he has to offer, was next on my to-do list.
Working with the fine netting for the walls and ceiling and the slippery vinyl floor was challenging.

Patience and reading instructions at least four times to get it right resulted in another finished project, after just a few days’ work.
Back to the backyard to see how the tarp and Spitfire worked together. After setting up the tarp again, the net tent was placed underneath. It got its structure by being held in place with adjustable guy lines that fastened to the corners and roofline of the underside (inside) of the tarp.
Beside me in the picture below is my first, smaller RayWay backpack that I made back in 2009.

To quote Ray, the Spitfire isn’t meant to be palatial. That’s the truth! You have to back into it through an opening made by 3 zippers coming together. My twice-weekly Pilates sessions sure paid off here! And, to keep the weight of the net tent low, it’s not tall enough for me to sit up in, although the tarp itself can be. But I figure that, by the time I get inside the thing after multiple hours on the trail, I’ll be ready to just zonk out. And will be grateful to be in a bug-free but ventilated space, especially in July and August.
It’s actually very fun snuggling into the Spitfire. Here are my two darling granddaughters peeking out of the lower foot end of the net tent. Cute, aren’t they? Too bad they aren’t up for a 5 month hike.

Time for bedding
Ray Jardine also offers instructions and materials for making sleeping quilts. Basically, you make a quilt (synthetic filler, not down), shape it slightly to fit your body, sew one end into a cozy pocket for your feet, and voila, you’re in business. Having his precise cutting and assembling instructions made it “voila.” Without those, I couldn’t have figured it out.
In process: putting all the layers together:

Because you basically don’t get added warmth from the part of a traditional sleeping bag that is under you, these quilts save weight by eliminating that part. In warm weather, you just cover yourself as you would with a regular blanket or quilt. In colder situations, you can tuck the edges of the quilt and its single layer border called a “draft stopper” slightly under your body. I love the freedom and flexibility of this technique.
With the added assistance of those two darling granddaughters, I was able to finish my lightweight summer sleeping quilt and several stowbags in three days. I had made a heavier quilt for early spring hiking a few months earlier, so I was now set for 3 seasons. I love how cozy it is to sleep under these!
Our “grandcats” showing typical feline disrespect for my diligent sewing efforts:

To store the quilt, tarp, and spitfire, I made several stowbags with the girls as well. I love sewing with them.

The final, most important piece in the backpacking puzzle: THE BACKPACK
Back in 2009, I made my first RayWay product, his 2200 cubic inch backpack, for a 1000 mile hike in Europe. I didn’t need a larger one because I didn’t camp or cook on this trip, staying instead in hikers’ refuges and inns. Light and easy! But I absolutely loved this backpack, which weighed in at…are you ready?…..just 11.8 ounces! Ray believes that hipbelts aren’t needed when you carry light enough of a load. I agree completely.
But for the AT, I definitely needed a larger pack. I’d be hauling camping and cooking gear, as well as warmer clothes for some months of the trip. After debating which one of the three larger sizes of backpacks to order, I decided on his largest, the 2800 cubic inch (45.8 liters). Again, the same design, in the size that was correct for my measurements, and in colors I personally chose (well, the darling granddaughters chose). In addition to the 45.8 liters, there’s an expansion collar that can add much more storage at the top of the pack, as well as three very spacious net pockets.
I was nervous about this project. Would the backpack be big enough for all that I wanted to take? Even though I have been meticulous about researching lightweight gear and eliminating objects that were simple indulgences, I knew I’d be taking more than more experienced backpackers would. Ray Jardine has thru-hiked the AT four times, so he has this process nailed, and often uses his smallest backpack.
But I need not have worried. It went together beautifully. Well, I won’t point out my late-night sewing errors, accompanied by very colorful language. But the mistakes are well hidden.


My gear fits in just right. I’m crazy about the pack, and love the blue color the girls chose.
So the gear is finally made…was it worth all the effort?
A big YES! Making your own gear gives you such a feeling of success and ownership in the whole process of this thing called a thru-hike. No one else on the trail will have what I have, although I’m sure I’ll see a few RayWay tarps and backpacks along the way.
Besides saving money (his kits aren’t overly expensive), another huge advantage is the weight savings. Ready for the numbers?
16.6 oz: tarp with one batwing (covers one end) and tent pegs in stowbags
11.8 oz: spitfire net tent in stowbag
1 lb 5.4 oz: summer-weight synthetic sleeping quilt in stowbag
2 lbs. 3 oz: heavy-weight, wider, cold weather synthetic sleeping quilt in stowbag
10.1 oz !!!: 2800 cubic inch (45.8 liters) backpack, plus expansion collar & 3 large pockets
Can you believe the weight of that backpack? His new design is even lighter than the smaller backpack was 8 years ago. The heaviest things involved are the comfortable, padded shoulder straps. There’s no pack frame, but it’s not needed. I arrange my items carefully in the pack, putting my 1/8 inch thick Gossamer Gear foam pad folded against my back, and my Thermarest NeoAir mattress likewise. It’s all very comfy.
My total pack weight for chilly early spring hiking (minus consumables) comes in under 14 pounds. I’m not exact on the final numbers, but I do know that it’s a very easy load to carry.
Tested and approved…so far….

I’ve been out on two weekend backpacking trips to test everything, and have been very pleased. My two biggest challenges so far haven’t been with the gear, but working out how many layers to take for cold weather sleeping (I sleep COLD!), and making myself crawl out of the Spitfire net tent at 2 am when nature calls. I hate getting out of our flannel-sheeted bed at home, so leaving a cozy sleeping quilt for a 37 degree potty run is REALLY t0ugh! I’m sure I’ll eventually train myself to end this early morning bladder discomfort.
Will the tarp and the net tent work out? So far, so good, but only time will tell. But I’m sure willing to give it a try. I have faith in the system.
Off to the AT in 2.5 weeks for a shakedown hike
Since I can’t begin my SOBO hike from Harpers Ferry till mid- to late-July, I am itching to get on the trail before then. So I’ll be going to Harpers Ferry for the ATC’s Flip Flop Festival during the weekend of April 22-23, and will hit the trail NOBO that Sunday for a weeklong practice hike. I CAN’T WAIT! Now that I have my gear, clothes and dehydrated meals ready, I’m eager to get this show on the road!!!
Thanks for your interest, and check back in a couple of weeks to see how all the gear…and this body…worked out on the trail.


This website contains affiliate links, which means The Trek may receive a percentage of any product or service you purchase using the links in the articles or advertisements. The buyer pays the same price as they would otherwise, and your purchase helps to support The Trek's ongoing goal to serve you quality backpacking advice and information. Thanks for your support!
To learn more, please visit the About This Site page.

Comments 32
You are awesome and amazing. Totally stoked to hear how your home sewn gear held up.
Sandra, thanks so much for the kind words. I hope that others who read this will be inspired to try making some of their own gear. Even some children have had success making some of these items. It’s so satisfying. I was amazed by all the careful attention to form and function Ray Jardine puts into his time-tested kits.
I actually miss sleeping in my tarp, Spitfire and quilt when returning home from a weekend expedition. But I’m guessing 2200 miles on the AT might take care of that…
You are inspiring! I wish I had the time to make my own stuff, but I am so dependent on other peoples designs. I am finally purchasing a tent my own tent after borrowing other friends tents and all have the dreaded problem of condensation. Would you have any suggestion of tents that will not have that issue that i can purchase? I am backpacker in California mainly. I have hiked the portion of the AT in the Shenandoah national park, it was beautiful and lot of bears. Good luck on your journey!
ps: I am friend and fan your son Jon. Congrats on your post! I look forward to reading more.
Elyse, thanks so much for your comments. Do you have access to a sewing machine? It wouldn’t take more than a week of part time work to knock out the tarp and the net tent. Ray Jardine offers a couple of different net tent designs. I chose the most complicated, durable style, since I will be using it for 2200+ miles.
I do believe that a tarp is the best way to avoid the condensation. And another benefit is that you aren’t shut off from the outside world of nature when you’re settling in for the night. I love laying there and being able to look out at the trees. When I was in a tent, it felt claustrophobic and removed from the very reason that I chose to camp. With the optional “batwing” adjustable doors for the ends, I feel like I have the option of more protection, should I need it during a storm.
I found this on line: http://www.cleverhiker.com/best-ultralight-tarps-and-tents/ , a review of various tarps and tents. I haven’t researched them, but will say that I really like the other gear that I have ordered from the first company listed, ZPacks. It’s not tough learning how to set up a tarp. If I can do it, without calling out for help from my engineer husband, anyone can do it. And it feels very cool learning different knots that you use.
Good luck!
So you’re a friend and a fan of our son, Jon. That’s great, since I am too! I watch him with awe and wonder at the amazing path he has chosen for himself. And how about that great wife? For those of you who don’t know Jon, check out the website mgatour.com, which is for his business, the “Mediocre Golf Association.” Tournaments for all those average golfers out there.
If you don’t want to make your own, and you want a bug net, the cottage gear companies make a good set of tents that I have had luck with. I mostly backpack in CA, though I did 1000 miles of hte AT last year and find that as long as it’s not raining (or even if it is raining, we can normally leave at least the doors near our feet open unless it is raining really hard), leaving the doors of our triplex open means there is enough airflow through the tent to prevent condensation, especially since you don’t get as much humidity in CA, it’s actually easier to avoid condensation.
Ruth, Just got back from a few nights near Greyson Highland State park; a beautiful section of the AT. So, reading your entry about doing the AT and making your own gear is amazing. Not sure thru hiking is for me (I like to stop and look too much). And it’s not an option until retirement 😉 But there is something about that call! Loved your tarp. Do you have a pattern? I can’t wait to hear about your trip. Carpe diem!
Susan, how great that you got out on the trail. I can’t wait to see every inch of it.
As for a pattern, I highly suggest you go to http://www.rayjardine.com and check out all the very affordable kits he sells. They come with complete instructions and the materials that you will need. He has revamped his design through the years, and it really works well.
If you check out on his website all the unbelievable adventures he and wife Jenny have had, you’ll be totally inspired to expand your horizons.
Ruth, Congratulations on your blog and completion of your beautiful gear. You look well prepared to enjoy the AT. I am inspired by your challenging adventures. I look forward to following along.
Thanks so much, Clarissa. It’ll help me keep going on days when the weather is like it was here today, just knowing friends like you are supporting and encouraging me.
so cool that you were able to make all this gear… I think the next time I make a gear purchase, it will be some sil-nylon to make my own… something. I probably won’t need gear for a while so I don’t have to decide yet! Great post!
I love hearing about your sewing adventures leading to your hiking adventures. I’d stalked Ray Jardine in my lead-up to my own thru hike this year, but knew I didn’t have time to make food and sew gear, so I look forward to seeing how it all works for you and applaud your gumption. Good luck! Hope to see you on the trail.
I know what you mean about not having the time to make both food and gear. Doing all this planning and sewing, along with dehydrating my food, has truly been a full-time job. But I have the luxury of being retired and can do it. I totally understand why others can’t find the time. This is a big deal, preparing for the AT! And throw in the training…pretty much 24-7!
I’ve enjoyed reading your blogs in the past, and hope very much to meet you along the trail. I go by “Yogi,” after my penchant for meditation and yoga each morning, and also my fondness for the cartoon character Yogi Bear. Seems suitable, considering where I’ll be spending my time starting July.
Ruth, semi-retired seamstress here who is also going to F-F-F and starting my nobo Sunday — I can’t wait to meet (and probably hike with) you!! Very motivational photos and results. Congratulations on all your work and best wishes along the AT.
~KC
KC, by the time I reply to your message, you’re already on the trail. I hope things are going great for you!
Very cool…and I like the title…never underestimate the power of profanity 🙂
Damn right!
I’ve had the great pleasure of discovering your AT blog this morning.
My hiking adventures started April ’16 @ 63 yrs with an 393 mile southern AT hike. Literally, today, I was to resume my hike where I left off, at Roan Mountain, but unexpected obligations occurred, so I’m looking forward to April ’18. All that to say it’s thrilling to see you and other women with grown kids experiencing a hiking adventure (solo, no less) with all the pleasures and pain it brings. Hiking is a highlight of my life.
I’m smiling and uplifted today, after reading your three blog post. Your courage and ability amazes and inspires. Thank you so much for blogging your AT ’17 hike.
Claudia, your words humble me. I’m just doing what I feel driven to do and get such pleasure from it. Happily, my husband understands me well and participates often.
It’s so nice to hear from someone else in the same age range. What we lack in speed we make up for in perseverance and hopefully patience. A season for everything!
Best of luck to you in April if 2018.
It was great to meet you this weekend, Ruth. I hope your shakedown hike is going well! I look forward to your updates. – Anne “Shivers”
Thanks for your good wishes. It was good to meet you, too. The week was super. I’m in the process of writing up another post.
Good luck on your flip flop hikes! You inspire me! My daughter and I did our first section hike in the Smokies in April and I hope to do a thru before I am too old! When making a Ray Way quilt, do you really need to cut and sew the gorget on or just cut everything in a rounded shape after adding the inches for what would have been the gorget? I am getting ready to sew mine and am just overthinking it. Have fun!
Sorry I didn’t respond till now. I didn’t see your message till today.
In case you haven’t finished your sleeping quilt yet, here’s my 2 cents about the gorget. It’s worth going to the extra effort to shape it as Ray Jardine suggests. This way it follows the shape of your shoulders and chest and wraps around you more securely. On a cold night, you’ll be very grateful. I totally trust his instructions and advice.
I tried to save time and didn’t put the 8″ wide draft stopper around my first quilt. I also made the quilt too narrow. I sorely regretted this on my first cold test outing. I ended up cutting the quilt down the middle (head to foot) and sewing in a 5″ extension of the nylon and insulation. I also sewed a draft stopper around the top and sides. It was a real hassle and I wished I hadn’t cut corners initially.
I just finished my third quilt. I now have a lightweight single alpine layer, a warmer double woodland, and the warmest double alpine. I’m set!
And this week I’ll be sewing my third backpack. I have a small 2200 cubic inch one, a large 2800 (the blue on in the photos), and will now make a medium 2600 for the warmer months on the AT, when I have lighter gear and clothing.
Good luck with your sewing and enjoy your hiking.
Cool beans. And no hip belts on your new pack either?
Trek on . . . andale
Hi again, Leo. Nope, no hip belt. If I can keep it under 25 pounds max, it works. On the AT as I write this, my base weight is 10 lbs. My food for 4 days is around 6 lbs and I don’t carry excess water, thanks to plenty of sources in this stretch approaching Shenandoah. By the end of the day, I’m ready to take off my pack, but so is everyone else.
What a great design. Glad to hear how much you enjoyed the sewing adventure.
It would have been mission impossible for me. What a great example of different gifts. How blessed you are to have the gifts you needed to explore this dream. <3
lot of information about hiking.
Congratulations! And best of luck! This was a neat post. I’m a DIYer myself and it was neat to see you do all of this. Stay dry! Florence is supposed to bring a bunch of rain.
Brian, it has been extremely rewarding making this gear. Unfortunately, my back and two doctors insist that I now use a backpack with a hip belt, to keep the load off my discs. Happily, I have found that the ULA Circuit backpack works perfectly for me for long distance loads. For local errands and short hikes, I still prefer my smallest “Ray-Way” pack I made 9 years ago.
Great post! I just completed by Rayway pack kit, completing my “triple crown of myog”: rayway pack, quilt, and tarp!
How did the gear hold up on the hike? Any “long term” rayway gear reviews or critiques?
Thanks- Ryan
Hey, congrat congratulations on all your sewing! It’s exciting to have gear that you made with your own hands isn’t it? Unfortunately I can no longer use my Tayway backpacks for anything more than just daypacks, because of back issues. Both my sports doctor and chiropractor insist that I have a hip belt so that the weight is not on my vertebrae, which I agree with.
I’m presently on the AT and have done several hundred miles with my other backpack and it’s working out well. But I’m sitting here at my campsite as I write this, looking at my tarp and net tent and look forward to another good night’s sleep there. I couldn’t be happier with this. Granted, one must slither into the net tent like a snake, but so far my back cooperates with these demands.
I started my hike this year on September 1 with my midweight Rayway quilt, but sent it home recently for a heavier one. I found that my Rayway double Alpine quilt was a bit too bulky for my new backpack, so I am now using an Enlightened Equipment down quilt for the colder weather. But overall, I still really like his products and wish I could use the original backpack more.
Good luck on all your hikes!
Ruth, I’m so impressed with how you went for it and made it all. So inspirational. Im also impressed by your GR5. Do you have an article on that? I’d love to read more about your experience. I recently learned about it when I was out in the dolomites. I’m not sure why not more people talk about it like they do the other trails.
Thanks for sharing. Blis
Hi Blis! What a nice surprise to be notified of a comment on this post. I’m still happily using the tarp and net tent when camping. I can’t imagine being stuck inside an enclosed tent when I’ve gone hiking to see nature. Laying in my net tent, I can look all around me, under the edges of the tarp.
The GR5 was fantastic. Like you, I’m always surprised folks dream of walking Spain’s Camino, which is jam packed with humanity, often on paved roads. The GR 5 gets you right into the heart of the beautiful Alos. I’d love to do it again someday, or maybe the Tour du Mont Blanc.
Unfortunately , I didn’t do a blog on the GR5. You can find a very good overview of it online at GRfive.com.
My newest trail to pursue is the modest Buckeye Trail, a 1444 route that encircles our state of Ohio. No mountains or breathtaking views, but an excellent opportunity to do a lot of walking and exploring not far from home during this age of covid 19.