 ">
">
Nifty Tricks I have learned on the AT so far

So far on the trail I have learned a lot about how to make mutli-functional use of items in order to save weight and make items last. It has been a fun challenge and along the way I have picked up the following tricks which can be actual life-savers along the trail. I thought I’d share!
1) You will initially carry too much stuff, learn to be regularly shedding items – two efficient ways of eliminating things
a) The 24-hour plastic bag rule – carry a few extra plastic bags with you and as you go through your day, put the things you use in the empty plastic bags. Over 24 hours, you will see what items you use daily. This can help you offload items you think you will use, rather than items you think you need on trail. An example for me here was shedding nail clippers and toothpicks, neither of which I used often enough to carry every day.
b) The 72-hour rule – planning resupply or justifying why you’re carrying something such as extra first aid items or socks, sometimes it can be better to use the plastic bag trick but lengthen it along a 72-hour rule, which roughly aligns with how often you will be near a town, roadside stop like a gas station, or a hostel where you can take care of something. If you haven’t used that item in 72 hours, ship it home or ahead to yourself at a convenient Post Office or Hostel that accepts mail.
2) The almighty Talenti Jar

I really have to thank my fellow Trek Blog writer and trail family member Strider here for this one! The Talenti jar is the plastic jar for the delicious ice cream gelato or sorbet you can pick up from most grocery stores. This container is made of a pretty hardy plastic and can be used to cold soak noodles, make overnight oats, or be a storage space throughout your day. It is a functionally-sized jar with so many uses, it’s something I will thru-hike with for the foreseeable future. Plus, once in a while, you can go into town and replace the Talenti jar with another jar, more delicious calories for your trek!
3) USPS Resupply boxes do come in handy, with some catches
There are quite a few articles on here about the mixed bag of experiences resupplying via USPS on the AT. For me, it has worked out mostly well, with some nuances. For the first half of the trail I planned 6 boxes, mostly food and minor resupply items like tooth paste and shoe inserts. The second half of the trek from VA I was able to refine the experience more to target valuable things to ship to myself and more practical things that tend to be expensive on trail to replace. Some suggestions for more effective resupply:
a) Find post offices which are adjacent to or literally on the trail. The AT passes through dozens of small towns, apps like Far Out have clear indicators of where those towns are and the post office locations
b) Be aware that most small town post offices have limited hours. Limited hours on Saturdays, daily lunch hours off, Sundays closed, and they often close around 4-5pm daily. Google Maps often has the most accurate hours for that local USPS office. I have been fortunate to time most of my Post office pick ups during available business hours, but know many examples of others getting caught and having to wait a day or two to pickup a package.
c) Bounce boxes can be very effective to lighten backpacks and send gear forward. Bouncing a box from one post office to another is an effective way to make items and resupply available to you later on the trail. Once you have paid initial postage there often is not a charge for bouncing a box from one USPS office to another in the area, check with the local USPS office for further details. I did this for a few boxes between Connecticut, Massachusetts, Vermont, and Maine.
d) An effective alternative to the Post Office are hostels – you can ship resupply boxes to hostels along the way, if you are planning on staying at that hostel it is an easy win. If you are planning just a pick up, some hostels charge a handling fee.
4) Sharing the journey with others
a) Every day on the trail it feels like a dozen stories and experiences worth sharing are generated by this journey. It can be moments with wild animals on the trail, a conversation with a stranger, a hitch with a local to town, or even a weather incident like a thunderstorm. Finding a way to capture some of these things helps to keep memories ordered in the right way because after a while some days go by in a blur. For me, I write a daily journal with simple bullet points and the night location where I stop. I post pictures and events to Instagram, and I share moments with my trail family and my boyfriend Jordan as receipts and bread crumbs to keep my stories and events fresh because so much happens in one day.
b) Post Cards – I have been sending post cards to friends and family off and on during my journey, everyone who has received one has reached out and said how much they appreciate me sending them a post card. Better than getting a bill or junk mail!
5) Keeping track of yourself and your items
a) Apple Tags – I have a few apple tags registered to others so I can be tracked remotely by family. These are lightweight and effective because they use GPS and anyone’s nearby iPhone Bluetooth to register their location. One drawback – they make chirping noises once you move them after a while being still, like first thing in the morning when you pack your bag.
b) Share your location via your mobile device – most smart phones enable GPS tracking of the device. I almost always have my iPhone on my person so sharing my location with my significant others is an easy way for them to track my general location.
c) Garmin Tracker – I use this for very remote locations like the White Mountains and Maine. Sometimes cell service won’t work at all, but the Garmin tracking service, which is an extra monthly subscription fee, can let you share your location with your loved ones and contact emergency services should you need them.
6) Practical items on trail – Fanny Packs and Peanut Butter + Oreos
Two things I have picked up on trail which have been essential to daily success on trail are Oreos + Peanut Butter and a Fanny pack. 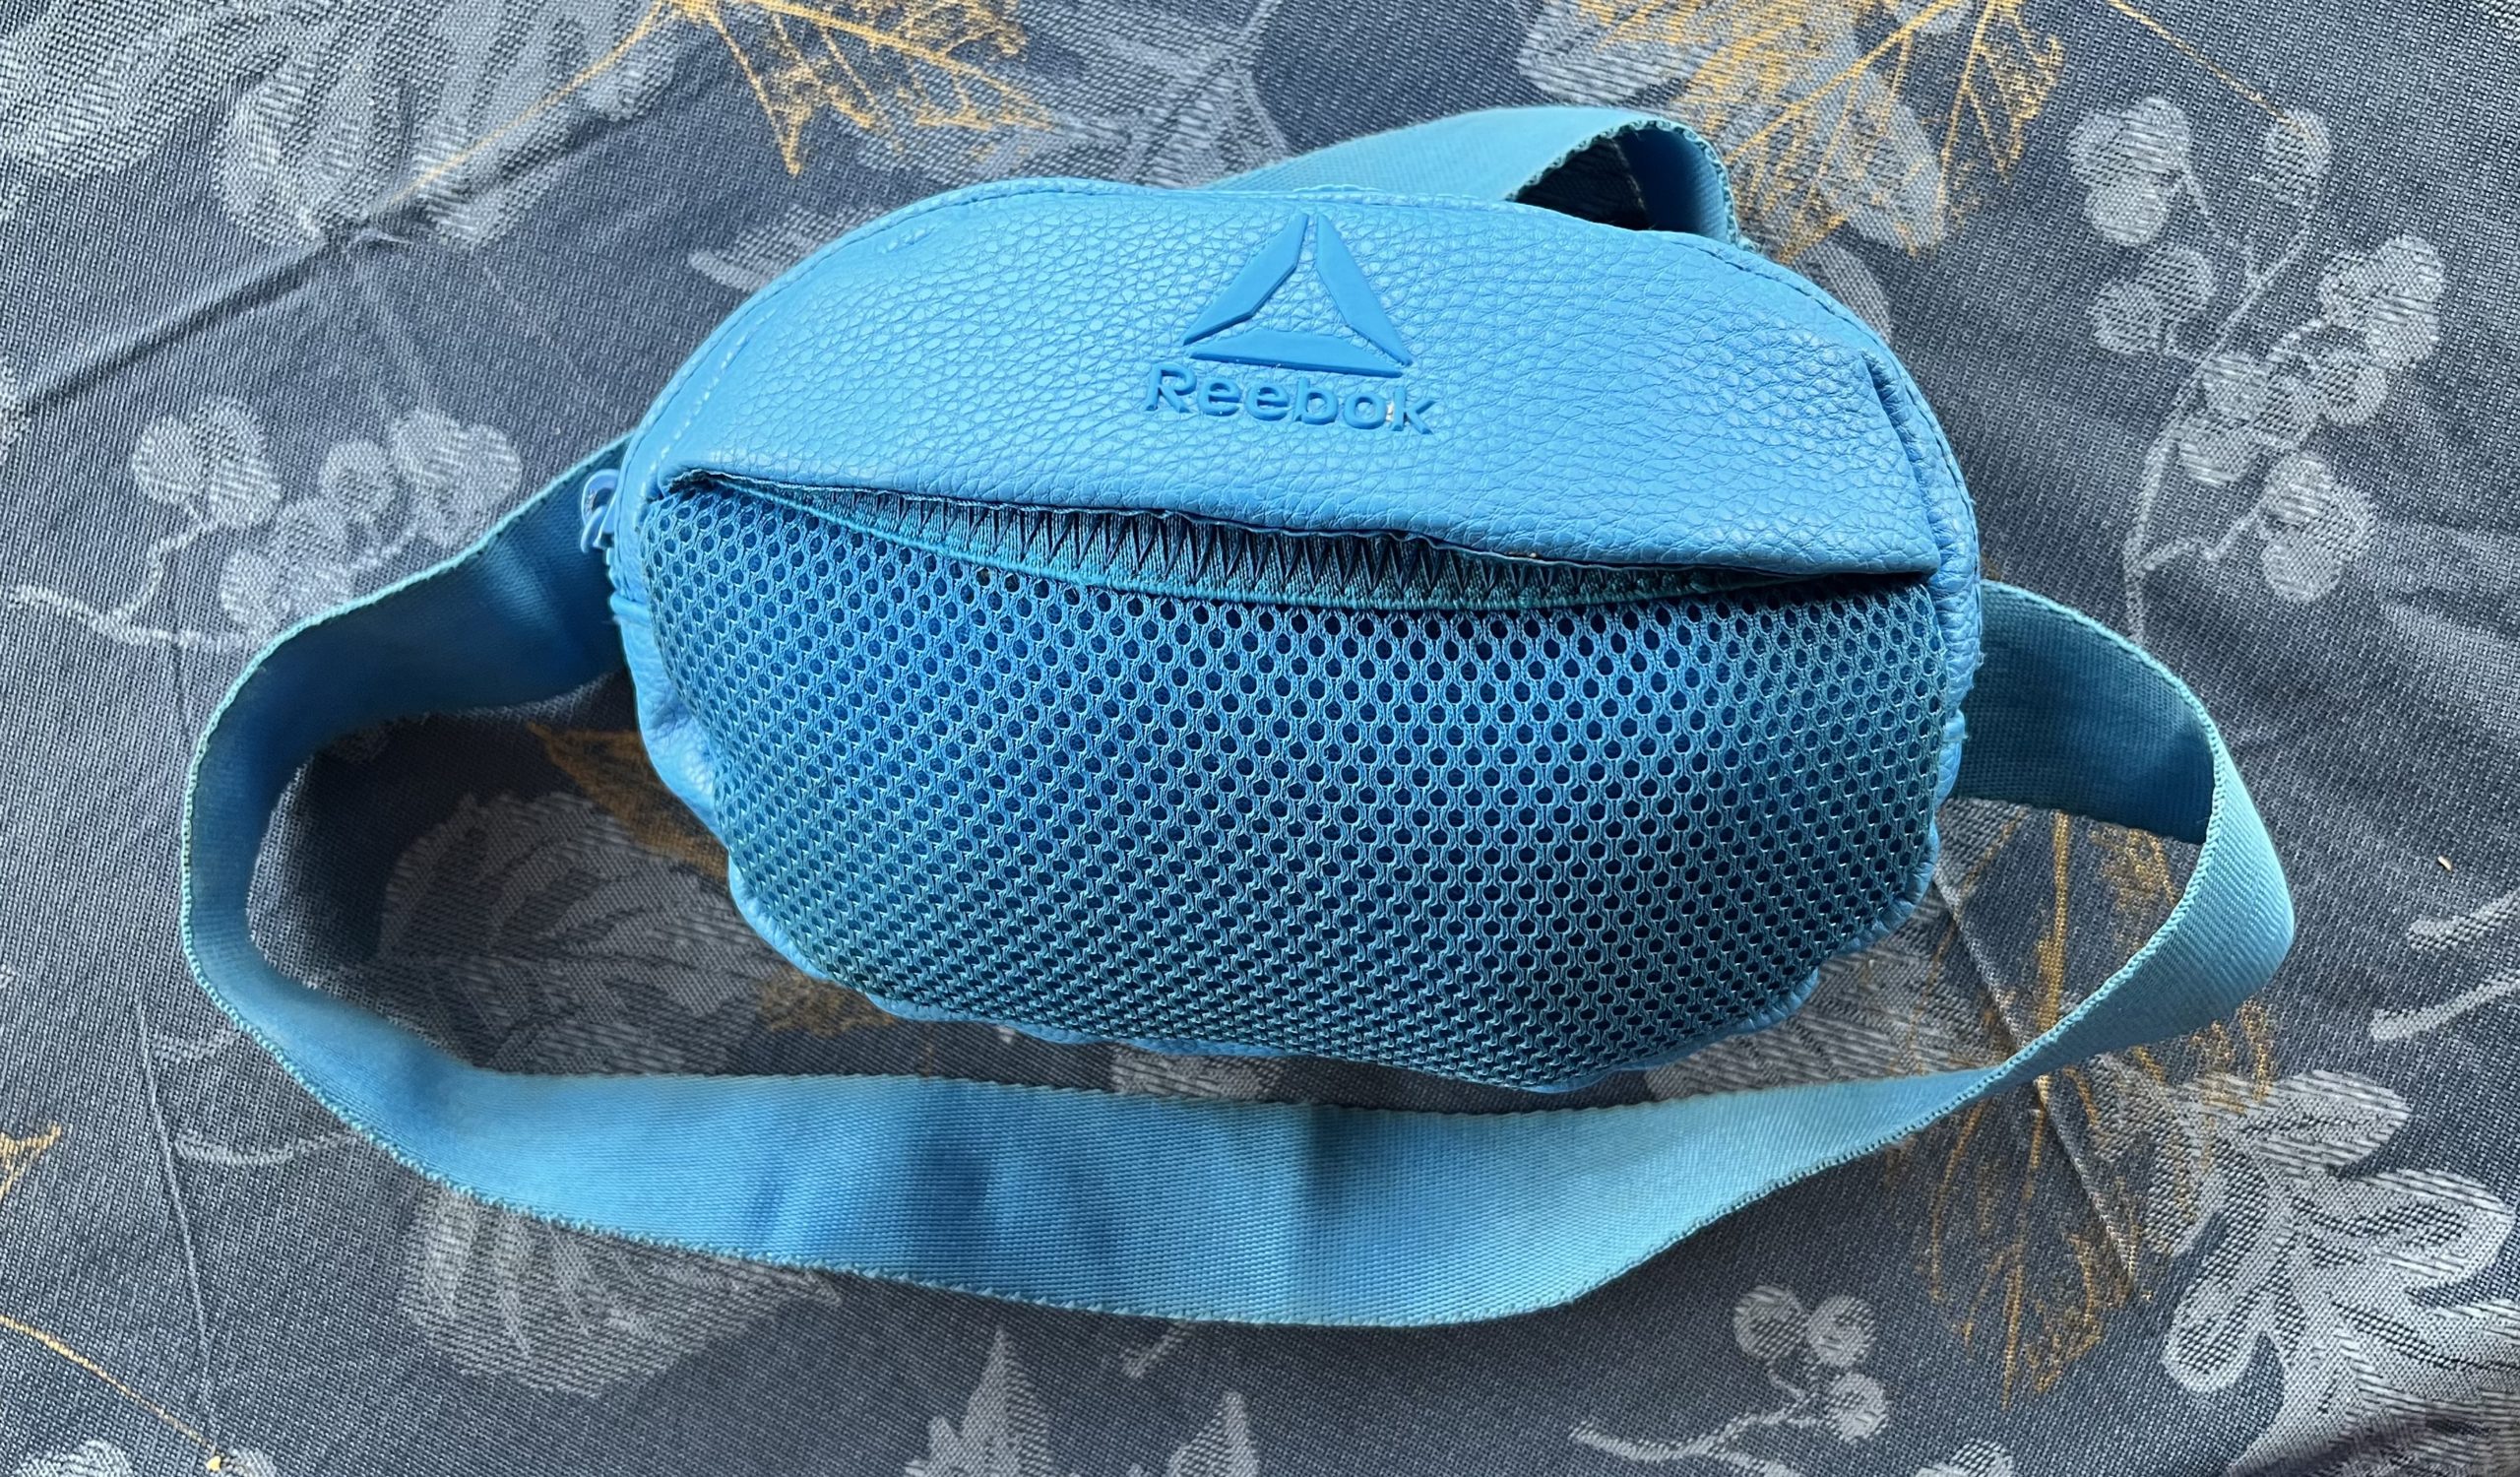
I use the Fanny pack to hold my snacks during the day. My current Osprey 58L backpack does not have side pockets on the waist belt so a Fanny pack has been a very practical add on item to keep snacks available during the day. I was not a fan of Fanny packs at first because they seemed to be extra weight, but they really do not add more physical weight to you and their convenience make access to snacks and other daily items essential.
Oreos and Peanut Butter – speaking of snacks and Fanny packs, I have to thank my trail family member Hobble-It for this delicious suggestion – mixing peanut butter with Oreos. Prior to the trail I never mixed the two, on trail, it’s a match made in snack heaven. I usually chow down on 2-4 every few miles or prior to a major climb, and the calories + protein combination is an immediate win for my metabolism out here. Thanks Hobble-It for the suggestion! It is seriously a caloric-game-changer of a snack out here!

7) Elevate your feet for 10 min daily
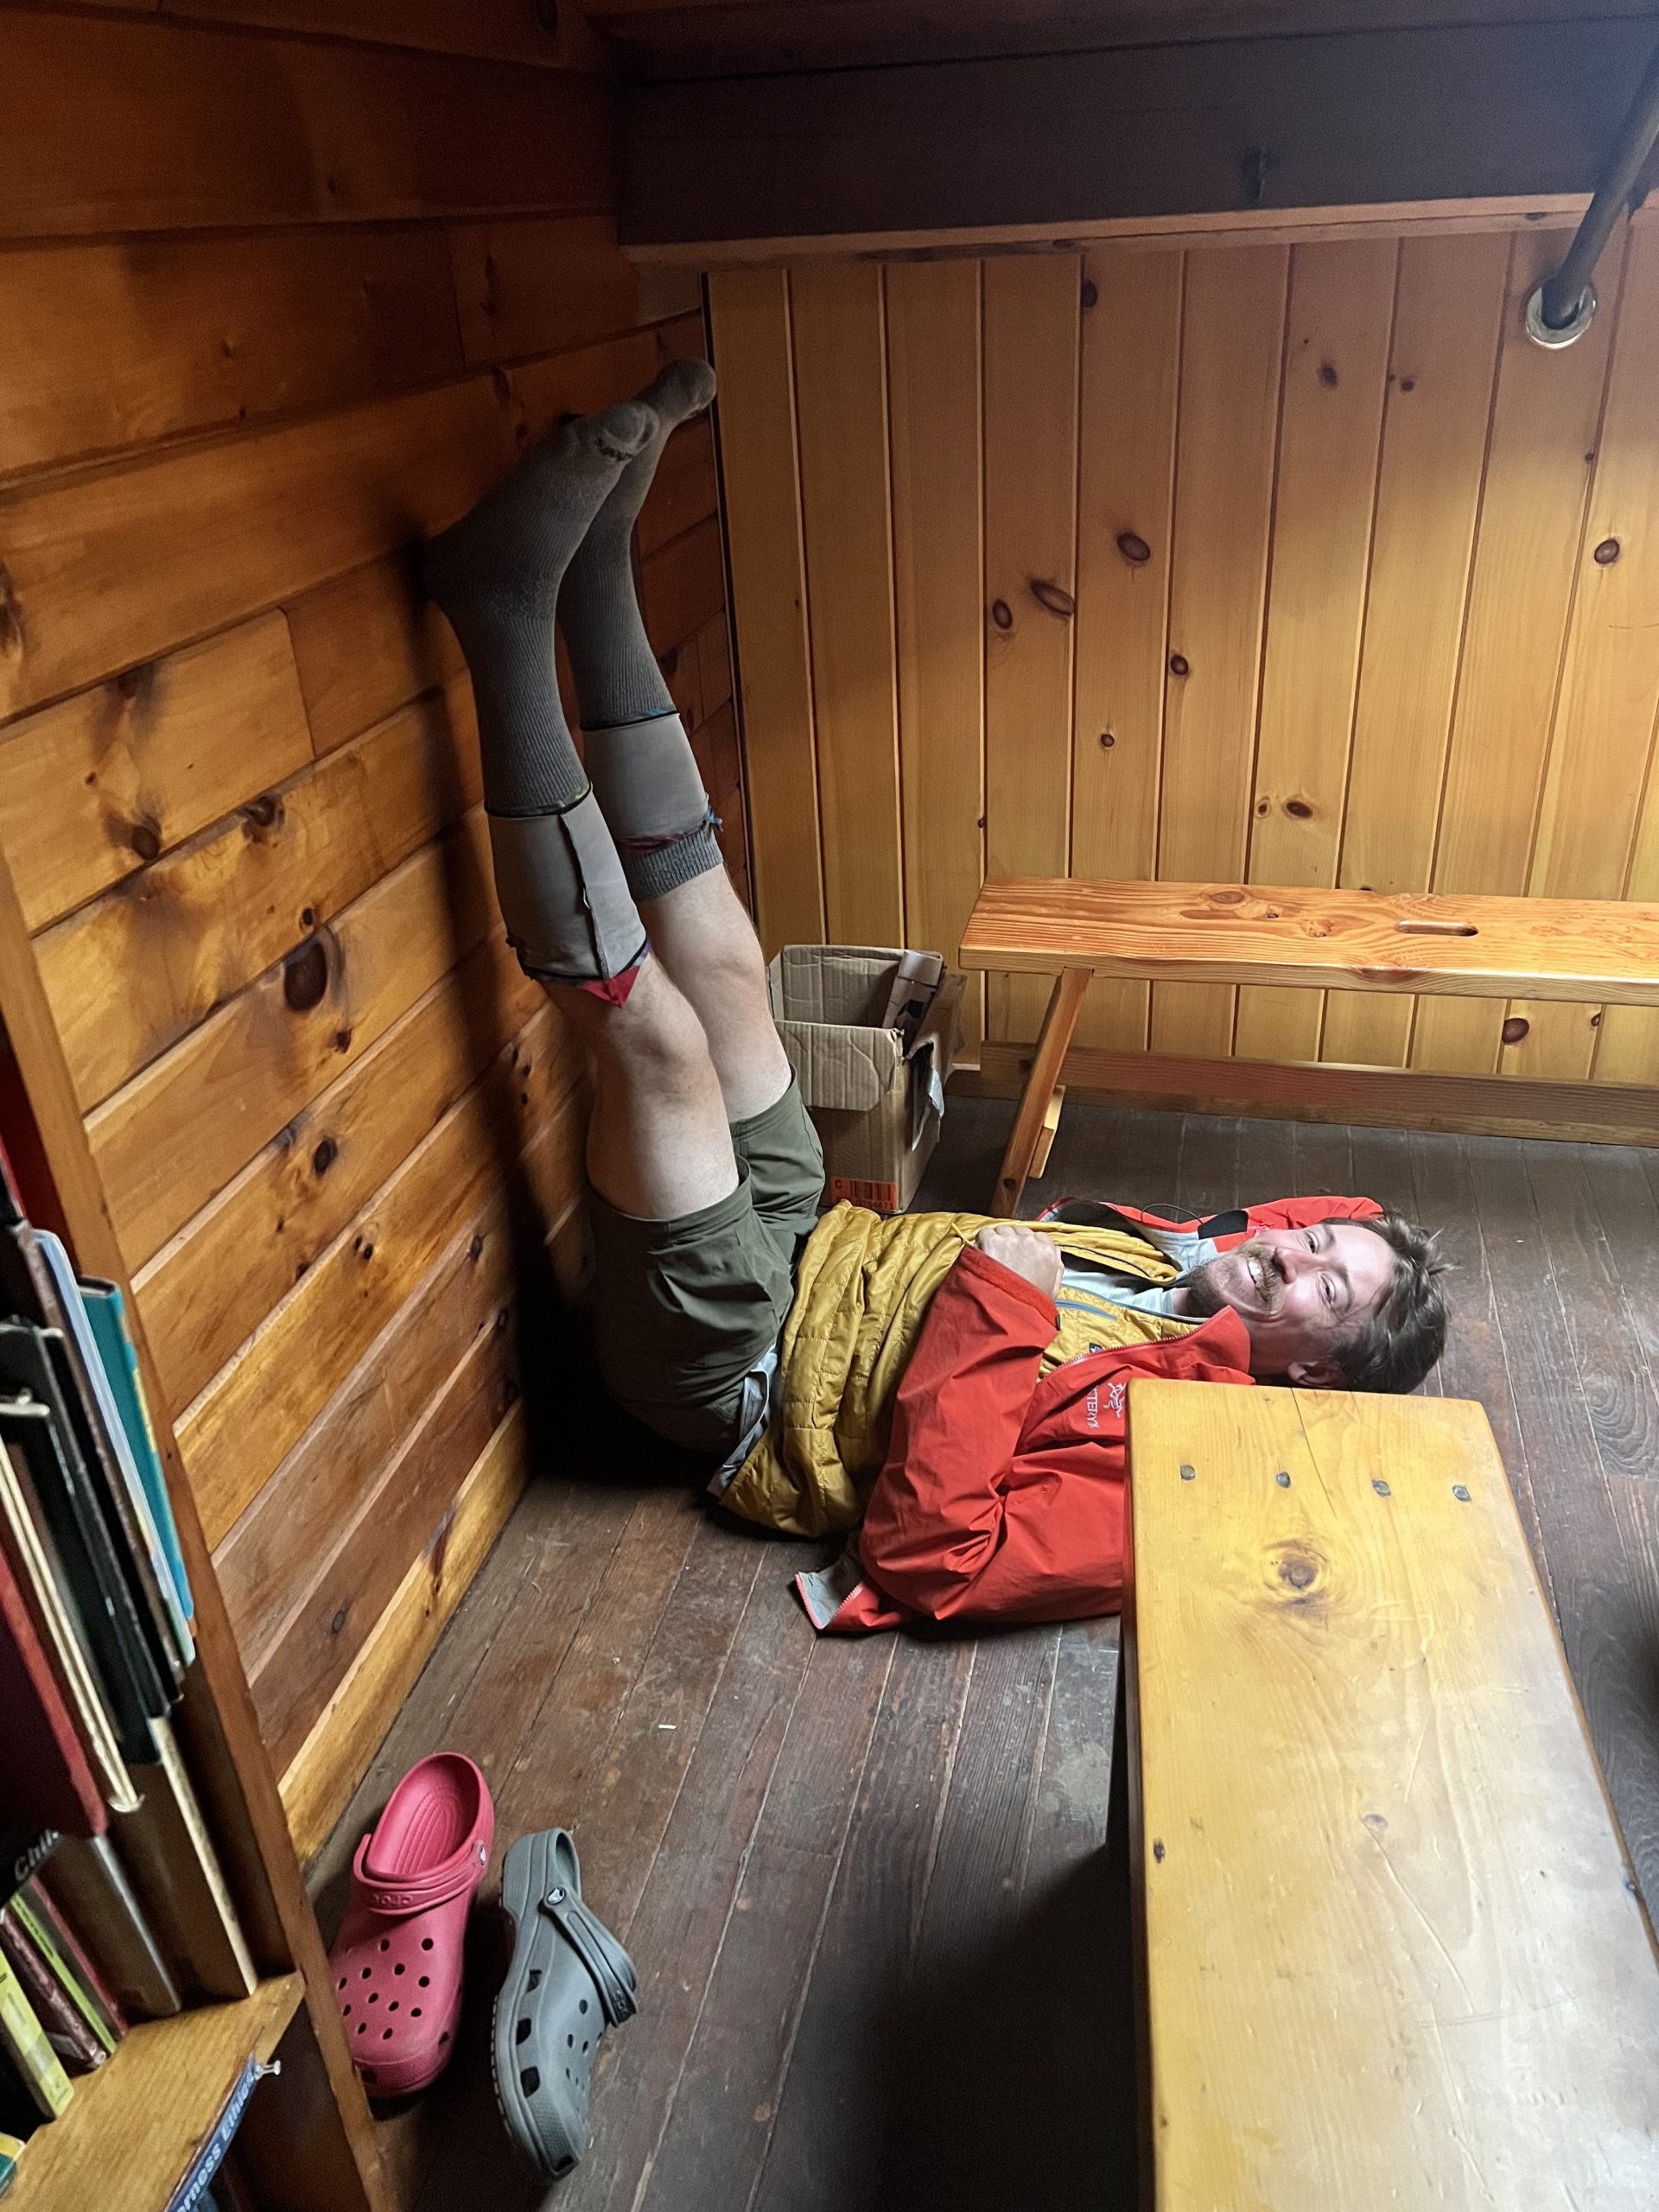
This simple trick can be a serious life saver for your feet. As you walk miles and miles, no matter how well supported your feet are with shoe inserts or the best-fitted shoes or boots, your feet are going to get very tired. A simple trick around the midday of your hike, especially if you are going through rough and rocky terrain on the trail, stop at a shelter or someplace with a wall, and put yourself in an L -shape like the image above for about 10 min. Occasionally wiggle your toes and gently flex your feet over the 10 minutes. Letting the blood drain from your feet can really help to reset how they feel, almost like taking a nap and feeling refreshed. It helps so much on rough trail days to do this simple elevation to keep your feet going throughout the day. Be sure to slowly and carefully come down from the position to gently allow regular blood flow to resume to your feet!

This website contains affiliate links, which means The Trek may receive a percentage of any product or service you purchase using the links in the articles or advertisements. The buyer pays the same price as they would otherwise, and your purchase helps to support The Trek's ongoing goal to serve you quality backpacking advice and information. Thanks for your support!
To learn more, please visit the About This Site page.

Comments 5
I’m 72 and I’ve been hiking on the remote yellow blaze trails in Shenandoah Nation Park since I was a kid. Just a suggestion from an old fart. Take the oreos and peanut butter and make a bowl shape in the peanut butter and fill it with honey. Take it to the next level! LOL
Plan to hike AT 2025. First time thru-hike. Liked your suggestions. I will use them. Any more suggestions for first-timer?