 ">
">
Gear Review: Peak Design Capture Camera Clip & Shell
My biggest hesitation prior to entering into the world of photography was finding a suitable carrying system. I’ll hike through hunger for an hour or more if I don’t have a snack in my hip pocket simply because it requires me stopping and opening my pack. Same goes for applying bug spray, SPF, or adding / subtracting layers. Once I’m in the hiking zone, I’m resistant to disrupt the flow, and I know many others who share this trait.
Said differently, there’s little difference between a camera in my pack and no camera.
Many of the other camera carrying systems I’ve encountered appear cumbersome. A large front harness seems both uncomfortable and restrictive to airflow. I’M LOOKING AT YOU HIKING VIKING– although he makes up for this by taking an extra 4 inches off his shorts. One friend clips his small camera case into his pack’s hip belt resulting in a persistent bouncing against his junk. No thanks.
It wasn’t until being pointed in the direction of Peak Design’s Capture Camera Clip that I experienced a sense of optimism. I’ve also had the opportunity to test the corresponding Peak Design Shell, a waterproof protective cover. After a couple hundred miles of testing under my belt, this optimism has transformed into satisfaction.
Specs
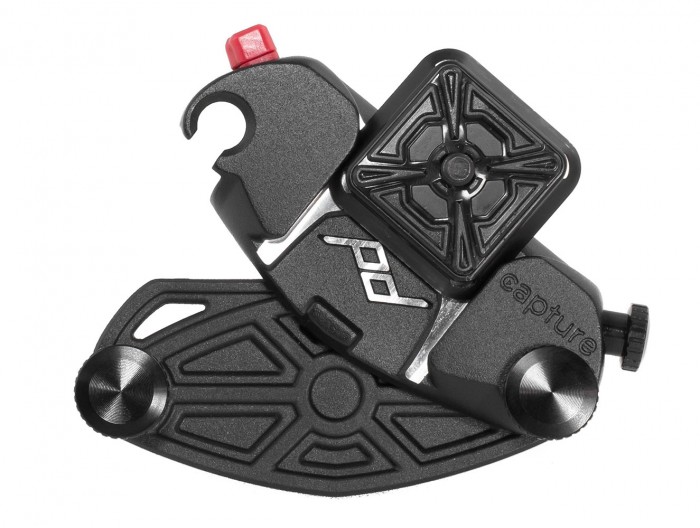
Capture Clip
MSRP: $59.95
Weight: 3.53 oz / 100g
Size: 4.1 in x 2.05 in x 1.1 in
Warranty: Lifetime
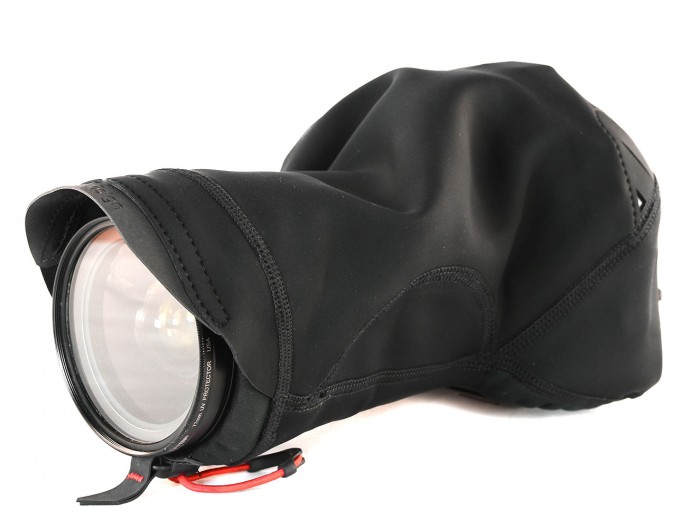
Shell
MSRP: $44.95
Weight: 3.99 oz / 113g (comes in three sizes, not sure which this is for)
Warranty: Lifetime
How it works
It took me maybe ten minutes to figure out how to affix this to my pack and to lock and release- without reading instructions (I lack patience). You will likely figure it out in half that time.
Pros (Capture Clip)
Weight
At three and a half ounces, I can’t imagine a lighter carrying system shy of just shoving a camera into a hip pocket, which would be impossible with anything larger than a simple point and shoot (I use a Sony a6000).
Ease of use / accessibility
This is the most important factor for a carrying system in my mind, and where the Capture really excels.
Hiking through Shenandoah National Park earlier this year, I noticed a couple standing at the edge of Skyline Drive, enthusiastically bouncing up and down while peering through their binoculars. Of course, I look over and there are three black bears at the top of tree, on their way down (presumably to start the next round of hide and seek). If my camera were in my pack, there would’ve been no chance I would’ve gotten the shot. I did, albeit it didn’t turn out great (currently looking for a more versatile lens, feel free to drop any recommendations in the comments).

The system is borderline too convenient- even more so than accessing my smartphone.
Value
Although sixty bucks may seem like a lot of money for a piece of metal that weighs 3.5 ounces, the system works very well and comes with a lifetime warranty. Carrying cases are going to turn to funk town after an extended hike, odds are you’re going to replace it often if you trek long distances on the reg.
Pros (Shell)
Function
Using the Shell, I’ve had my camera exposed to the rain for several hours without any water leaking through. The fact that I can keep my camera attached to my pack strap while hiking in the rain is a major plus. If a storm appears to be an extended downpour, I will still tuck my camera away in my pack , but if I think it might blow over in an hour or two, I will (and have) leave the camera out under the Shell.
Cons (Capture Clip)
My gripes are minor.
Not ideal for packs with thin straps
I typically day hike with a Cotopaxi Luzon Del Dia pack (which has quite a cool story). The pack straps are thin and the weight of the camera will cause the Capture to slide down the strap slowly during an extended hike.
Adjustment period
I’ve fastened the clip to my left strap (so I can grab the camera with my right hand), which has forced me to re-learn how to put on my pack. Since it’s difficult to put the strap holding the camera on second (it gets tangled and the camera makes it hard to rotate back into place), I have to consciously put the left strap on first, which is opposite of how I’ve done it previously (approximately 14 trillion times). Unlearning this routine has been difficult.
Cons (Shell)
Not ideal for mirrorless kit lens
Even the small shell is way too large for the Sony a6000’s kit lens. This doesn’t impact its ability to protect the camera in the rain, but requires removing the shell in order to take a picture, which can become burdensome. Since I plan on getting a better lens soon, this is a short-term complaint.
Overall

For the purposes of backpacking (more than just day hikes), the Peak Design Capture and Shell is a superb system. Granted, this is the only camera carrying system I’ve ever used while backpacking, but I have a hard time imagining liking anything better. For $105, you can have a quality camera carrying system that is easily accessible, light, protective, and comes with a lifetime warranty.
Disclosure: the following products were donated for the purpose of review.

This website contains affiliate links, which means The Trek may receive a percentage of any product or service you purchase using the links in the articles or advertisements. The buyer pays the same price as they would otherwise, and your purchase helps to support The Trek's ongoing goal to serve you quality backpacking advice and information. Thanks for your support!
To learn more, please visit the About This Site page.

Comments 1
I’m sure it’s great. To be honest, I use a $3 carabiner and have it on my sternum strap (yes, far from banging on sensitive areas) . If I had a professional rig like yours, it would be well worth the investment.