 ">
">
Camera Basics To Learn Before You Hike
If you’re like me, a phone camera won’t be enough for when you start your hike. With incredible views around every turn, chances are you’ll invest in a higher quality camera to take photos that will capture these memories to look back on after your hike. I’ve seen plenty of posts about what camera is best to bring, which weighs the least, what produces the highest quality images, but what’s the point in getting a top notch camera if you don’t know how to use it? This post will go over simple ways to use your camera beyond the auto-settings in a way that’s doesn’t overcomplicate things and is hopefully easy enough for everyone to understand.
Aperture, ISO, and Shutter Speed
What are these and how do I use them?
Together, these three will determine how your image looks, and changing one will affect the other two. A proper understanding of the three can help you to use each one to aid the others.
Aperture:
The aperture affects the depth of field. It is measured in f-stops. I.e. where on your camera it says a number like f2.8 or f6 – that is your aperture.

A wide-open aperture (lower f-stop) will give you a shallower depth of field – or more simply, a blurrier background. A wide-open aperture also increases the amount of light entering the lens, creating a brighter photo.
A small aperture (higher f-stop) will give you a fuller depth of field – or more simply, a more in-focus background. A small aperture also reduces the amount of light entering the lens, giving you a darker photo.
ex. Photos of people will usually want a wide-open aperture (lower f-stop) because it will blur the background and draw attention to the person in focus. Alternatively, photos of landscapes, like a mountain range, will want a smaller aperture (higher f-stop) because it will keep the entire scene sharply in focus.
But what if you have a smaller aperture to take a photo of a landscape, but the photo is too dark? A smaller aperture produces a darker photo than a wide-open aperture, so wouldn’t I have to lower the f-stop to brighten the picture back up?
No. This goes back to the theory of each setting helping the other. If you have one set to where you’d like it, and have a problem with exposure, the other two can help you fix those levels.

Wide-open aperture – foreground in focus, background blurry
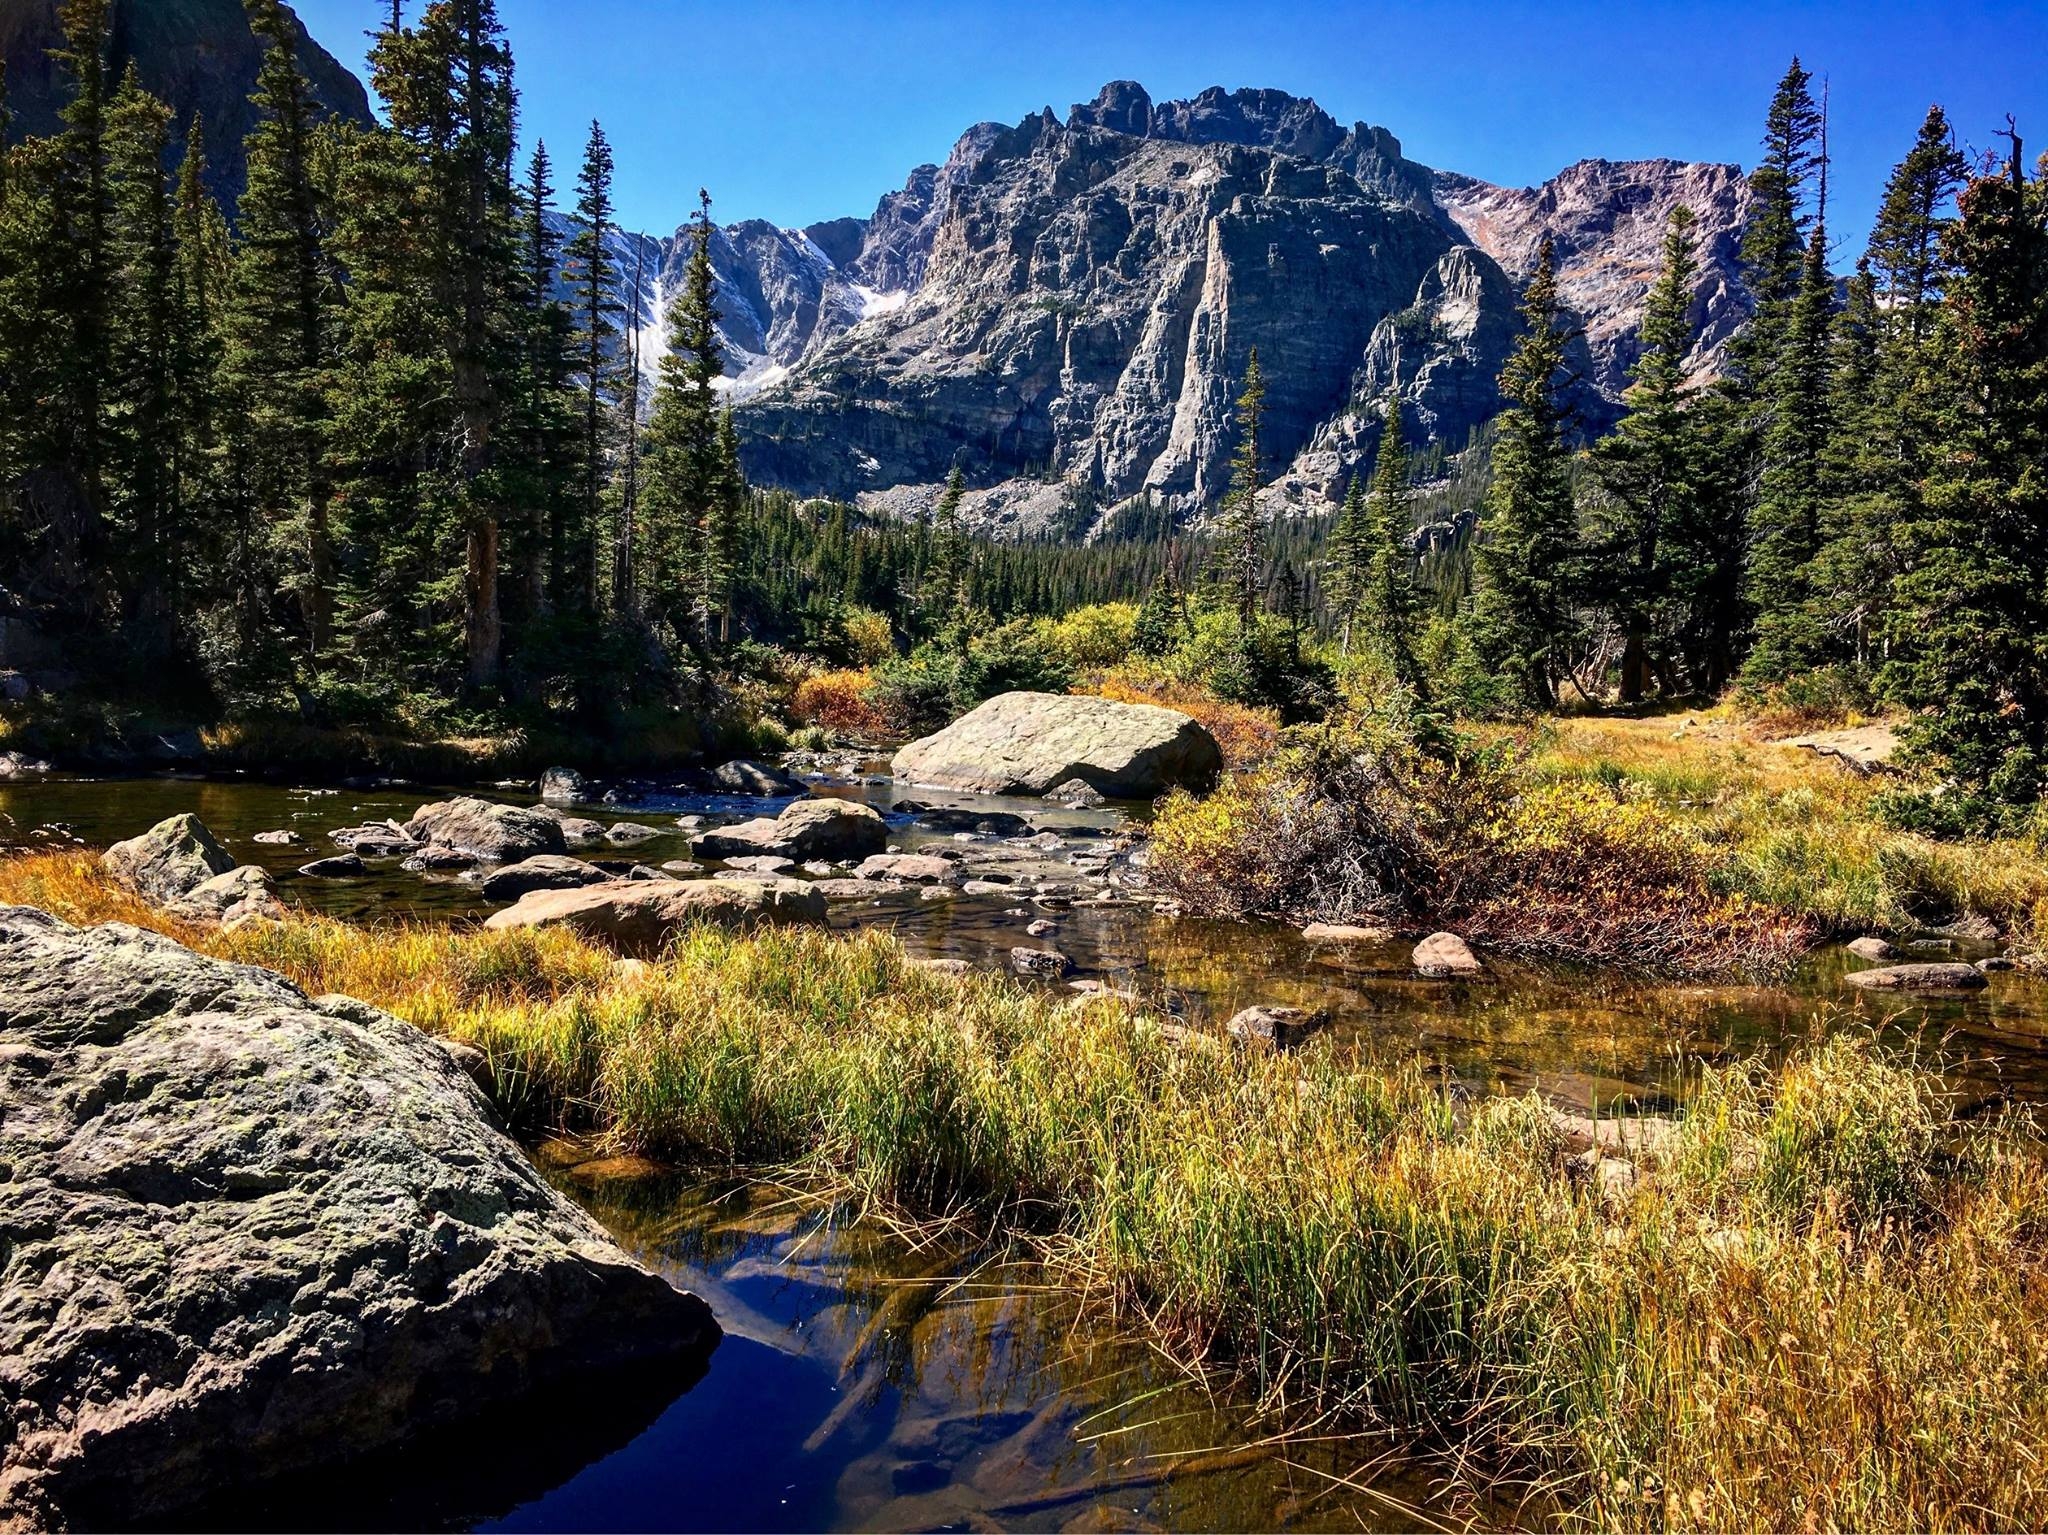
Smaller aperture – everything in focus
ISO:
ISO, or International Organization for Standardization, controls exposure using the camera’s internal software. A higher ISO will create a brighter photo, which helps with shooting low-light photos, like at dawn and dusk, or at night. However, a higher ISO also creates more digital noise, resulting in grainier photos. A lower ISO lets less light in, and is good for shooting in extremely bright lighting. It also creates an image with less noise (less grainy).
Thus, if you take a photo and it looks good but is a bit grainy, try lowering your ISO.
But what if I lower the ISO to reduce the graininess of my photo, but it becomes too dark?
This is where your aperture can help. If you lower the ISO to reduce the grain, but your photo becomes too dark, try widening your aperture (lower f-stop) to add more light that way instead.
Going back to the question at the end of the aperture section, if you have a smaller aperture to take a photo of a landscape but the photo is too dark, instead of widening the aperture to brighten the photo, you can raise the ISO to add more light.
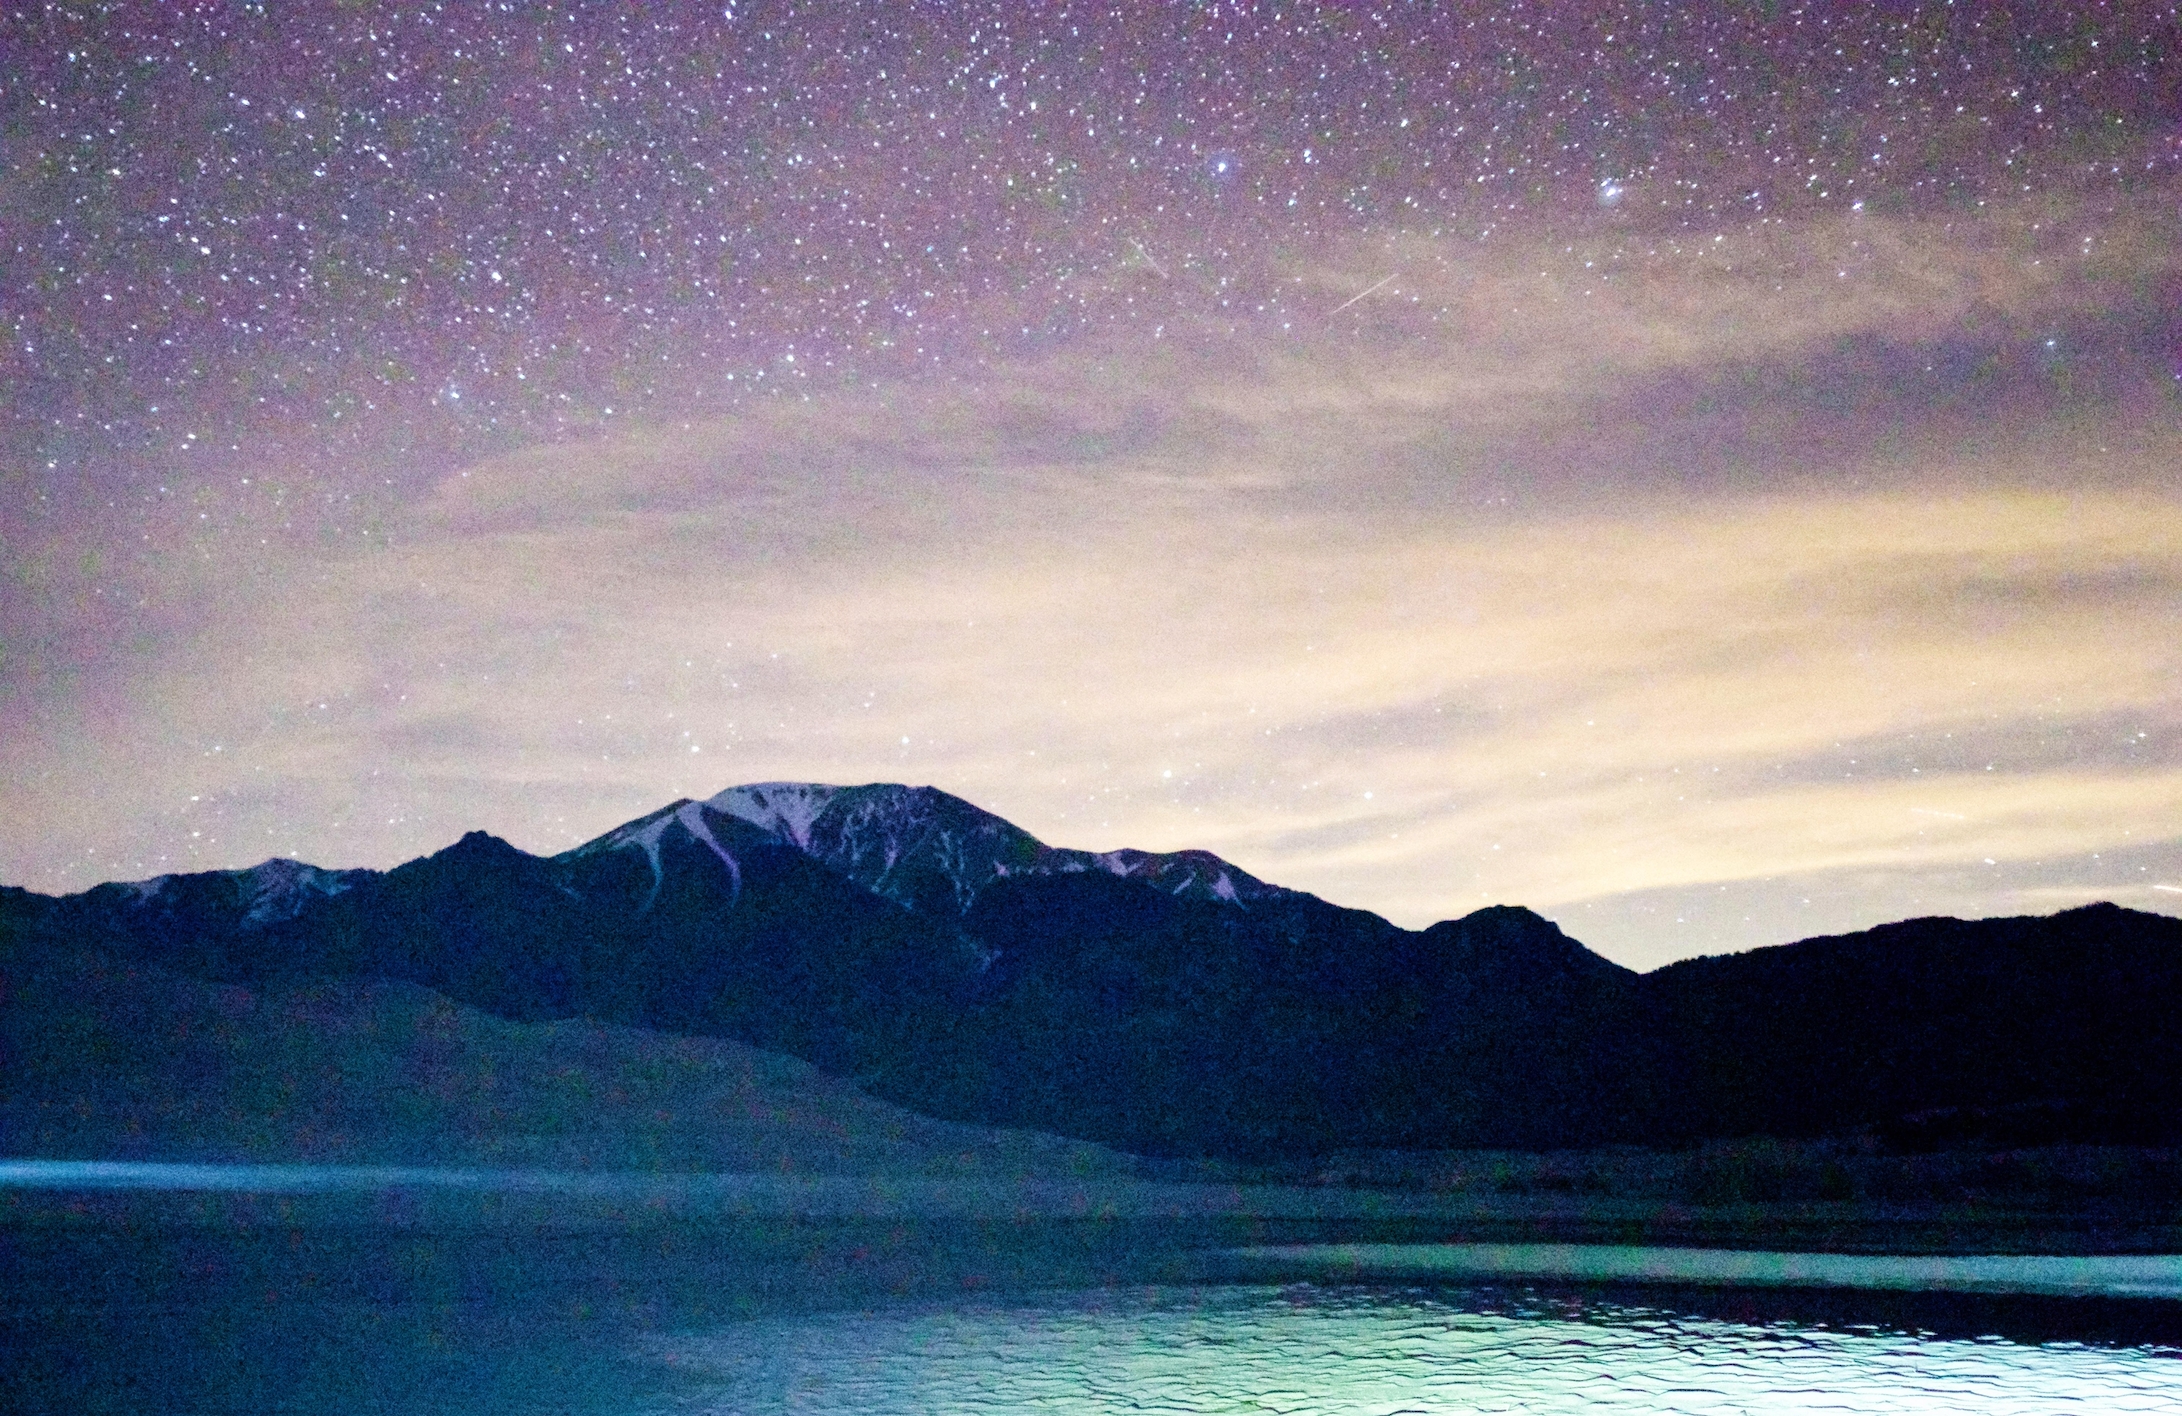
Higher ISO – brighter, more grainy

Lower ISO – darker, less grainy
Difference in how ISO and Aperture affect light:
Both settings will affect the light in your photos, but they will do so in different ways. As mentioned, the ISO controls exposure using the camera’s internal software. Alternatively, the aperture controls how much light enters the camera by changing the size of the opening in the lens. Thus, the ISO is creating exposure, while the aperture increases the natural light.
ISO = forced brightness
Aperture = natural brightness
Shutter Speed:
The shutter speed is how long the shutter stays open. Increased shutter speed means having the shutter click faster, while shorter shutter speeds have the shutter click slower.
ex. 1/125 = shutter stays open for 1/125th of a second
1/5 = shutter stays open for 1/5th of a second
4sec = shutter stays open for 4 seconds
For fast paced shots with quick movement (like sports), an increased shutter speed will produce a crisper shot. For capturing movement (light painting, flowing water, etc.) a shorter shutter speed will take longer to capture the shot, and blend the movements. Increased shutter speeds create darker photos because the light touches the image sensor for a shorter amount of time, while decreased shutter speeds create lighter photos because the light is touching the image sensor for longer.
ex. If an image appears blurry because someone is moving too fast, like a person running, increase your shutter speed.

Slower shutter speed – captures long movements

Faster shutter speed – catches fast movements
Rule of Thirds:
This is one of the most basic rules of photography. It is unrelated to the settings on your camera and applies more to how you frame your shots. Following the rule of thirds will create well balanced shots that are more visually appealing.
Imagine drawing lines to separate your photo into thirds, both horizontally and vertically (thus creating 9 separate boxes on your image).
The four intersections of these lines are, in theory, where the points of interest in your shot should be placed in order to create a balanced shot. This is because our eyes naturally gravitate towards those parts of an image, rather than the center or other areas, so positioning your points of interests on these intersections will create a more natural visual.

Rule of thirds

Rule of thirds example – point of interest: yellow tree, following one of the imaginary thirds lines // point of interest: start of trail in foreground, also on intersection of thirds

This website contains affiliate links, which means The Trek may receive a percentage of any product or service you purchase using the links in the articles or advertisements. The buyer pays the same price as they would otherwise, and your purchase helps to support The Trek's ongoing goal to serve you quality backpacking advice and information. Thanks for your support!
To learn more, please visit the About This Site page.

Comments 6
Awesome and easy!! I’m going to print this out and keep it with me while I commit these items to memory — thanks so much for sharing, Juliana!
I love taking photos of the places i have visited, however, seldom do they result in anything worthy of framing. Hopefully, with the knowledge you have shared, I’ll be able to improve the quality of my images. Thanks for such an interesting topic!
And “Professor” takes an early lead for favorite as Juliana’s new trail name. Superb work.
Professor Juliana,
So now I understand some of the magic! Does this mean I can get a DSLR camera and you’ll give me some private lessons? It’s the least you can do for all of the anxiety you cause me. 🙂
Mom
This is a great overview. Thank you for posting on this as I’ve been in the search of a good entry level camera. This confirms what I am looking for with the examples listed here and after further searching online. Happy hiking only a few days away on your PCT journey! Enjoy every step as a memory and experience.