 ">
">
Resupplying and Caching Food, San Luis Loop Style
Being flexible is an important characteristic in a thru-hiker, at least in my limited experience. Many hikers have had to utilize that trait over the past few months, and I am no exception. While I always had plans to cache food if doing a long hike with the dogs, it has become an essential part of my plan to remain self-sufficient while hiking this summer.
Unfortunately, there is very little “literature” on the interweb regarding caching food for a thru-hike. Hopefully this post will help out future hikers.
Related: The Best Backpacking Meals
Food
Ahhh, food. One of the best benefits to long-distance hiking. I am incredibly disappointed that I won’t be able to stuff my face in town once a week, but can’t complain too much since at least I still get to go. Over the past few years I’ve come up with my own method to meal planning. Probably not the best, since I don’t watch calories, but it seems to work well for these “shorter” trails.
Breakfast
Pop-Tarts. The best breakfast item. Supplemented with oatmeal, which is lighter and can be cold soaked. I’ve also started bringing Cream of Wheat and brown sugar.
Tuna Packets
I absolutely love these things! They are also cheap and easy to eat on the go. Perhaps my least favorite part about Canada is that they don’t sell flavored tuna.
Dinner
This is where I have the most variety. I mix up the following to keep things exciting:
Knors Rice Sides
Knors Pasta Sides (with butter!)
Idahoan Instant Mashed Potatoes
Pasta (with Parmesan and Butter)
Ramen/Noodles (with ad- ins like siracha)
Snacks
1 generic granola bar per day
1 generic cereal-fruit bar per day
2-3 Clif bars per resupply
1 Justin’s peanut butter per resupply
1 baggie goldfish per resupply
Random baggies of trail mix and Oreos in resupplies
1 bag of fruit gummies per day
1 Slim Jim per day
Candy (M&Ms, Sour Patch Kids, etc.)
1-2 gel shots per resupply
4 Mug Brownies total
1-2 gel shots per resupply
Greenbelly Meal bars in some resupplies
Spices/Add Ins
Siracha packets
Tajin packets
Random restaurant packets (jelly, Chick-Fil-A sauce, hot sauce, etc.)
Lemon Pepper
Garlic Powder
Italian Seasoning
Cinnamon
Brown Sugar
Parmesan
Butter
Chicken packets
Drinks
Mio
Nuun tablets
Powdered Skratch mix
Powdered Hot Chocolate
Tea bags
Dogs
Purina Pro Plan Sport 30/20
Glucosamine Tablets
Olive Oil packets
Justin’s Peanut Butter
Crappy, high calorie dog treats
Non-Food Items
Not going into town means planning for every eventuality. This is a bit stressful, but I think I have almost everything I need.
Stove fuel
Climbers salve
Musher’s Secret
NatGeo topo maps
Bathroom wipes
Dr. Bronner’s
1 pair Altra Lone Peaks
The Planning Process
After our great Sask Crossing food blunder on the GDT last year, I have been nervous that I would make some grave error in the planning process. This has led to a certain fastidiousness in record keeping. To ensure that I wouldn’t make a dumb mistake and forget an essential item in a resupply I kept food inventory records as well as recorded what I put in each box.
The nice thing about doing this is I will know what I have in my upcoming boxes while on trail. Here is what my lists looked like:

I also labeled my boxes to keep track of which box is going where. An important step since different sections will are different lengths.

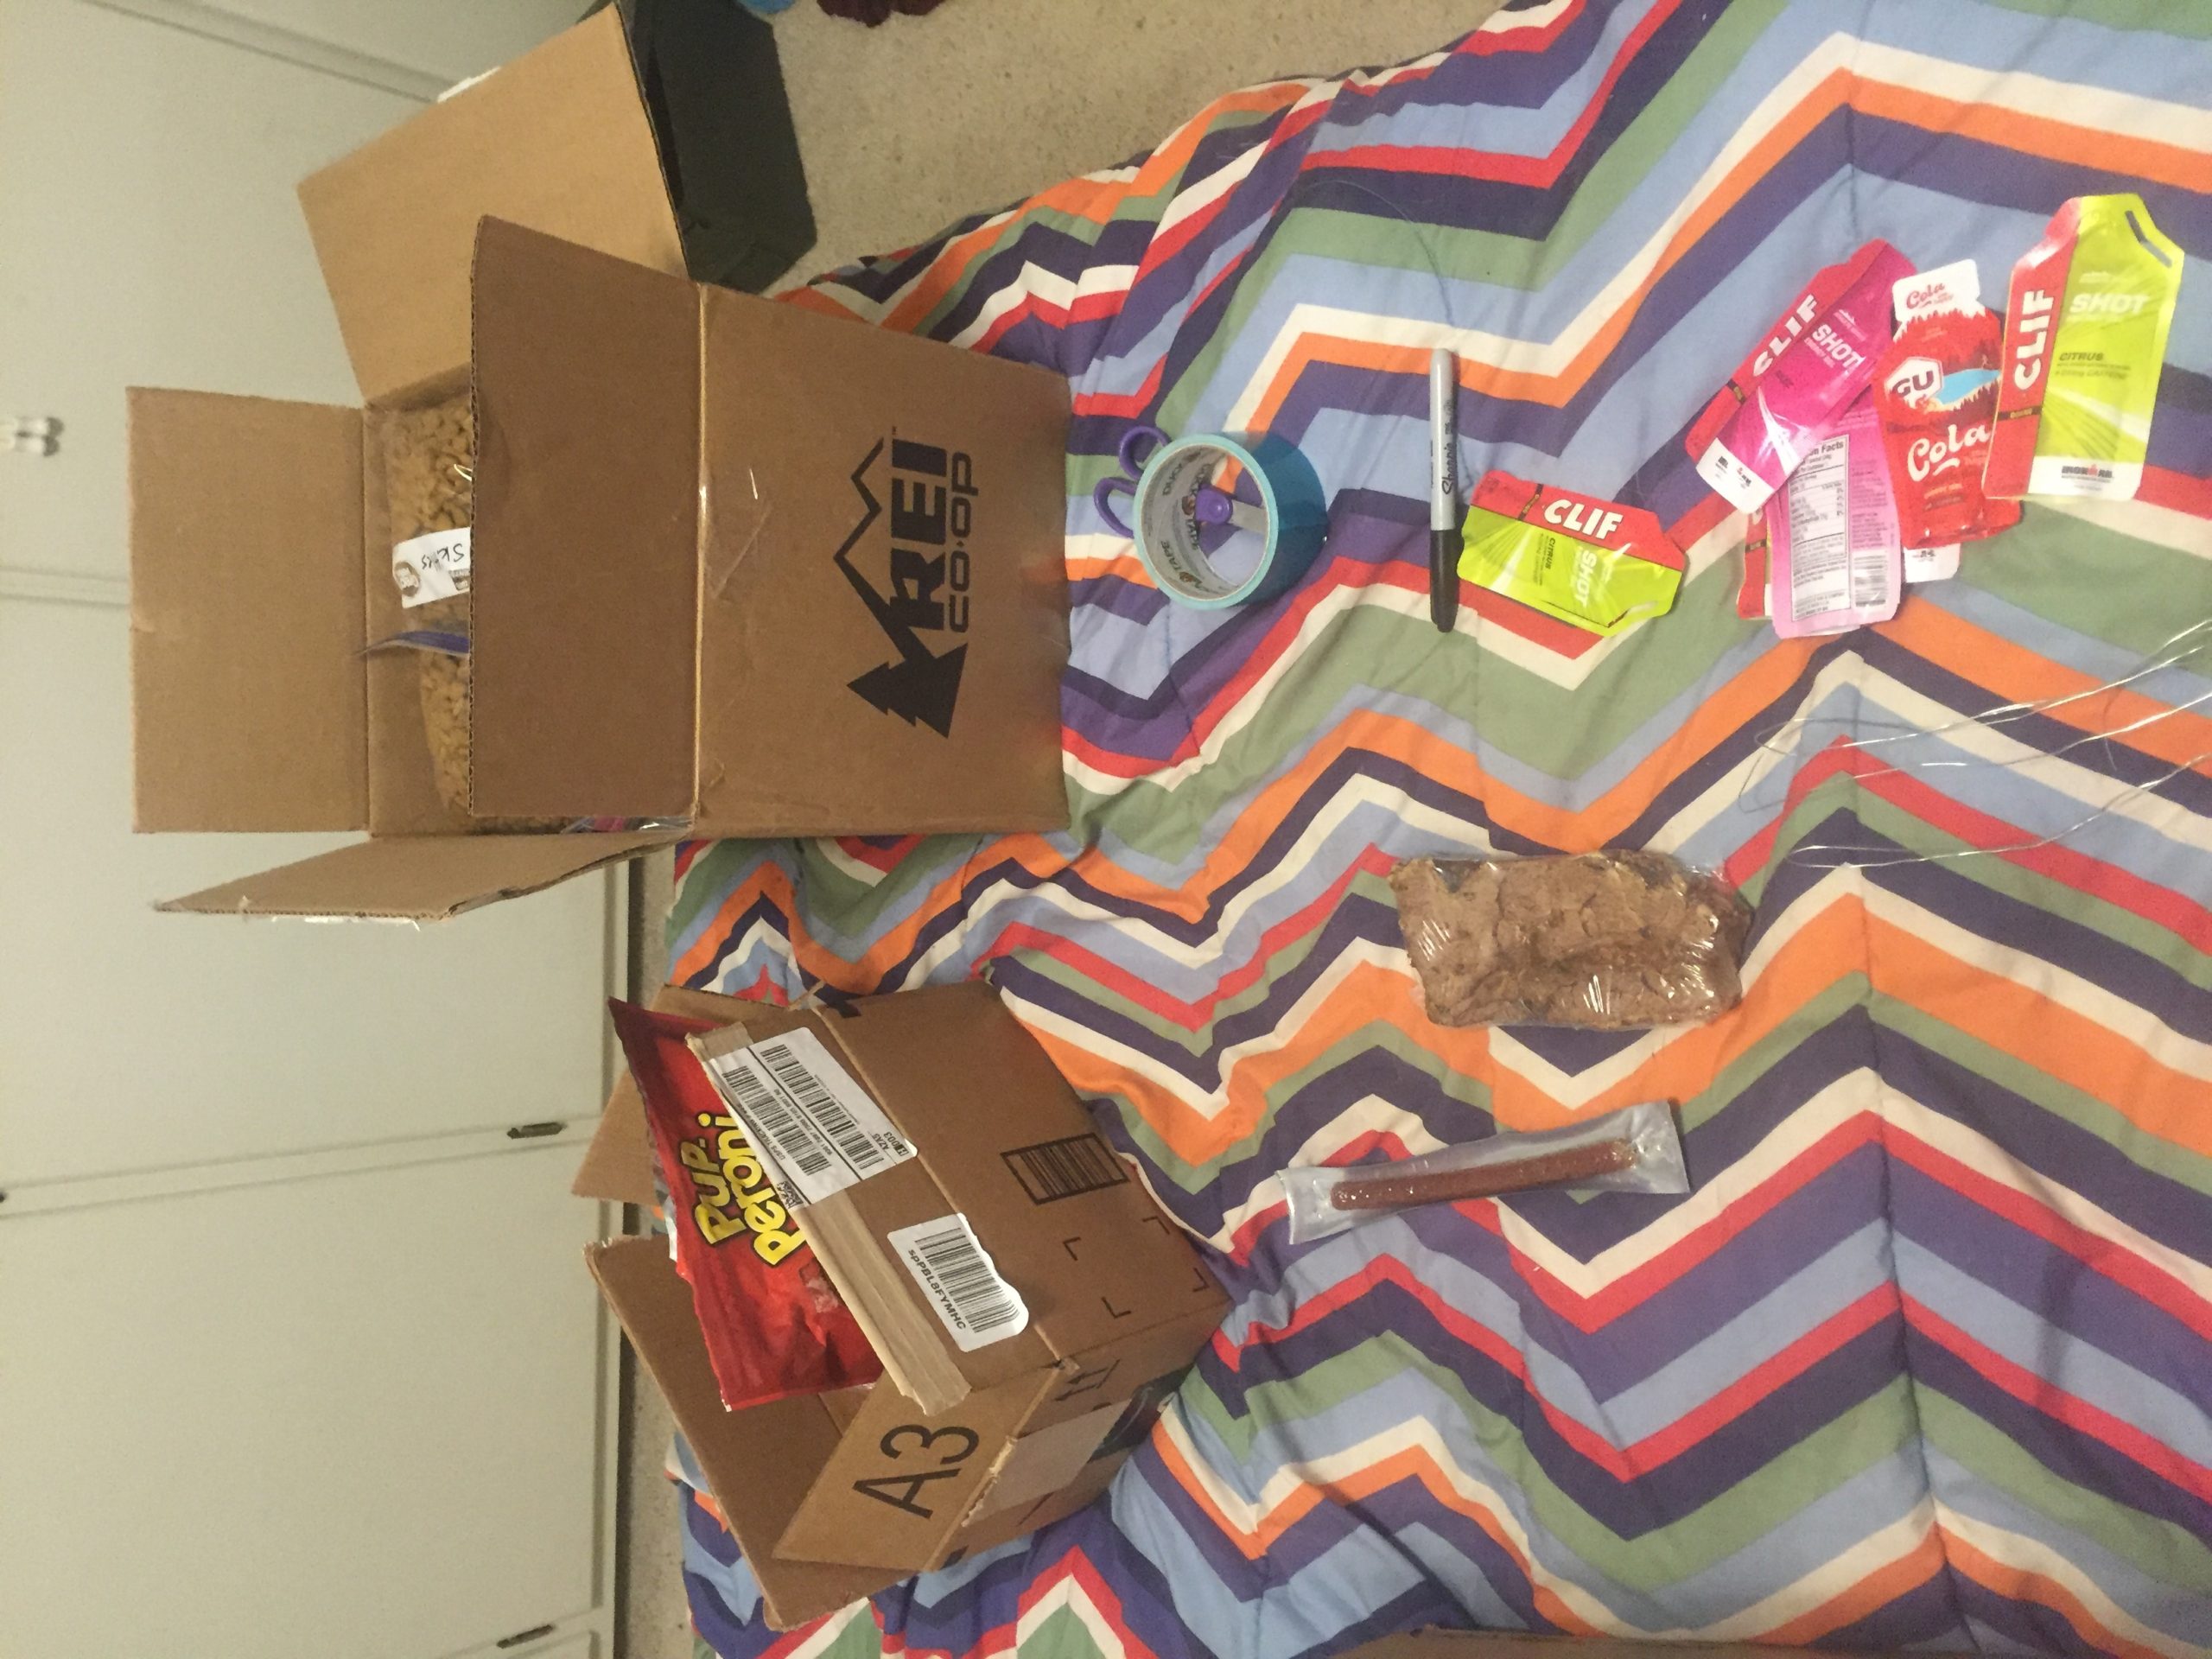
A four-day resupply crammed into one box.

Adding last-minute items to my boxes.

Storing 24 ammo cans is more troublesome than you would believe!
Caching
I was fortunate enough to learn about caching from Thunder and Snow, two super awesome hikers I met on the GDT last summer. They are the ones who suggested military ammo cans.
Now there are some downsides to these ammo cans. While certainly cheaper than buying a whole bunch of bear cans or Ursaks, they do run about $10 to $15 apiece. They are also not that big, and it takes some creative packing to get four days in one can. Since I’m also packing for my dogs, I need twice as many cans.
Currently, I have 24 cans plus my bear can. That equates to 13 resupplies. I am not planning on usingOopsaks as I feel they serve the same purpose as a bear can rather than an Ursak.
In reading about water caches, I did run across one glimpse of information on caching food that said they used pain cans or cookie tin cans. However, I don’t think I would change my methods as the ammo cans are better camouflaged (see below), sturdier, and easier to lock.
The Art of Hiding Food
I’m just back from placing my food and water caches. Here is how it went:
All my caches were hidden in places I could get close to with my 2wd sedan. I did almost always walk up trail (if there was trail in that section) to hide the cache.
I tried to pick memorable landmarks to tell me when to leave a trail, such as a switchback or blaze/sign. From here I attempted to get out of sight of the trail, but that wasn’t always possible depending on the terrain. The next step was to find a suitable tree to tie the ammo cans to. This usually involved a relatively scraggly tree so as to better hide the cache from view. Needless to say, I am COVERED in scratches from battling trees all weekend.

After selecting a location, I used camouflaged color rope to tie the latch to the metal bar bellow it. Hopefully this will “lock” the can so animals have a harder time breaking in. I also used the rope to tie the cans to the tree. The rope can take about 100 pounds of force before breaking. While not enough to stop a really determined bear, it should prevent my cache from wandering miles away before I can get to them.
Once the caches were secured, I spent time camouflaging each one. Since the cans were already army green and I had unwittingly picked camo rope, this was not as difficult as it could have been. The biggest thing was to hide the duck tape message asking strangers not to steal my food. I covered the cans with whatever was available—rocks, sticks, bark, dirt, etc.

Can you find the box?

The last major step was to ensure that I can find the cache later. Luckily, I have a pretty good memory for such things, but trails look different from different directions and on different days. I marked each location with a waypoint on my Gaia map, took pictures with my phone, then uploaded the pictures and added notes to the waypoint. I am also planning on adding what is in each box to the waypoint note and recording my directional notes in my journal in case I have technology problems.
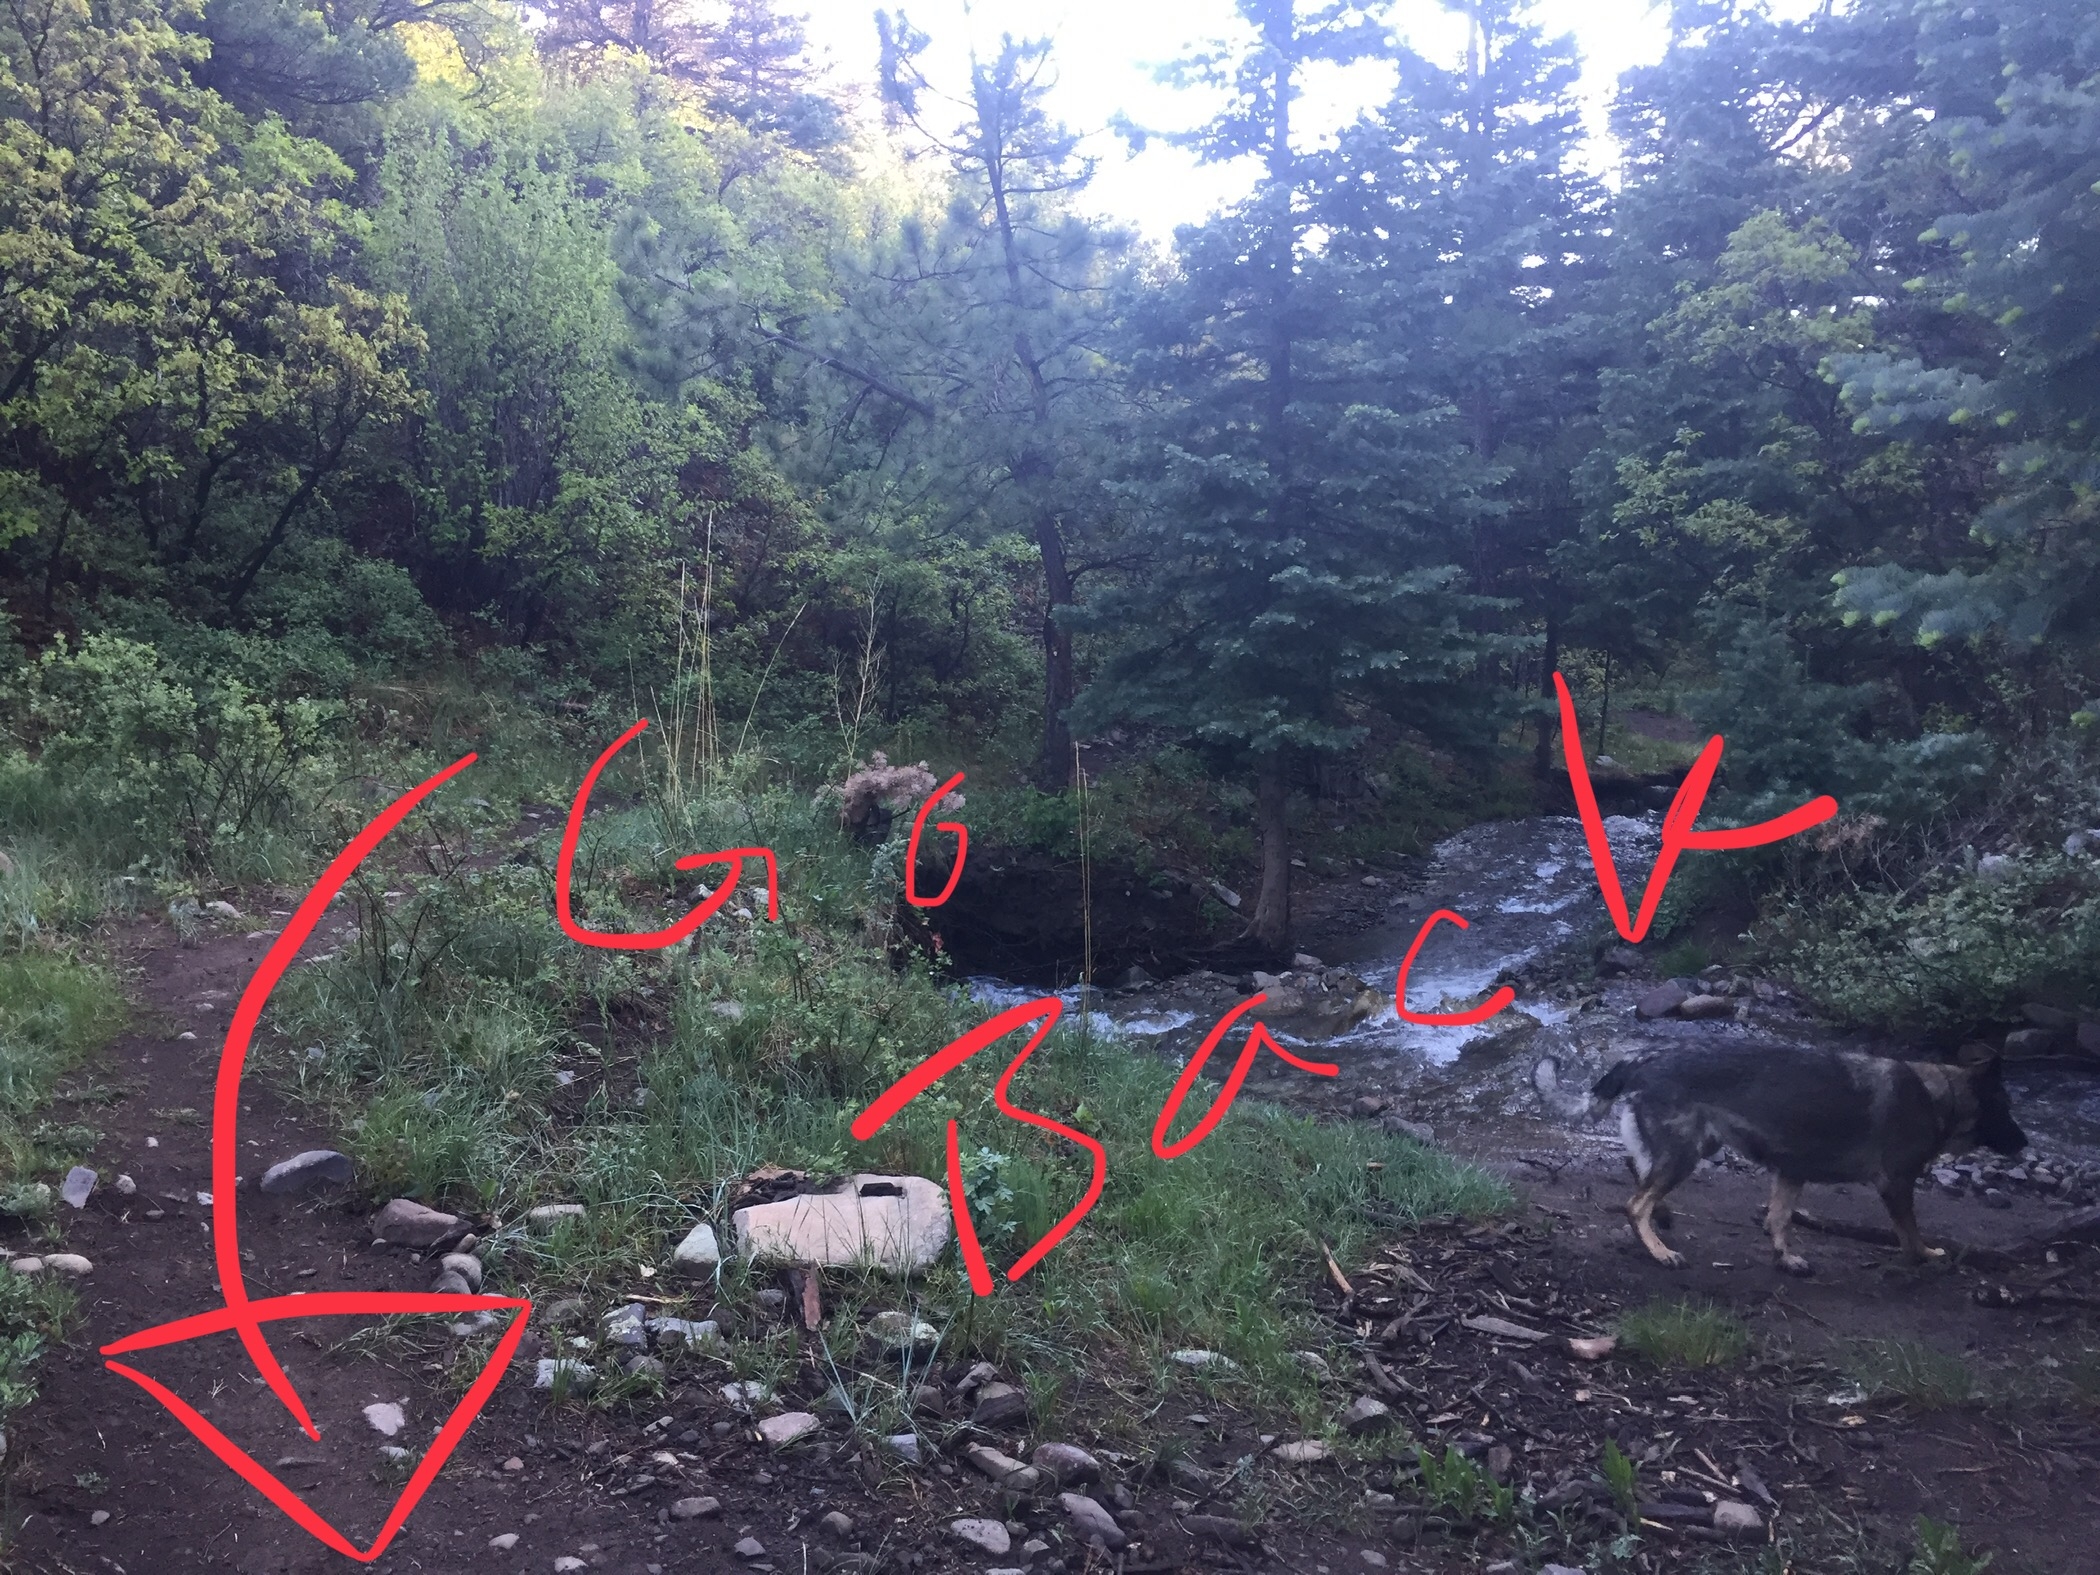
Super glad I figured out how to write on my pictures!
How well will this work? Who knows. There was one cache I placed, then went back the next morning to take pictures and it was the way I left it. A good sign! However, I will be sure to either update this post or make a future one after I finish my trek.
All in all, it took me at least eight hours to put together the food cache boxes and two days to drive around and hide them.


This website contains affiliate links, which means The Trek may receive a percentage of any product or service you purchase using the links in the articles or advertisements. The buyer pays the same price as they would otherwise, and your purchase helps to support The Trek's ongoing goal to serve you quality backpacking advice and information. Thanks for your support!
To learn more, please visit the About This Site page.

Comments 2
When you are finished with your hike, you can either start geocaching, or sell your ammo cans to someone who wants to hide some good geocaches. I would suggest to others who are considering doing this that you can record the GPS location of your cache so it is easier for you to find later. The free geocaching app for android, c.geo, would work for that.