 ">
">
5 of the Best Backpacking Trips in Olympic National Park
Olympic National Park is a hiker’s dream destination. How many other places in the United States can you hike from the white sand beaches of the Pacific Ocean, through an ancient, old-growth rain forest, and up to a glacier-capped peak in the high alpine in a single day? Most of the rugged interior of this million-acre tract of land is accessible only by foot or by horseback, and the majority is also a wilderness area.
The park’s 611-mile trail network—which includes 135 miles of the Pacific Northwest Trail—is ideal for backpacking, with hundreds of potential loop or point-to-point itineraries possible for all ability levels. Here are five of my absolute favorite backpacking trips in Olympic National Park (plus permitting, campsites, and other logistical considerations). This is not an exhaustive list, but rather an overview of some of the most scenic and popular hiking the park has to offer.
1. Hoh River Trail to Blue Glacier

The Blue Glacier viewed from its lateral moraine.
Length: 37 miles
Type: Out-and-back
Elevation gain: 3700 ft
Difficulty: First 12 miles easy; last 6 to the glacier strenuous
Getting there: The road is paved all the way. Trailhead parking is competitive, so plan to arrive early in the morning.
Permit considerations: High elevation campsites are quota sites. Bear canisters not required.
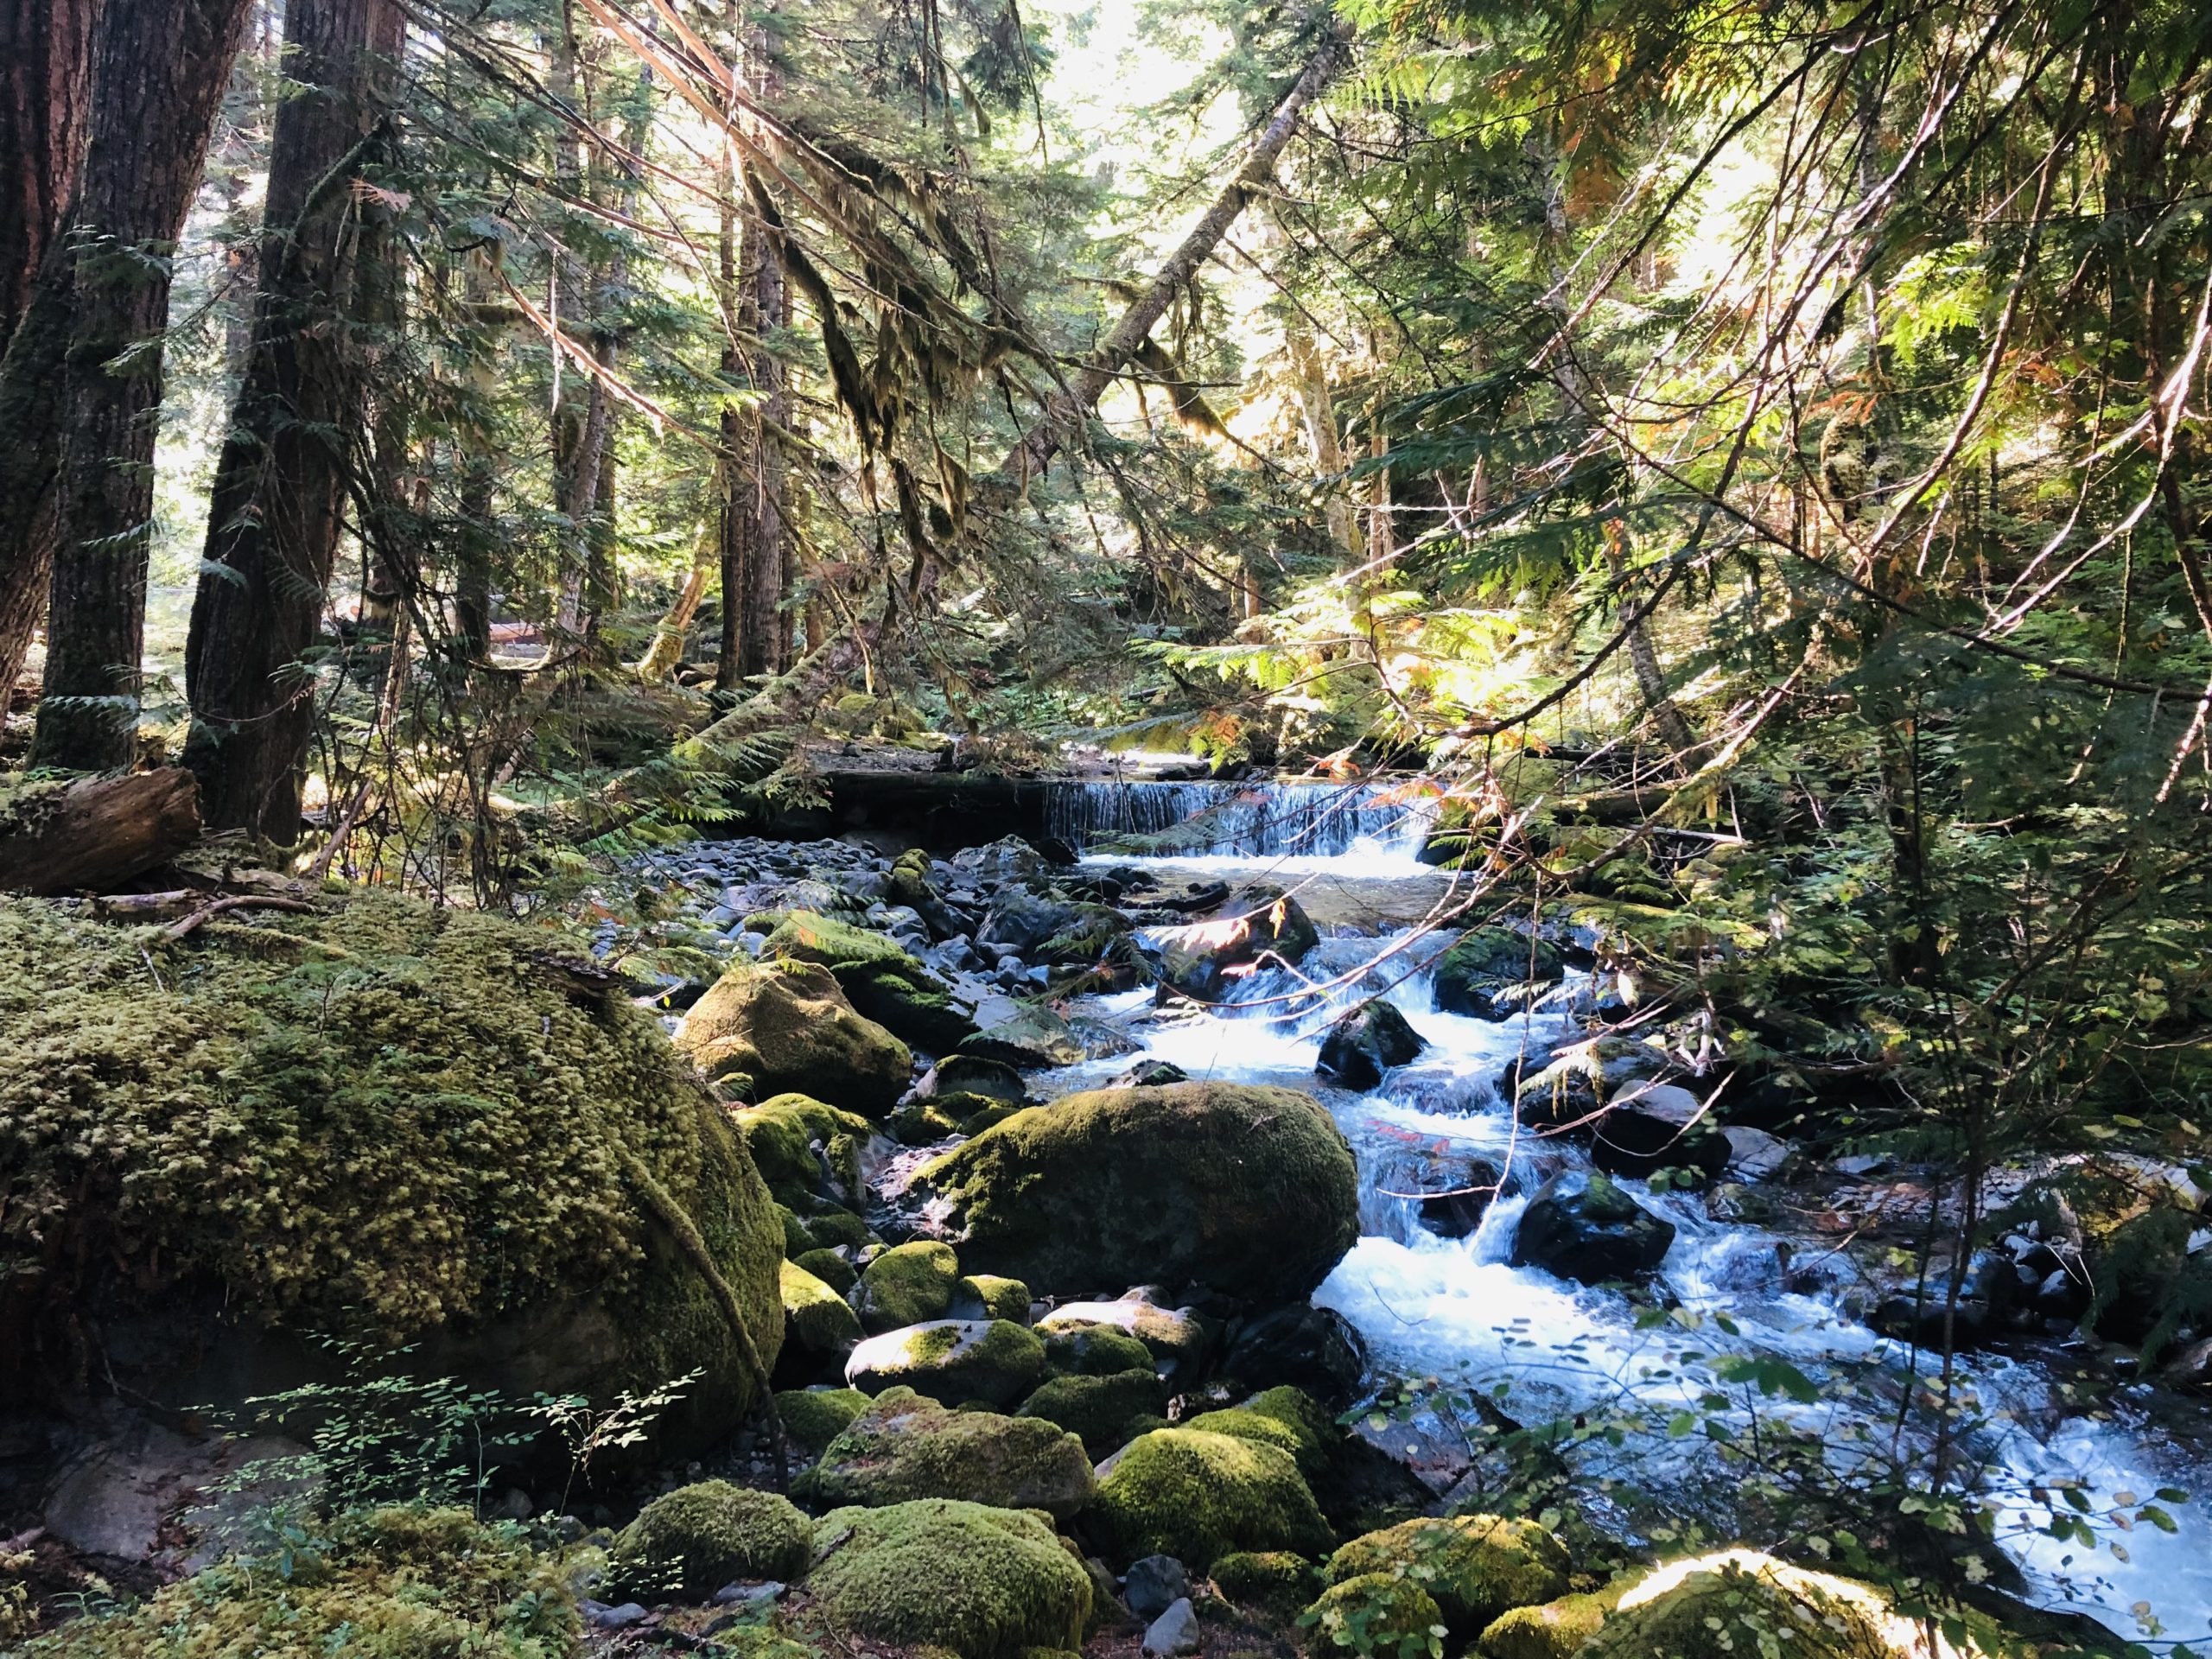
The first 12.4 miles of this trail comprise an easy stroll through the Hoh Rain Forest. There’s plenty to love about this hike long before you get out of the trees: immense spruces, firs, hemlocks, and cedars abound in this section, along with lush ferns, mosses, and peekaboo views of the mighty Hoh River itself.
Still, the trail’s big schtick is really the glacier at the very top of the trail—the only place in Olympic National Park where a non-mountaineer can get up close and personal to 7,900-foot Olympus itself via the lateral and terminal moraines of the Blue Glacier. Many people tackle the glacier from a base camp at Lewis Meadows or Elk Lake.
On your way back to the car, zip around the 0.75-mile Hall of Mosses loop near the parking lot for some additional rainforesty goodness.
Warning: You’ll have to climb significantly in the last five or six miles on the way out to the glacier, as well as navigate a landslide via a long, sketchy rope ladder just before Glacier Meadows. The ladder will pose a challenge for folks who struggle with heights or exposure.
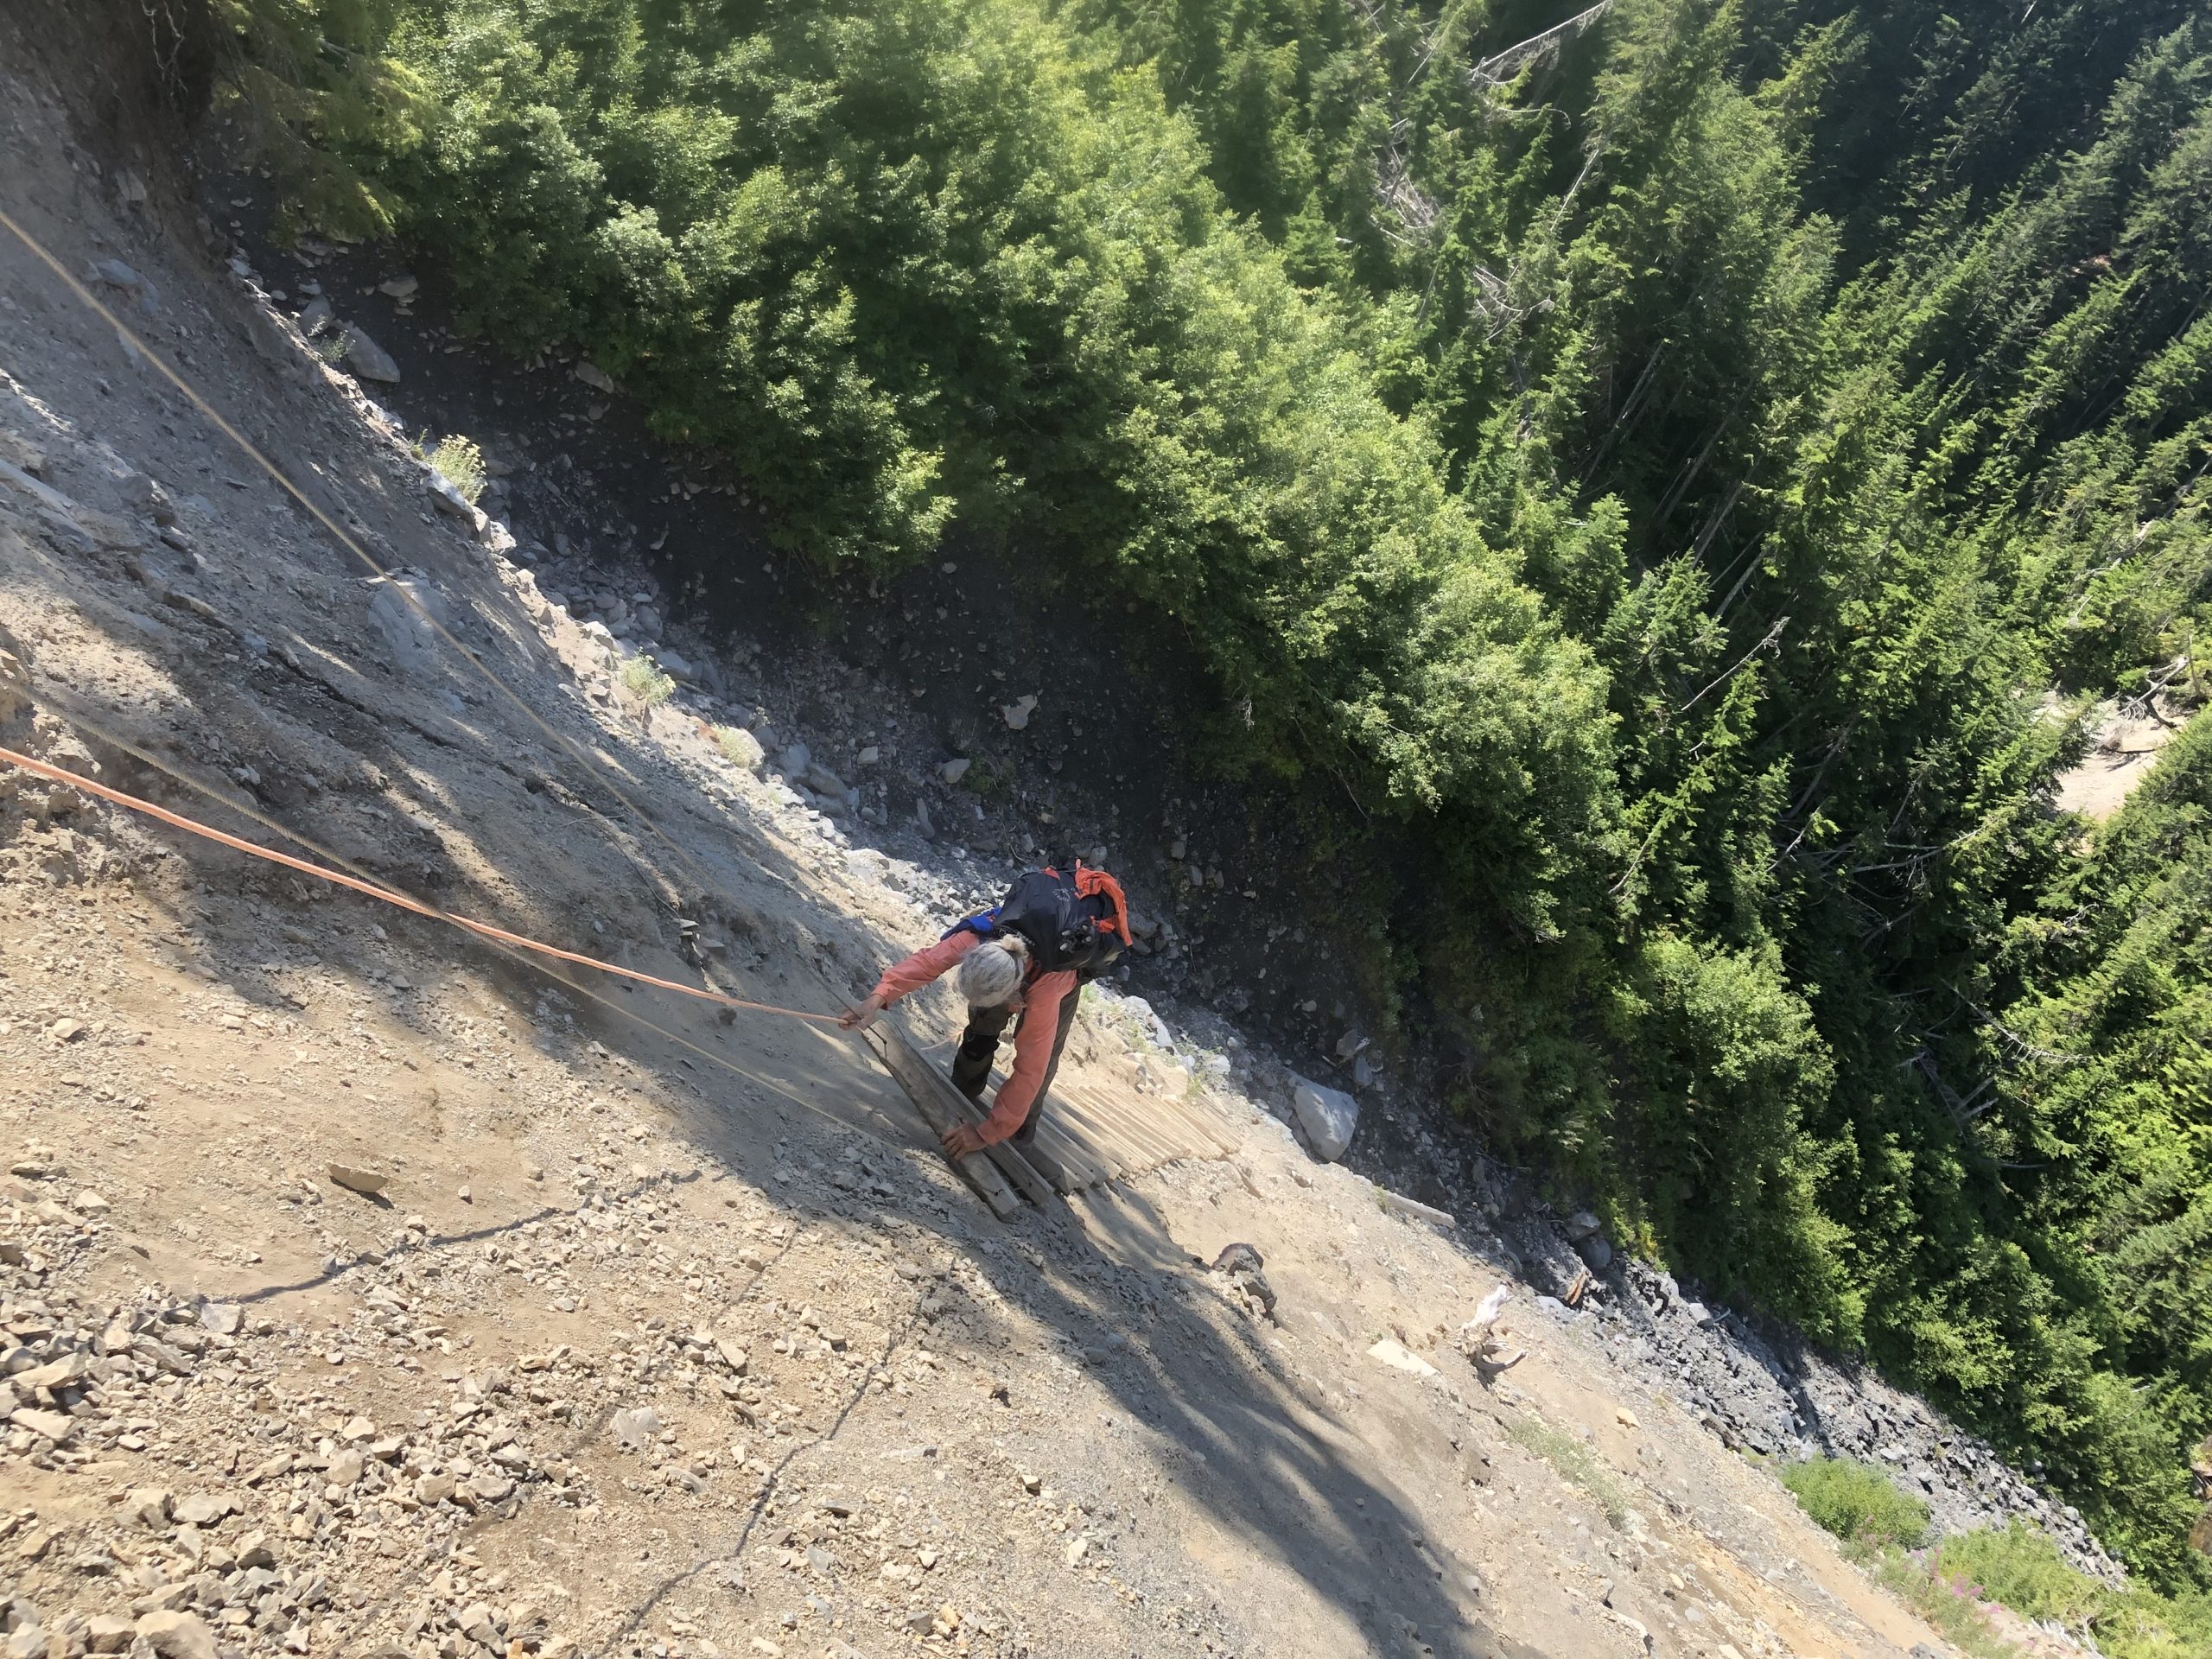
Yeahhh not sketchy at all.
Make it shorter: You can still have a very pleasant rainforest hike with almost no elevation change if you camp at Lewis Meadows (mile 10) and turn around.
2. High Divide / Sol Duc Loop

Length: 19 miles
Type: Loop
Elevation gain: 4000 ft
Difficulty: Moderate to strenuous
Getting there: Paved, two-lane road all the way. Smooth sailing.
Permit considerations: All campsites are quota sites. Bear cans required.
The High Divide is one of the park’s few true ridge walks. Start at Sol Duc trailhead and head counter-clockwise past lovely Deer Lake up to the High Divide. As you navigate over Bogachiel Peak, you’ll gain views of Seven Lakes Basin to the north and Mount Olympus to the south.
This is a great hike for wildflowers in summer and fall foliage later in the season. While the mountain vistas are fantastic on this loop, the many picturesque alpine lakes along the way steal the show. The entire Divide is basically a gigantic huckleberry patch, which means tasty treats in late summer and a good chance at a black bear sighting.
After the hike, you can grab a shower and a soak at Sol Duc Hot Springs Resort—so bring your bathing suit in the car.
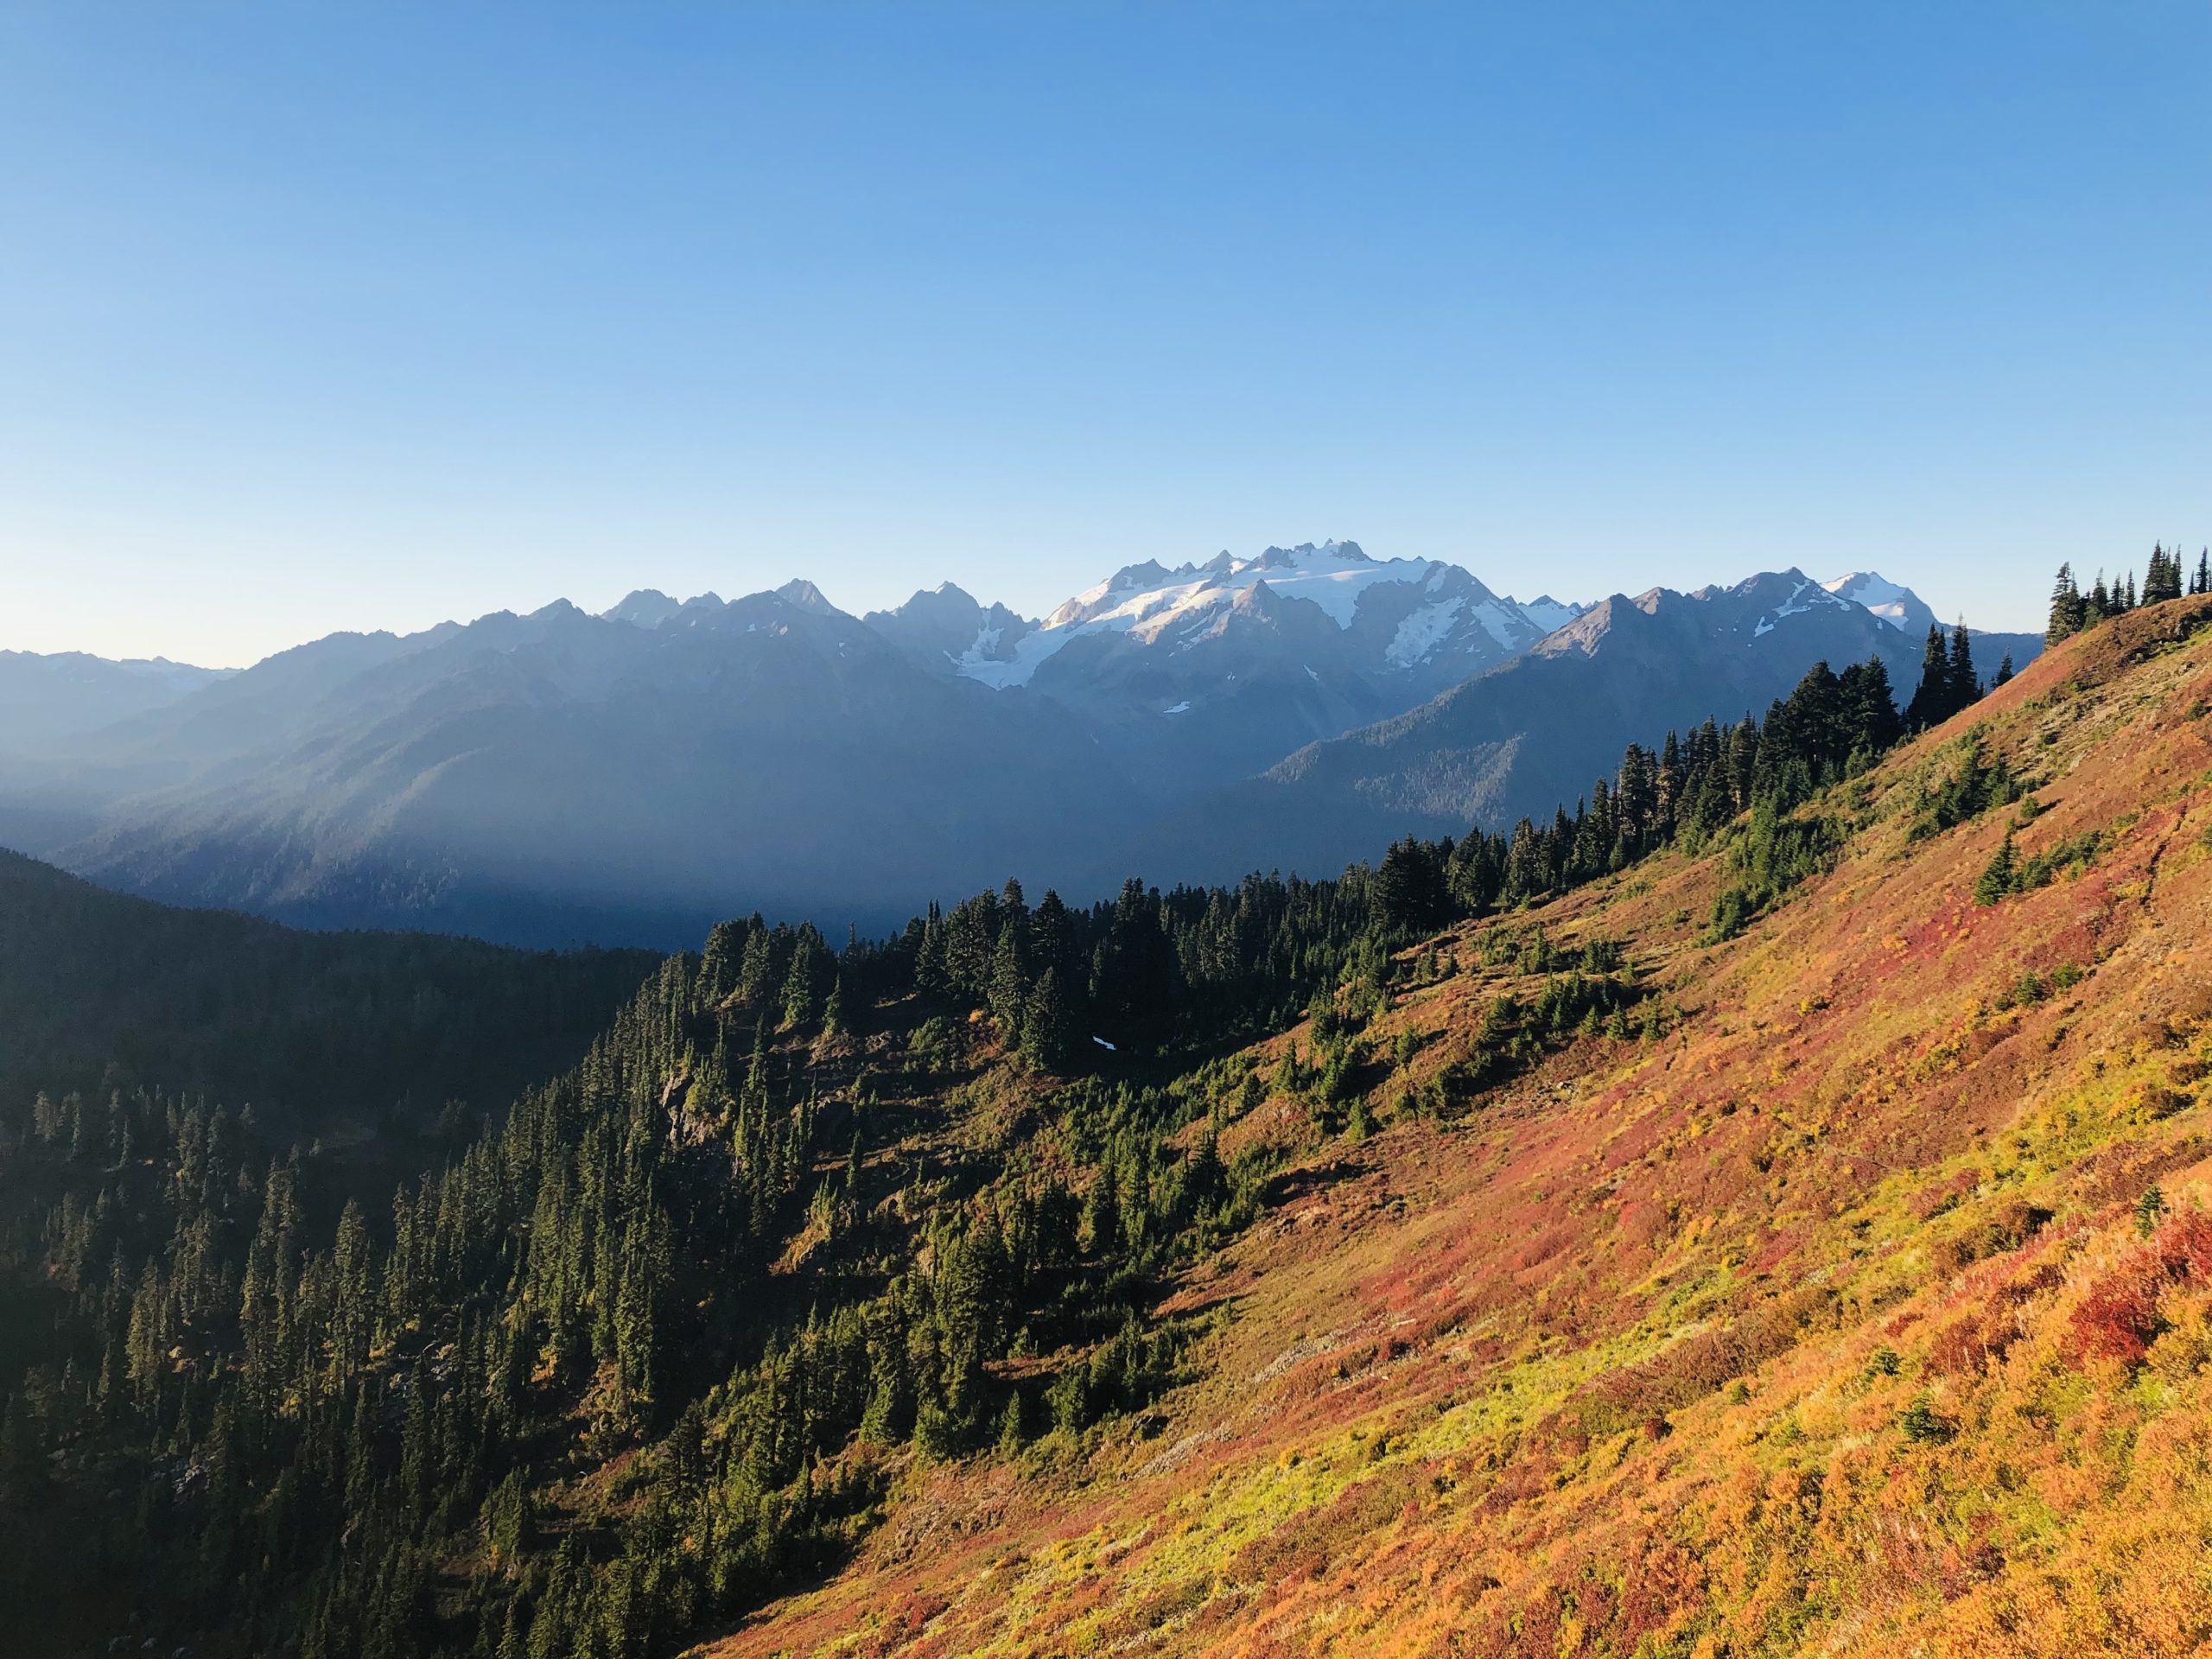
Mount Olympus from the Cat Basin primitive trail.
Make it longer: At Heart Lake, continue straight on the Cat Basin primitive trail and continue around past Swimming Bear Lake and Spreadeagle Pass. At Appleton Pass, pick up developed trail again and head back down to the Sol Duc Trail. This primitive trail is mostly easy to follow, but is steep, indistinct, overgrown, and eroded in several places, so I would only recommend it for experienced hikers. This extension will give you more miles and excellent vistas, including the best views of Mount Olympus in the area.
3. Enchanted Valley / Anderson Pass / O’Neill Pass Loop
Enchanted Valley is one of the most popular beginner backpacking destinations in Olympic National Park.
Length: 52 mi
Type: Lasso (loop/out and back hybrid)
Elevation gain: 11,000 ft
Difficulty: Moderate to strenuous
Getting there: The road to Graves Creek Trailhead has some washboard but is in great shape overall as of this writing. Graves Creek Campground (primitive, self-service, $20/night) is 0.4 from the trailhead and is a great place to spend the night before getting an early start the next morning.
Permit considerations: No quota sites on this loop, but some sites require bear canisters.
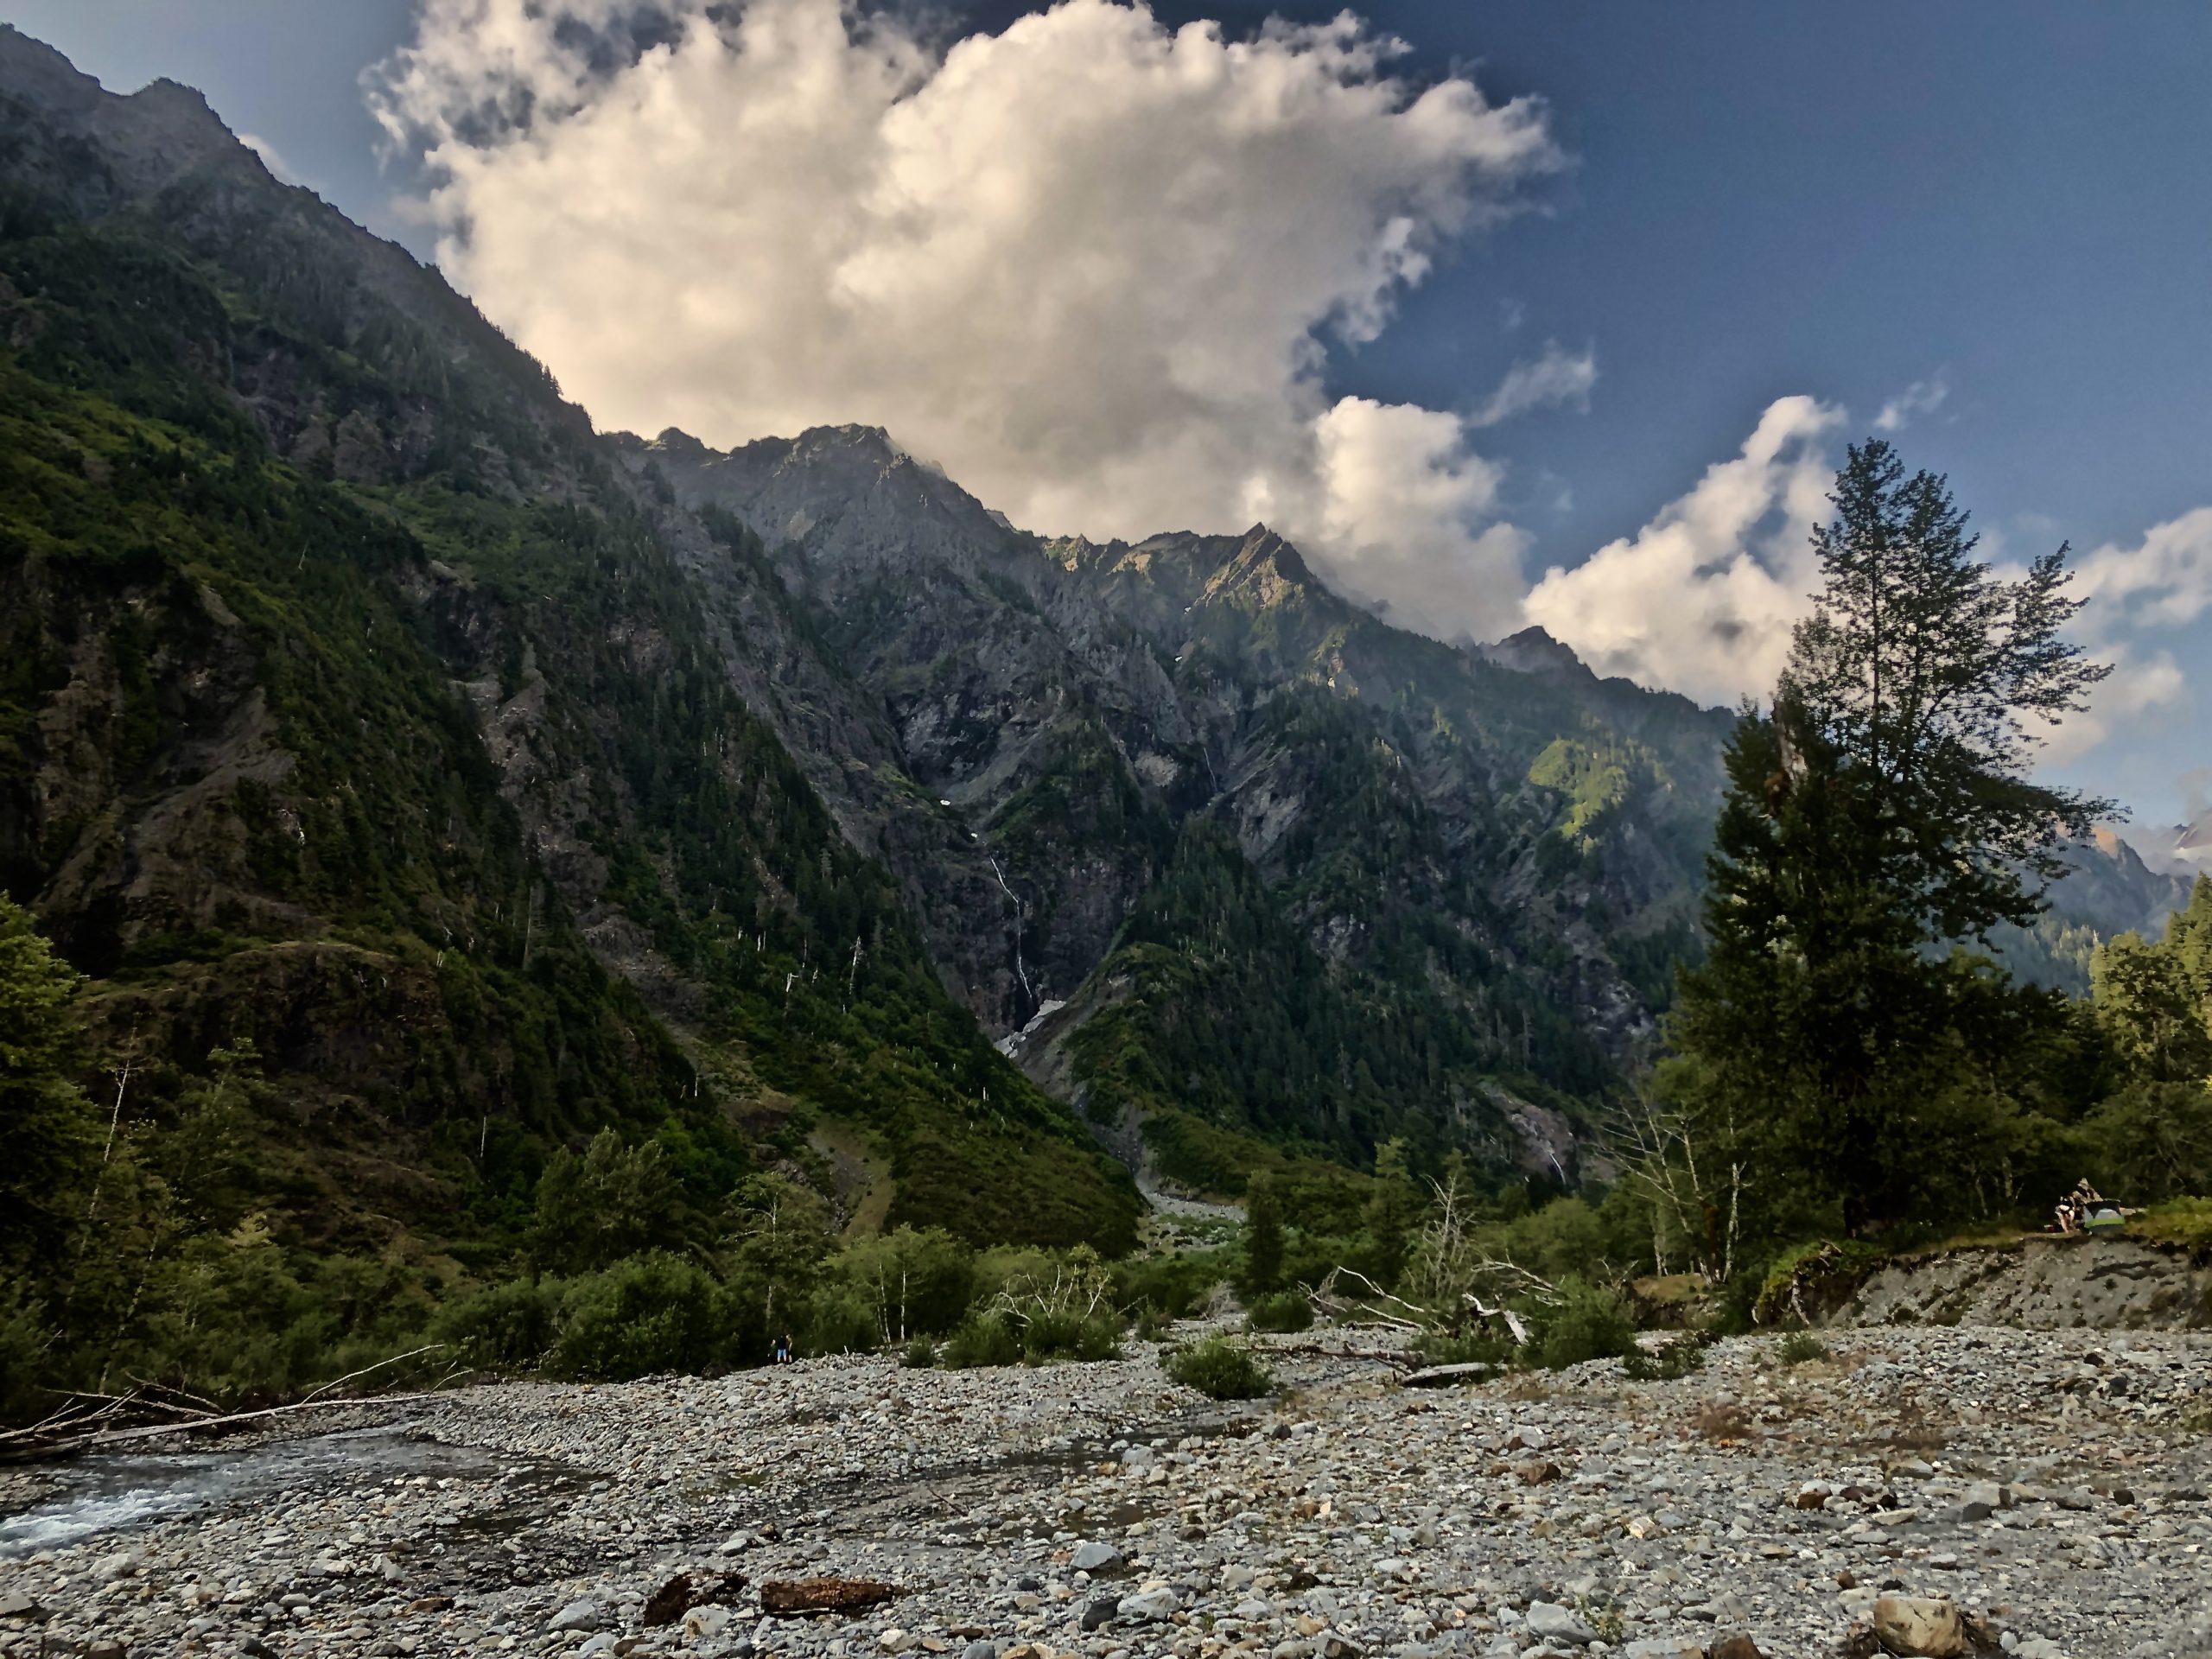
This hike begins in the Quinault Rain Forest. Be prepared to crane your neck a lot and say, “WOW LOOK HOW BIG THAT TREE IS,” at least 40 times on your way to aptly-named Enchanted Valley. There’s lots of camping in the valley, and you can watch the waterfalls tumble down 4000-foot valley walls from your tent.
From there, you’ll enter the loop portion of this hybrid “lasso” hike, beginning a roller coaster ride over Anderson, LaCrosse, and O’Neil passes. The Anderson Moraine and LaCrosse Lake spur trails are both worthy side trips along the way.
On your way home, you can stop at the coin laundry on Lake Quinault to wash your clothes and/or use the pay showers.

Anderson Moraine—the glacier is basically gone now, but this is still a worthy side trip from Anderson Pass.
Make it shorter: Just go out to Enchanted Valley and back. If you can book two nights in the Valley, set up a base camp and day hike to Anderson Moraine from there.
4. Grey Wolf Pass / Cameron Pass / Hurricane Ridge Loop

Lillian Ridge.
Length: 43 mi
Type: Loop
Elevation gain: 13,000ft
Difficulty: Strenuous
Getting there: The last eight miles of Deer Park Road are narrow, steep, and winding as you climb to 5,500-foot Deer Park Trailhead. As of 2022, the road is in excellent shape, but you do have to be cautious of other vehicles coming downhill fast around the many blind corners. Parking is limited.
Permit considerations: Everything in the Grand Lake area is a quota campsite, the rest are not. Some sites require bear cans.
This hike balances some very remote, seldom-visited parts of the park with the highly photogenic Hurricane Ridge area. You can expect decent trail conditions between Grand Pass and Hurricane Ridge due to that area’s popularity. Every other part of this loop is quiet and infrequently maintained, so expect overgrown vegetation, deadfall, and eroded/washed-out sections of trail in places.
This hike offers up both solitude and a veritable buffet of scenery, including mossy forests, Mount Olympus, and glimpses of Port Angeles, the Strait of Juan de Fuca, and British Columbia. You’ll also get to enjoy one of the park’s precious few sustained ridge walks on Lillian Ridge and Hurricane Ridge.
This is a challenging hike featuring several very steep and strenuous climbs on this loop, notably Lost Pass, Cameron Pass, and Grand Pass.
The Grey Wolf River.
Make it shorter: Park at Obstruction Point Trailhead (closed for the remainder of 2022) and just do the Grand Lake / Hurricane Ridge area, which is undoubtedly the most scenic portion of the hike.
Make it longer: Take some extra time to explore side trails along the way. Cedar Lake is a worthy side trip from Falls Camp, and when you get to the Obstruction Point area, check out Badger Valley in addition to the ridge walk.
5. Shi Shi Beach to Ozette Lake
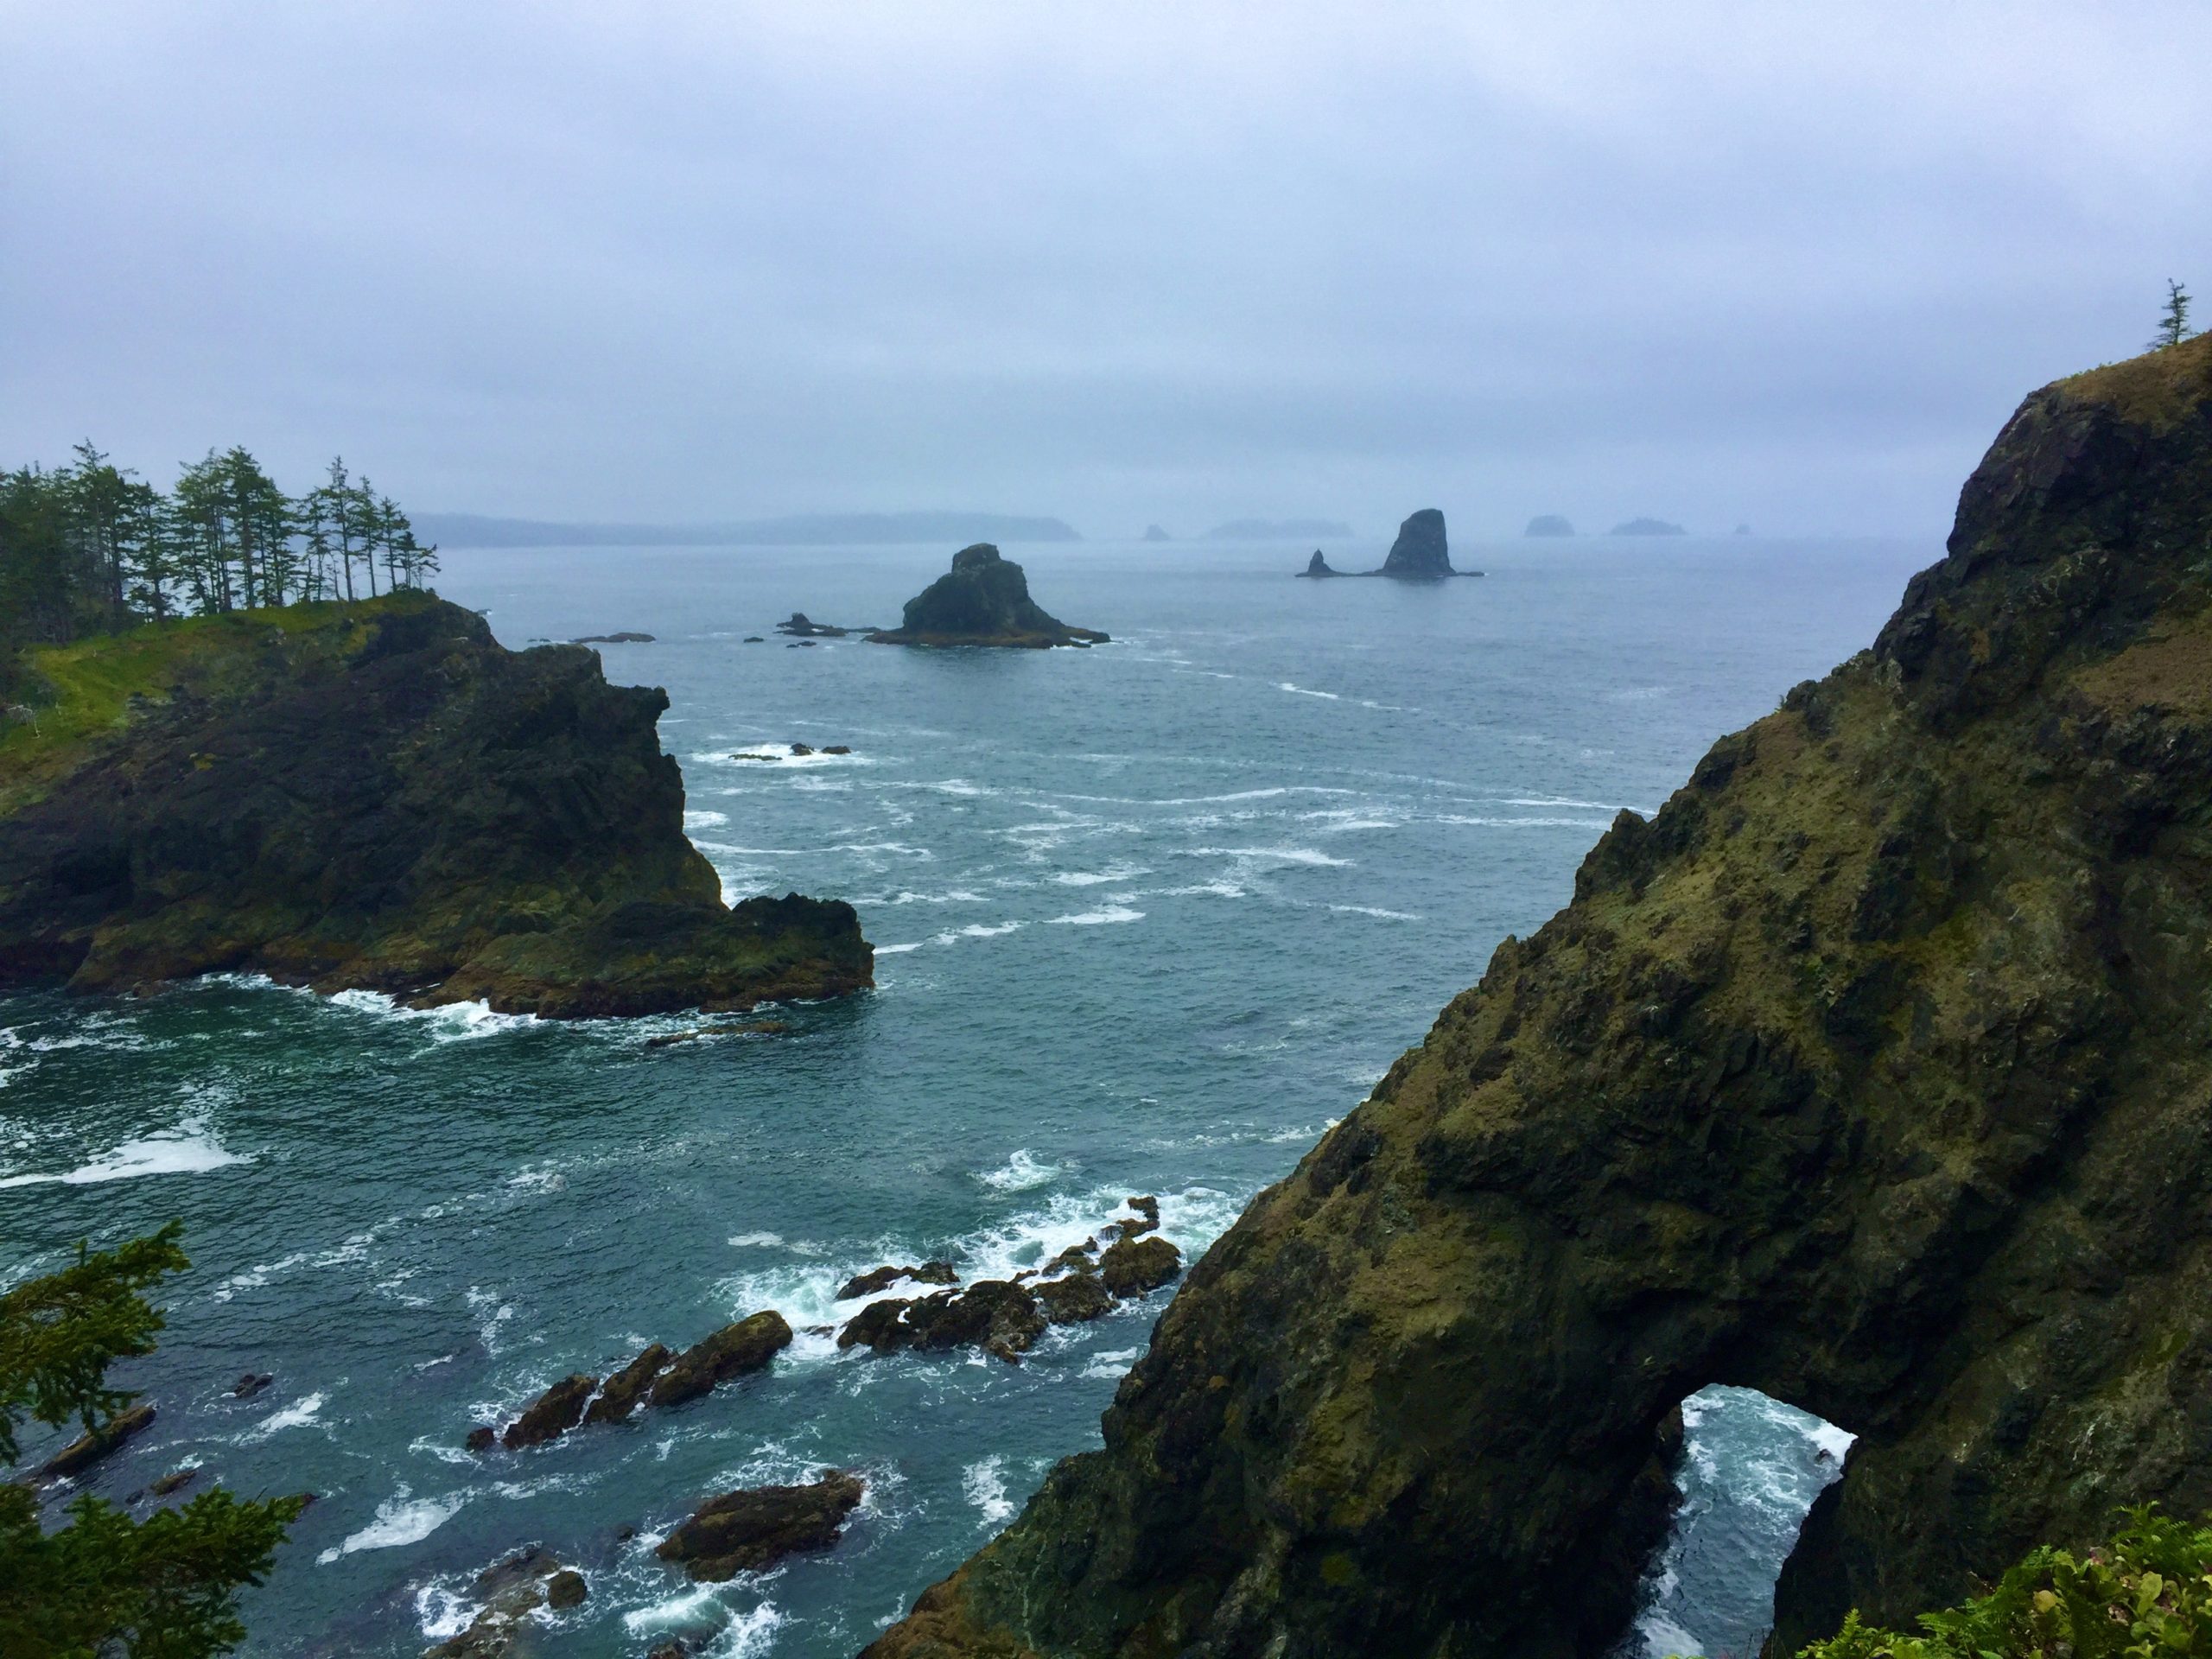
Photo via Dan Purdy.
Distance: 19 mi
Type: Point-to-Point
Elevation gain: 500 ft
Difficulty: Moderate
Getting there: At Shi Shi Beach, park your vehicle at one of the many grass/dirt lots along Tsoo-Yess Beach Road. Local homeowners run these lots, and you’ll find specific payment instructions at each lot. Also, as you’ll be parking on Makah land, please be familiar with their rules and regulations. Chief among these is the Makah Recreation Permit, which must be displayed on your parked vehicle.
Permit considerations: Many of the beach campsites are quota sites. Bear cans are required at all sites.
No Olympic National Park backpacking guide would be complete without at least one beach hike. I haven’t actually done this hike (it’s on the bucket list), but one of our writers has and has created a fantastically detailed profile of it. If you can shuttle or stage two vehicles, you can do this as a point-to-point hike. Otherwise, it’s short enough that you could do it as an out-and-back.
Look forward to beach sunsets, tide pools, sea stacks, and other exciting beauty things on this gloriously unique hike. You will need a tide chart to navigate around some headlands, while others are impassable even at low tide and must be bypassed via overland trails.

Starfish bravely clinging to some kelp. Photo via Dan Purdy.
Make it shorter OR longer: You can’t start any further north than Shi Shi. However, you could turn around earlier than Alava to make it shorter or press on as far as Rialto Beach to make it significantly longer.
READ NEXT – The Olympic North Coast: 19 Miles of Magical Coastline in Olympic National Park
Olympic National Park Backpacking Logistics
Good to Know
- Dogs and other pets are not allowed on any trail in Olympic National Park. Service animals are OK.
- You won’t see any mountain bikes in the park, but many trails are accessible to pack animals.
- Cell service is spotty to nonexistent throughout most of the park. Do yourself a favor and assume you won’t have a signal.
Permits
Heart Lake is a popular, quota-controlled campsite on the High Divide Trail.
You will need a permit to camp backcountry anywhere in Olympic National Park. Permits cost $8 per person per night plus a $6 booking fee. You can make reservations yourself online at recreation.gov up to six months in advance and print the permit within five to seven days of the start of your hike.
Quota sites: Some backcountry campsites are limited by a quota. If you sign up for one of these sites, you are expected to keep to your itinerary. On the park’s helpful Wilderness Trip Planner map, quota sites are indicated by yellow tent symbols.
Other sites are not quota-limited. You still have to register for these sites, and the park expects you to follow your itinerary as closely as possible to make search and rescue efforts easier. However, it’s not as big of a deal to stay at a different non-quota campsite since they’re non-competitive.
Unlisted campsites: Recreation.gov doesn’t list every backcountry campsite in the park. Unlisted sites are reservable, but you must know to ask for them. To do this, you can book a trip in the area you want to hike, then email the Wilderness Information Center (WIC) and ask to change the campsite. You can also try calling the WIC directly at (360) 565-3100 to book your permit over the phone, in which case the rangers can help you build an itinerary.
The backcountry rangers at Olympic National Park are extremely knowledgeable and helpful. It’s well worth calling, emailing, or stopping in person at the WIC to chat with them about your intended hike. They can also help you make changes to existing permits.
Bear Canisters
Some (not all) campsites in the park require you to store your food in a bear can. Be careful to note whether any of your campsites require canisters. If you don’t own one, you can usually get a free loaner from one of the WICs. While the park can’t guarantee they’ll have enough loaners on hand at any given time, I’ve never had a problem getting one. You can also buy canisters in Forks, Port Angeles, or Seattle. The Forks Outfitter also has a rental program.
Bear Can Recommendations: BearVault BV500 || Garcia Backpacker’s Cache (this is the kind the park will loan you)
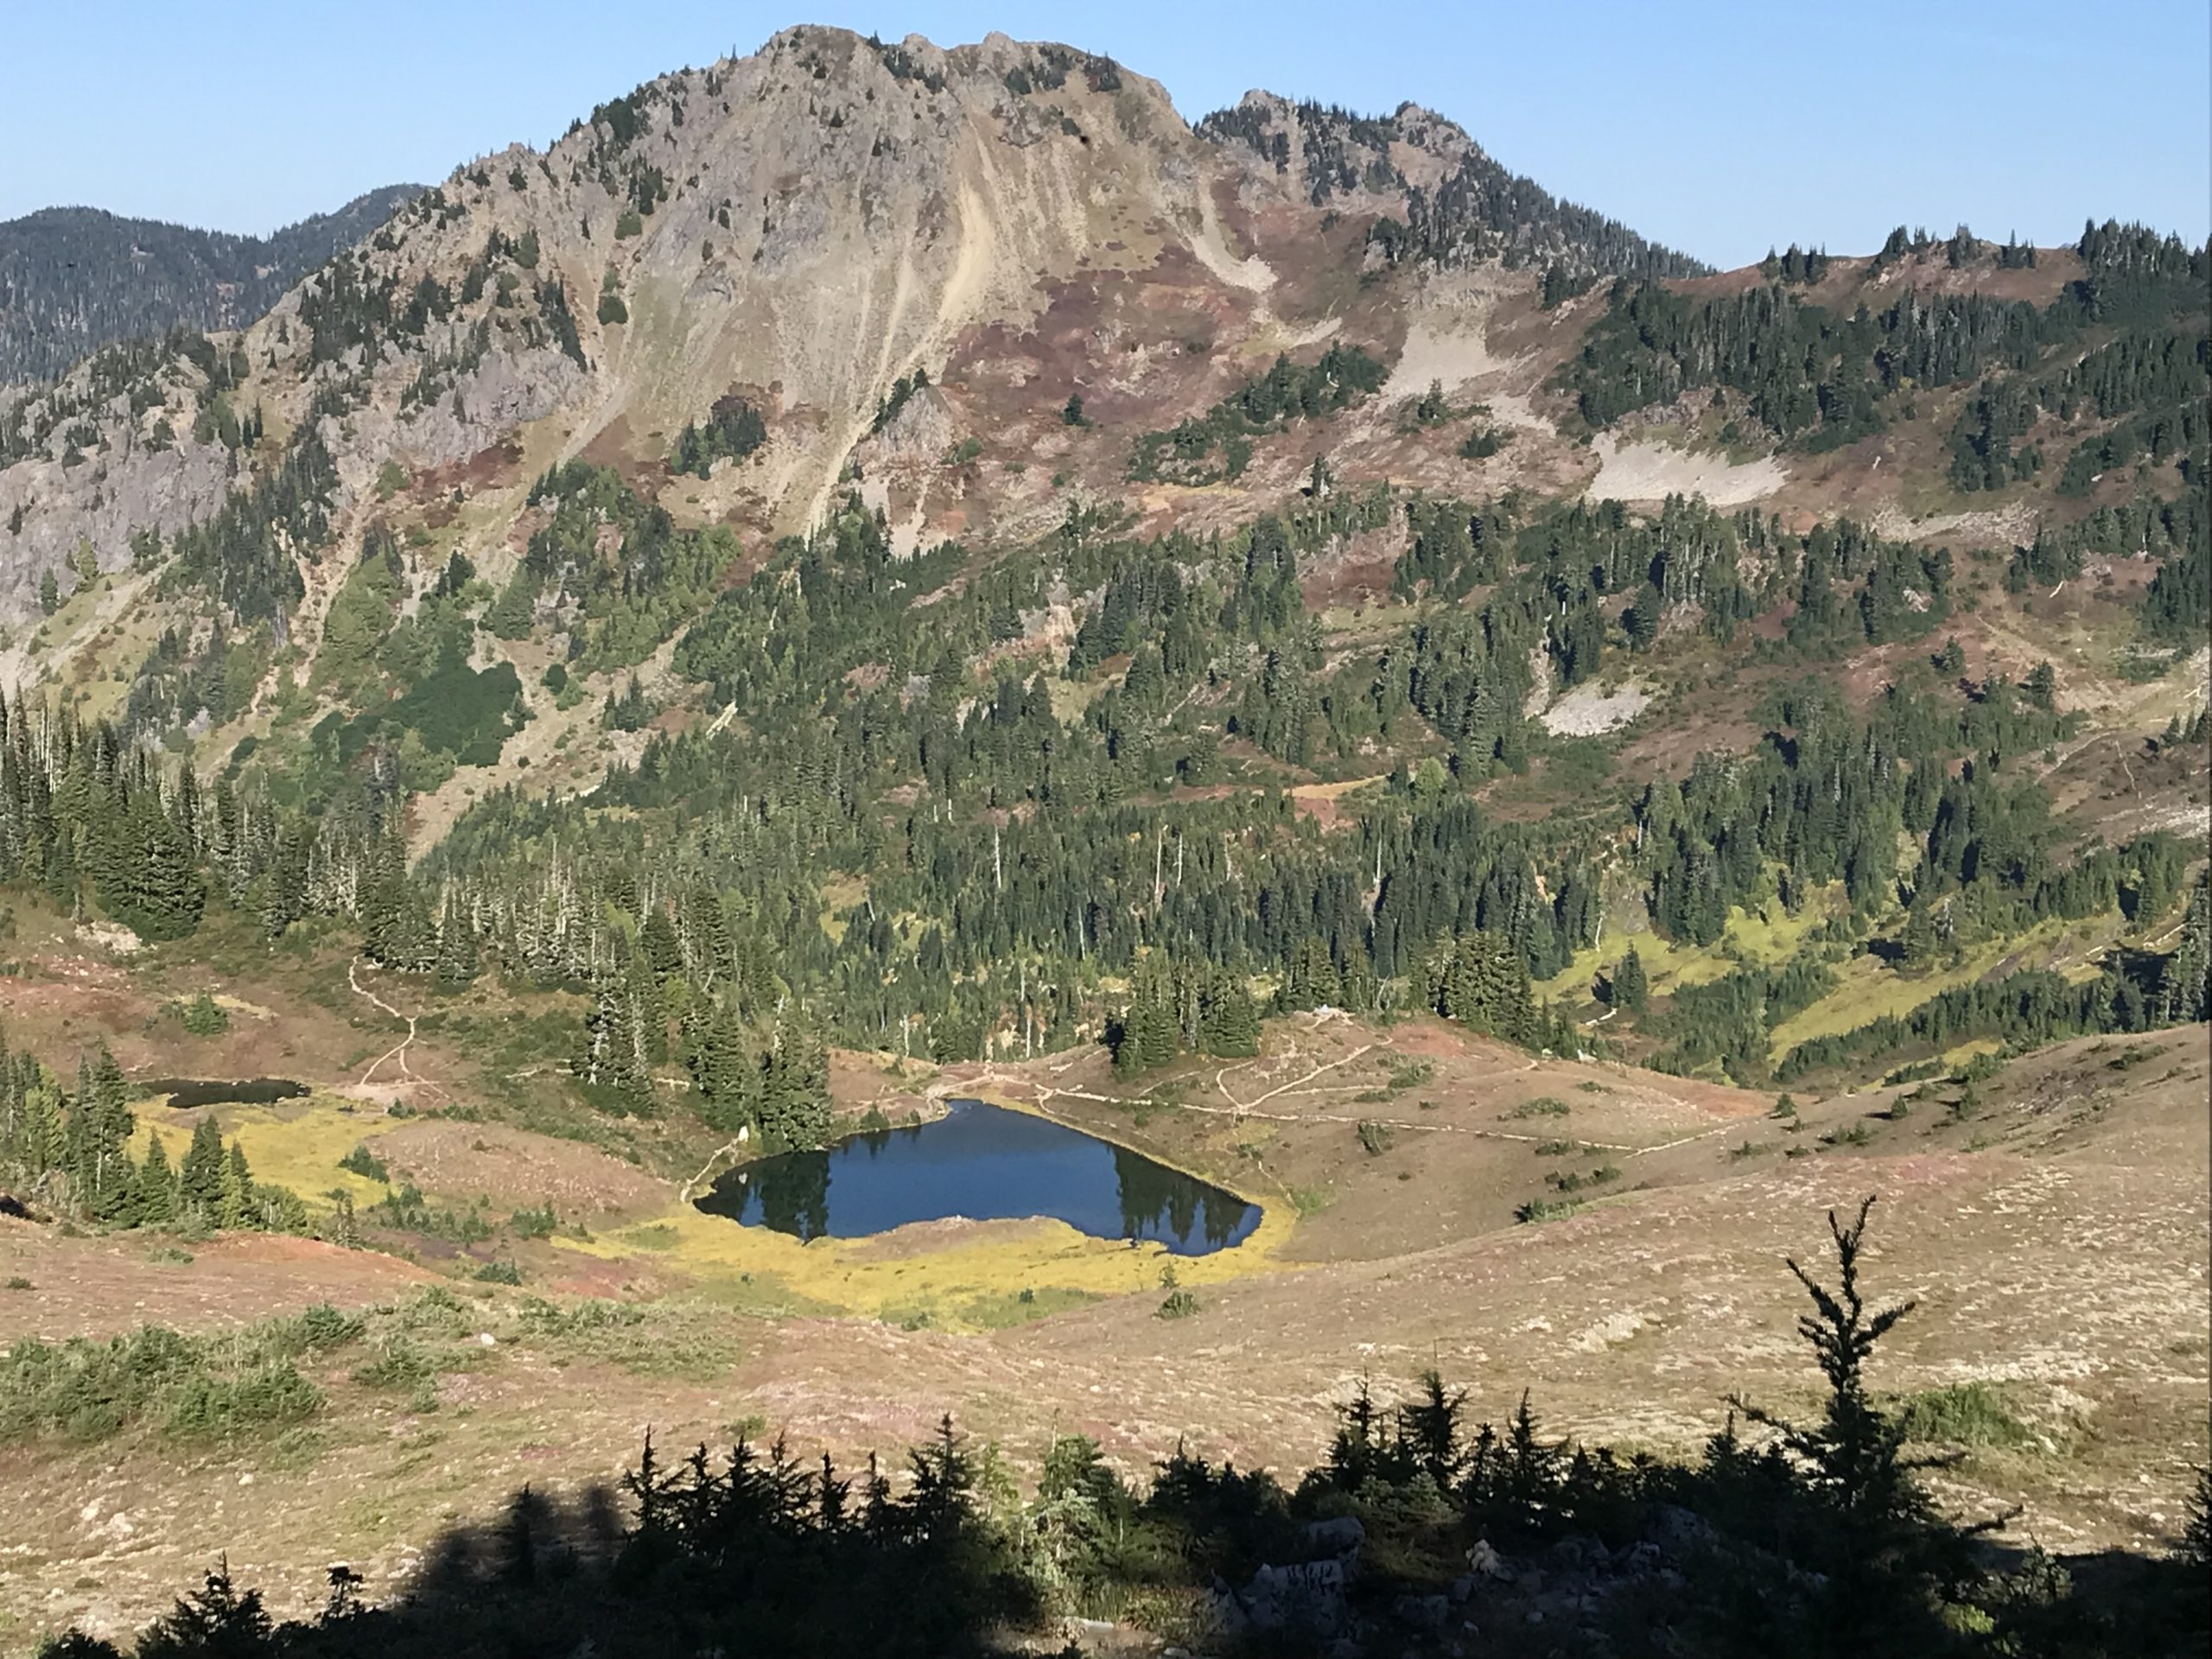
Best Time to Hike in Olympic National Park

Fall colors at Gladys Lake on the Grey Wolf – Hurricane Ridge loop.
May through mid-October are the relatively dry months in this area, though the weather is always unpredictable on the peninsula. July and August are the busiest, most popular months. If you go before July, you’ll encounter gushing streams and waterfalls, more snow, and bugs, but fewer crowds. If you go in September or later, you’ll have fewer bugs, fewer crowds, and a shot at seeing some color change in the alpine tundra. Note that some high-elevation areas are only available for campsite reservations in the summer months (June or July through mid-October).
Final Thoughts

Grey Wolf Pass.
This is far from an exhaustive list of backpacking trips in Olympic National Park. You can make any number of different itineraries on the peninsula, including many that are less crowded than the popular gems we’ve highlighted.
I also encourage you not to limit yourself to just hikes within the confines of the park itself. There are tons of trails in the Buckhorn Wilderness and surrounding area that are worth exploring too. Washington Trails Association is an invaluable planning resource for anyone looking to scope out potential hikes in the area.
Featured image: Seven Lakes Basin, 2005. Photo by Brian. Graphic design by Zack Goldmann.

This website contains affiliate links, which means The Trek may receive a percentage of any product or service you purchase using the links in the articles or advertisements. The buyer pays the same price as they would otherwise, and your purchase helps to support The Trek's ongoing goal to serve you quality backpacking advice and information. Thanks for your support!
To learn more, please visit the About This Site page.

Comments 2