 ">
">
Giggles’ Gear Modifications and Tips for a Thru-Hike That Starts Tomorrow or Is Still in Your Dreams
Everyone has their own way of doing things on a thru-hike, whether it is how they attach their umbrella to their pack, when they take a break for dinner, or what they find makes the best pillow at night. I have found it helpful to see what others are doing so that I can fine-tune what works best for me.
Here is a short list of modifications that I either created or gathered from others before and along my hike. At the bottom, I have also included some ideas that did not work for me. I was happy to have thought of or learned about some of these modifications and tips before I started my hike, and the ones I didn’t know would have been quite useful to know at the outset so I figured I would share them. The list below contains things that are simple adjustments to make and can be done the day before your hike, on trail, or during advanced planning.
Protecting Yourself from the Elements, Particularly the Sun
I am allergic to sunscreen and sunburn very easily, so finding ways to cover up was especially important for me. It also became important for other hikers in the Sierra, where the sun’s intensity increased and the sun reflected off the snow, putting more of the body in danger of getting sunburned.
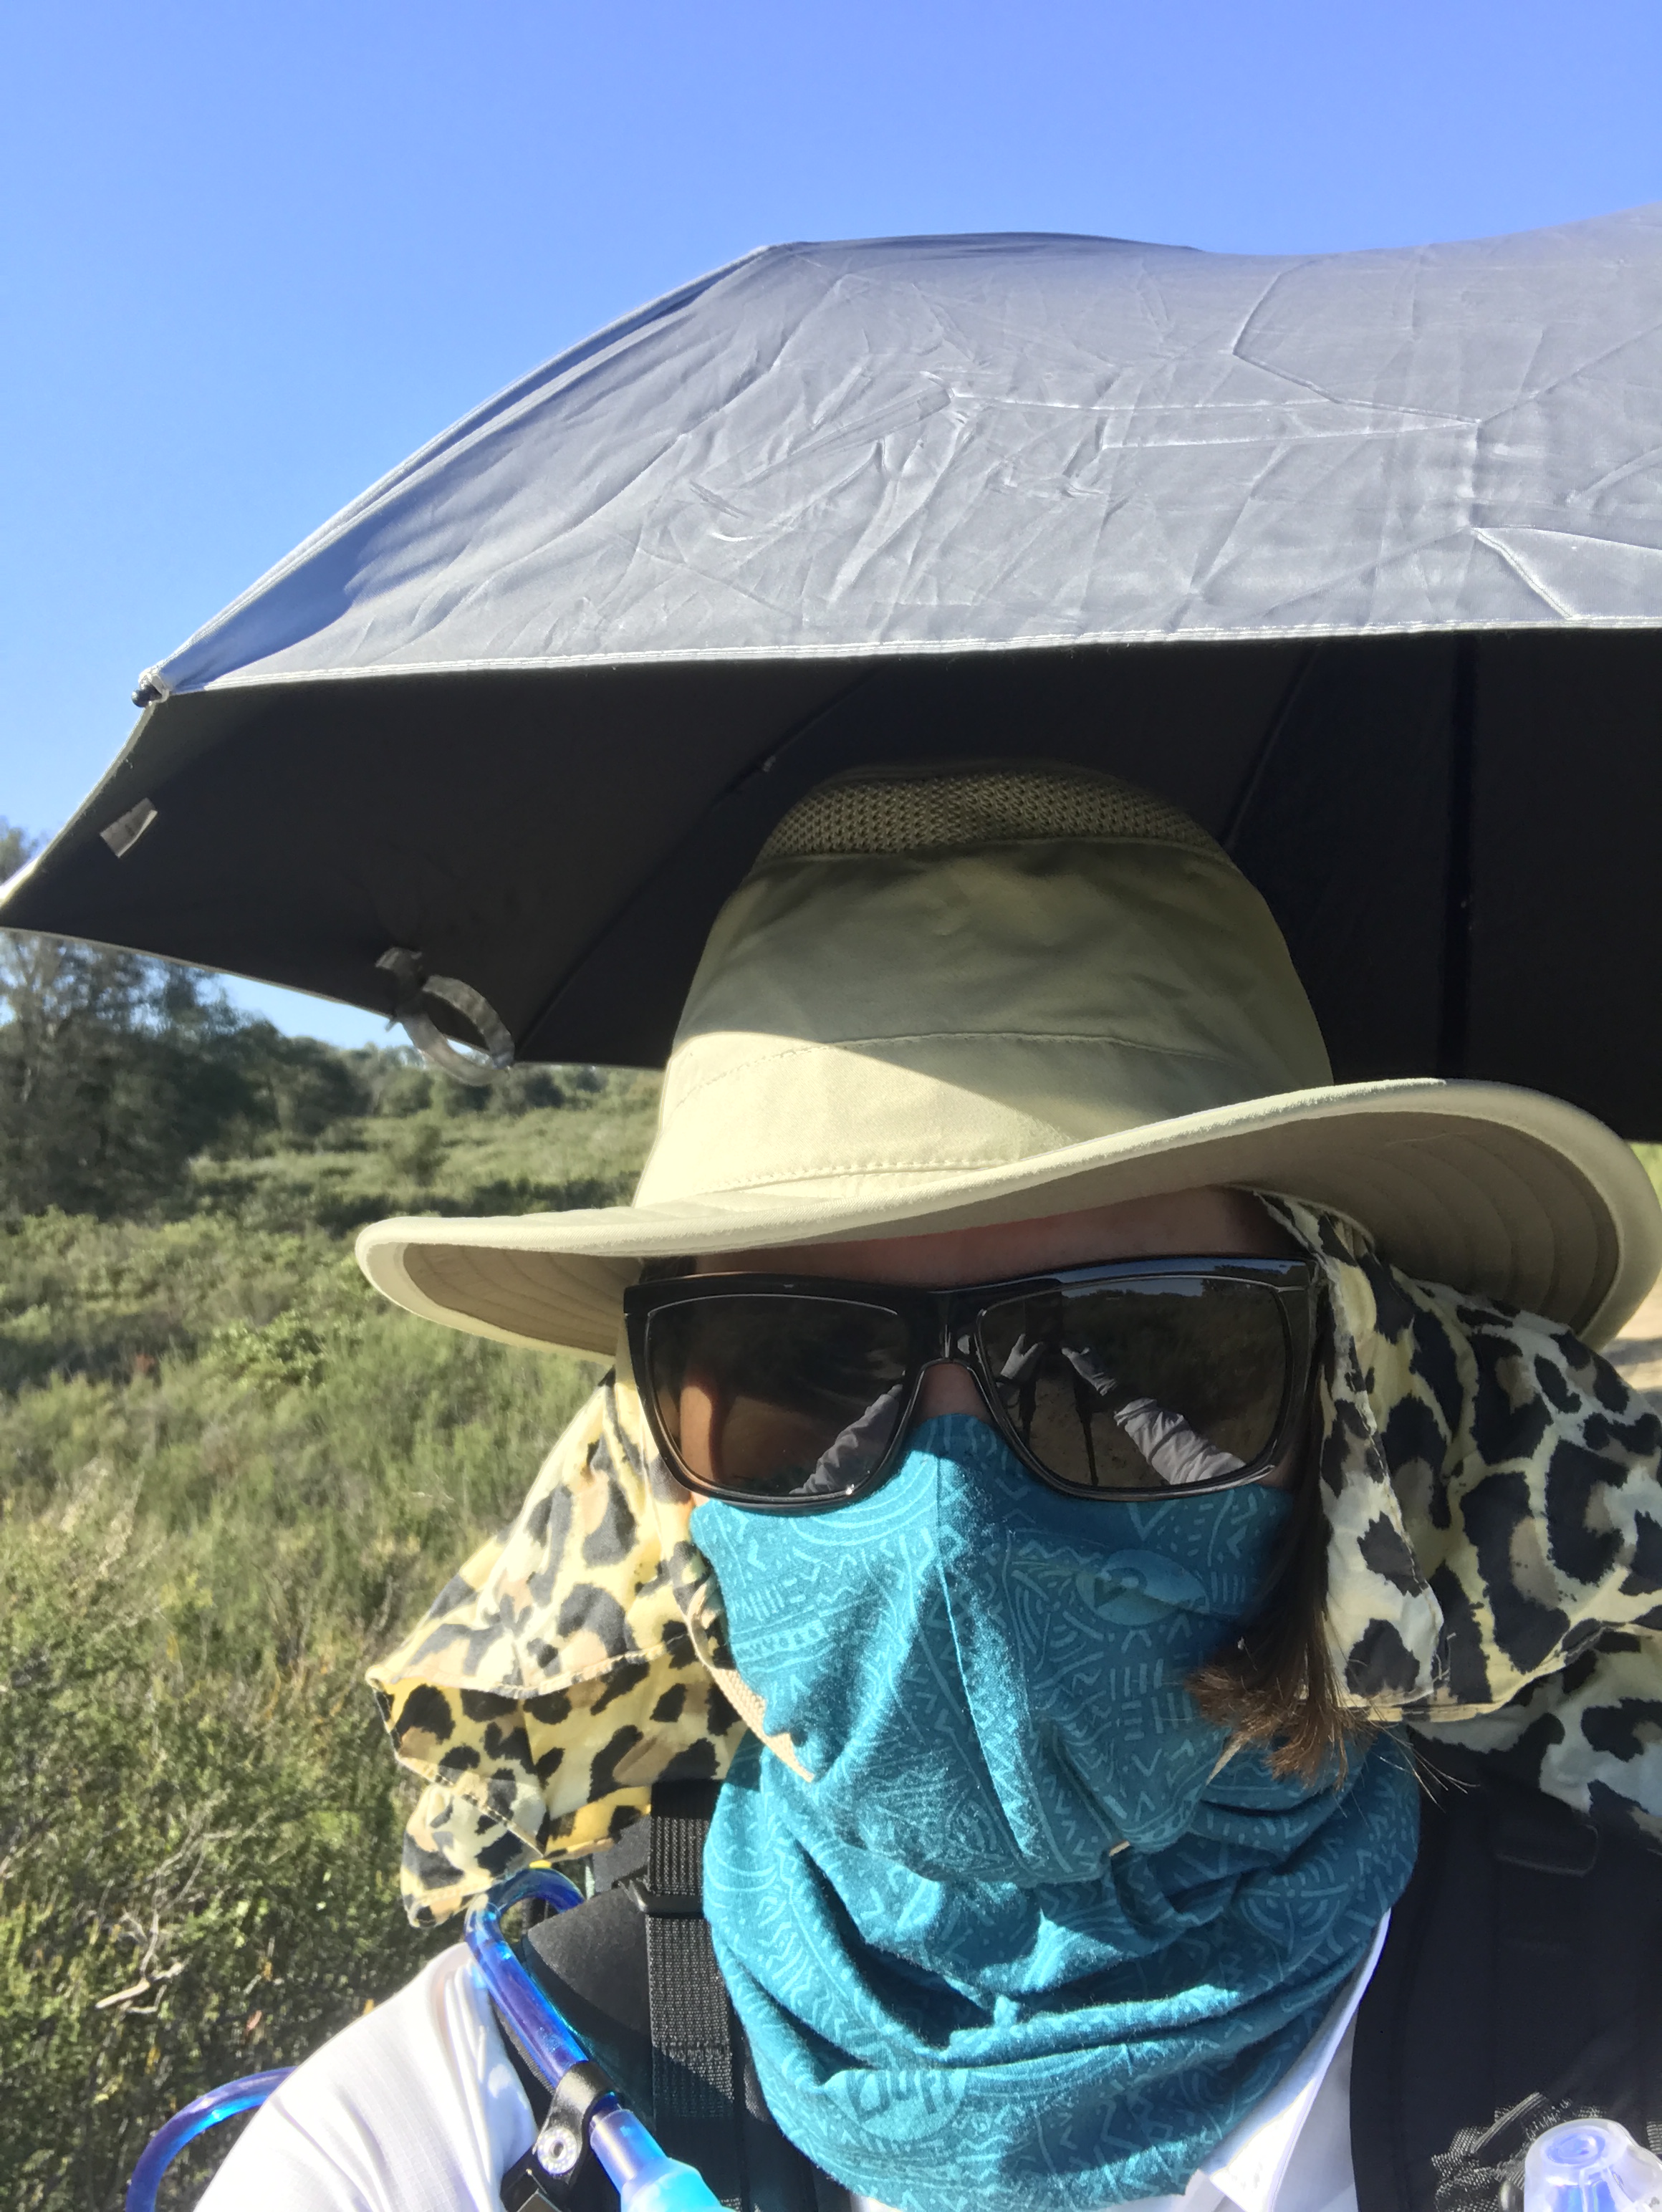
- Umbrella attached to pack, wearing a bandana, and modified neck gaiter.
Tips:
- Wearing a bandana under your hat not only helps protect you from the sun by shading your neck and ears, but also if it is adjusted properly can protect your eyes a bit by shielding the sides, where your sunglasses may not cover.
Modifications:
- Planning on wearing a neck gaiter or buff? I found inserting a nose piece made it easier to keep it from falling down and decreased fogging of my sunglasses.
Get the beta:
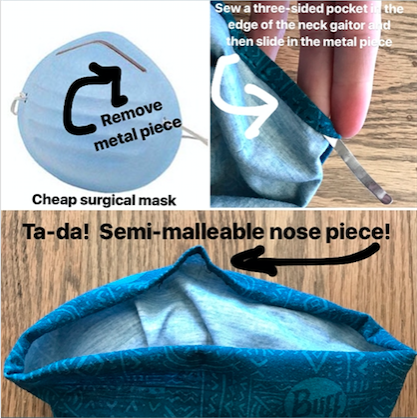
- Buy a cheap surgical mask with metal nose piece (often sold at drug stores).
- Remove the semi-flexible piece of metal.
- Find the middle of the front of the top edge on the neck gaiter (this should be the part of the gaiter that will rest on your nose).
- Place the metal piece there and fold the top edge down over it. Sew around two sides to created a three-sided pocket if you would like the metal piece to be removable, or sew around it entirely so it won’t fall out. The pocket method is the most versatile, but you may want to pack an extra metal piece in case you lose the one you’ve been using.
- There are many ways to attach an umbrella to your pack; here is the way I attached my Montbell Sun Block Umbrella to my ULA Catalyst backpack. The attachment held up well, except in extremely high winds. I found, however, that even though the umbrella offered a great reprieve from the sun, it limited visibility. The limited visibility was mentally draining and discouraging, particularly on uphills because it was hard to see the end of the up. After the desert section on the PCT, I stopped using my umbrella.
Get the beta:
- Get a semi-flexible attachment cord or
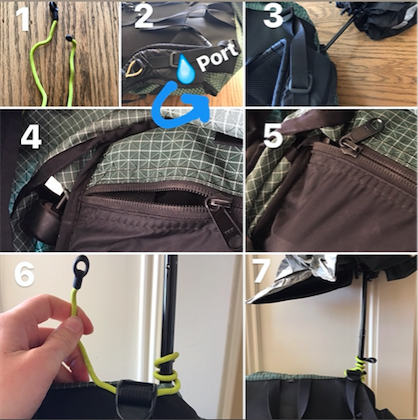 two (sold at REI).
 - Find the water port on the ULA Catalyst (use the one of the left hand side when you are wearing the pack).
- Insert the base of the umbrella.
- Unzip the zipper to the pack frame compartment.
- Insert the base of the umbrella into the pack frame compartment (how far you insert it is personal preference; I preferred to insert as little as possible as this allowed me to extend the umbrella higher over my head). Then zip the zipper closed as much as you can.
- Wrap one of the semi-flexible attachment cords around the umbrella stem twice and then around the load-lifter strap.
- Wrap it around the umbrella stem once more. A second semi-flexible attachment cord can be used for extra stability or to adjust the angle. Use it in a similar way attaching either again to the load lifter strap or to the haul loop.
Water Bottles, Bladders and the Sawyer Squeeze Filter
I used the Sawyer Squeeze Filter, Smartwater bottles and a Platypus bladder as my water system on the Pacific Crest Trail. Filtering water from natural water sources using the Sawyer Squeeze Filter cleans the water, yielding safe drinking water. When the filter becomes clogged or after extensive use, the filter needs to be cleaned using a back-flushing method described in the modifications below.
Tips:
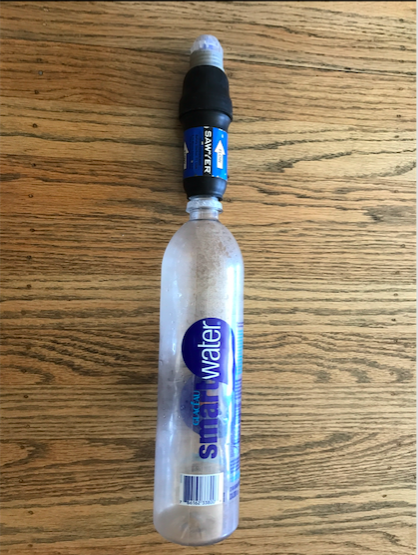
- Sawyer Squeeze filter with Smartwater bottle.
- The bags that come with the Sawyer Squeeze tend to wear fast and can leak. The Sawyer Squeeze is also compatible with Smartwater bottles, which are widely available, hardy and last longer than the bags. I only used two sets of Smartwater bottles in five months. I also find that Smartwater bottles can be less clumsy to use. Whether a bag or bottle is easier to fill will depend on the water source. Some people prefer one over the other and some people bring both. I, personally, much prefer using the Smartwater bottles.
- Your Sawyer Squeeze has a gasket that allows it to fit with your water bottle or bag. Without this gasket, the filter does not mate properly and will leak potentially contaminating your water.
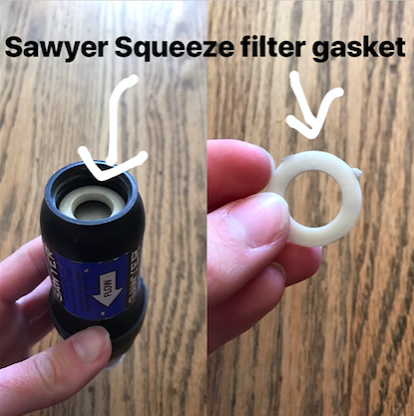
- On left, gasket in place properly. On right gasket we found lying on the trail after falling out of someone’s filter.
The easiest way to avoid this issue is to avoid losing your gasket. It is not necessarily as easy as it sounds. After extended use the gasket can sometimes fall out unnoticed and often into the water source when you are filling. To avoid this, hold the filter with the attachment part facing up when it is not attached to a receptacle so that the gasket cannot fall out. If you do lose your gasket, head to a hardware store and try a hose gasket as a replacement before resorting to replacing the whole filter.
- If you are using a water bladder, you may want to roll up the excess area as it empties so that you maintain a constant pressure in the bladder ensuring a more steady flow.
Modifications:

- Sawyer Squeeze filter with Smartwater bottle and suck top.
- The white suck top that comes with your Sawyer Squeeze can be replaced by the suck top from a Smartwater bottle. The Smartwater bottle suck top can be used to back flush your filter. This eliminates the need to carry the Sawyer Filter syringe on your trip (the syringe can be used at home for a more extensive back flushing).
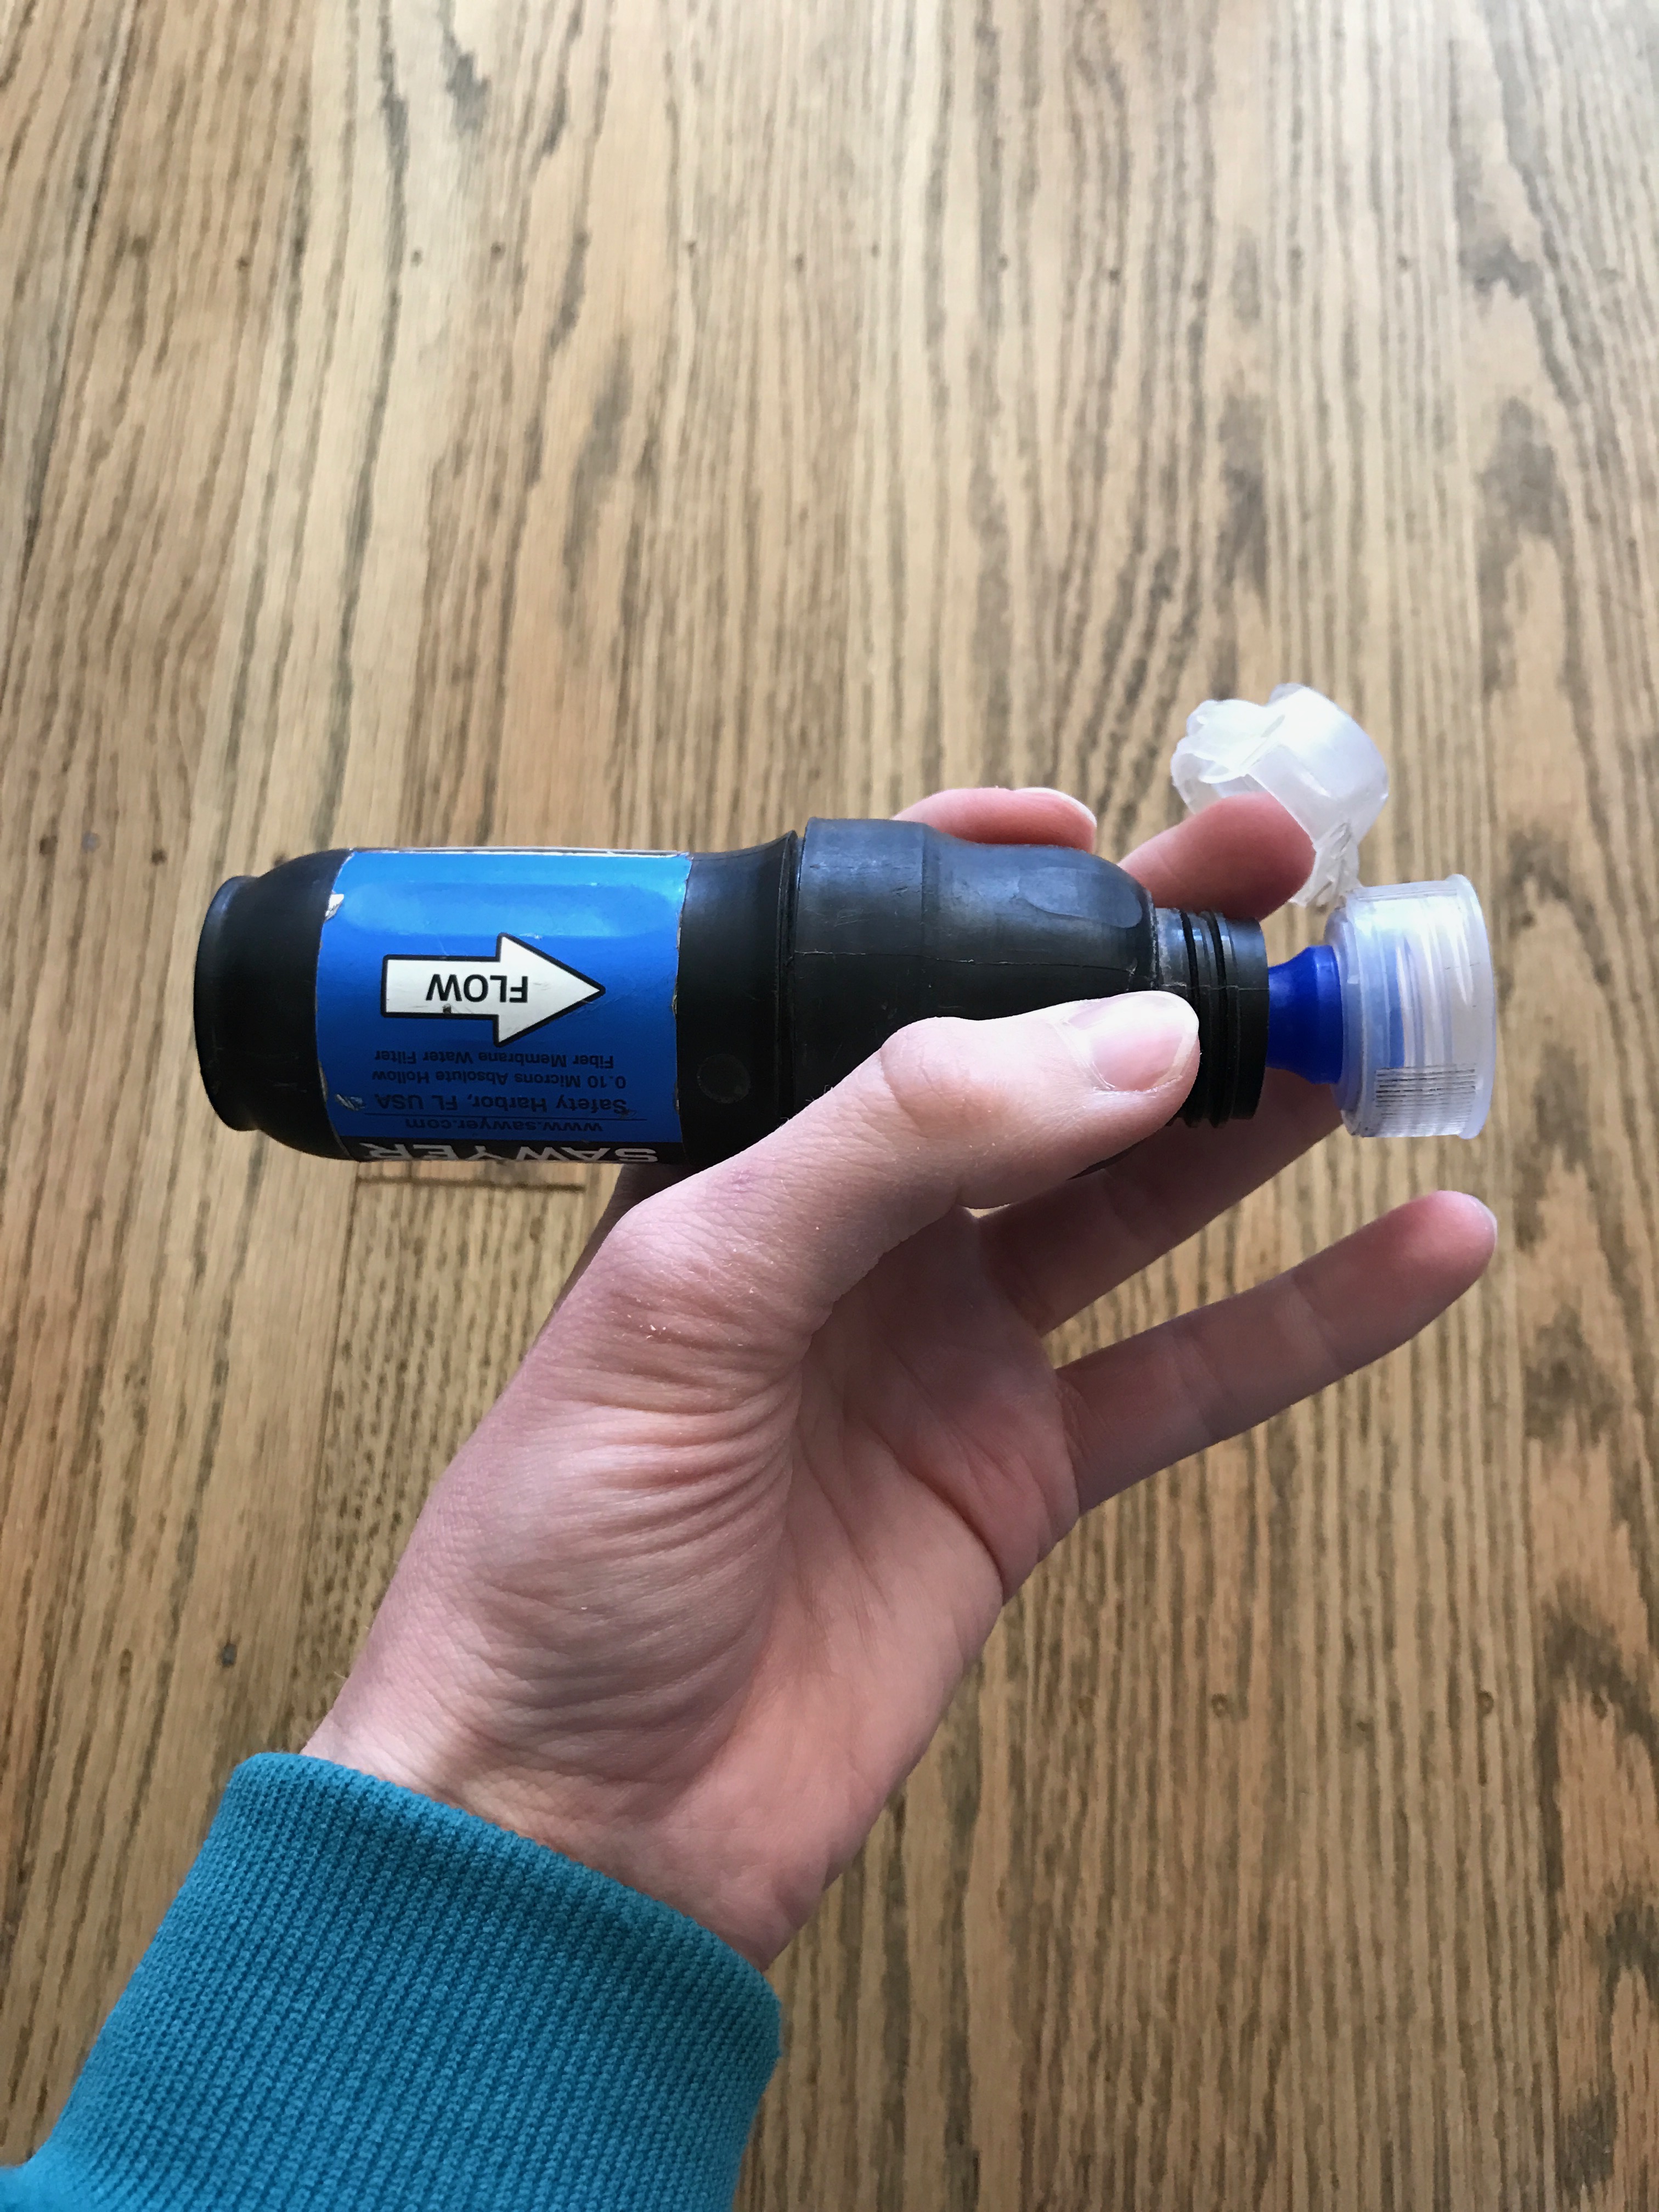
The Smartwater bottle suck top can replace the syringe for back flushing.
Get the beta:
- Gather your Sawyer Squeeze filter with a Smartwater suck top attached and a clean water bottle or bag.
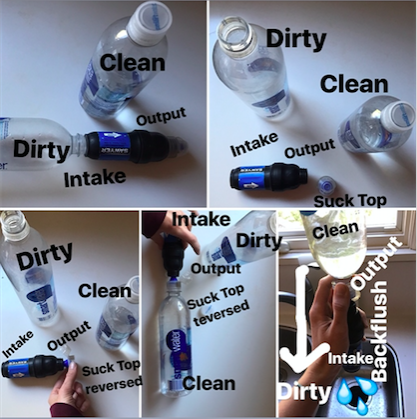
- Where dirty refers to the water bottle containing dirty water, clean refers to the bottle containing clean water, intake refers to the side of the filter in contact with dirty water and output refers to the side of the filter that produces clean water.
- Unscrew the dirty water bottle or bag from the filter and set it aside. Then unscrew the suck top.
- Flip around the suck top and line it up with the nipple on the output side of the filter.
- Attach a clean water bottle or bag to the suck top (on the side for screwing things on).
- Turn everything so the clean bottle or bag is on top and squeeze. Water will run through the filter backward, thus back flushing it. Do this until the water coming out is clear and coming out easily. (The water coming out is not filtered so be sure that you are not accidentally contaminating something while doing this.)
- If you plan on packing some duct tape for first aid or repairs, try

- Adding duct tape to your dirty water bottle.
putting it around your dirty water bottle. If you are using your water bottle with a Sawyer Squeeze filter, the duct tape will give you extra squeeze power and increased durability. It also serves to mark the water bottle so that it does not get confused with your clean water bottles.
Get the beta:
- Tape the amount of tape you want to bring with you around the center of your dirty water bottle. When you replace your dirty water bottle, move the tape.
First Aid and Backcountry Bathroom
Tips:
- Try using some Kinesiology Tape or Leukotape on hot spots and early blisters. This can provide extra protection from rubbing. The tape fits smoothly along the body and is pretty good at staying on even when wet.
- If you are carrying an ice axe, it can make a very effective trowel. Consider not carrying a trowel while carrying an ice axe.
- To rinse your menstrual cup in the backcountry it can be helpful to use a water bottle with a suck top as it allows for increased water pressure.
- “If you don’t know how much toilet paper you will need, pack extra. It is light!”- Frodo, PCT hiker, San Diego
Your Backcountry Kitchen
Tips:

- Opening a bear canister with a spoon or ice axe.
- If your bear canister needs a coin to open it, like the Bearikades and Garcia Backpackers’ Caches, you can instead use the back of your spoon or your ice axe. For bear canisters like the BearVaults, you can use a credit card to ease opening them.
- Carrying your stove in a cloth case? Carefully use that as a pot holder.
- Make a spice kit. It will make all your food more interesting and, if you share it, it will make you friends too.
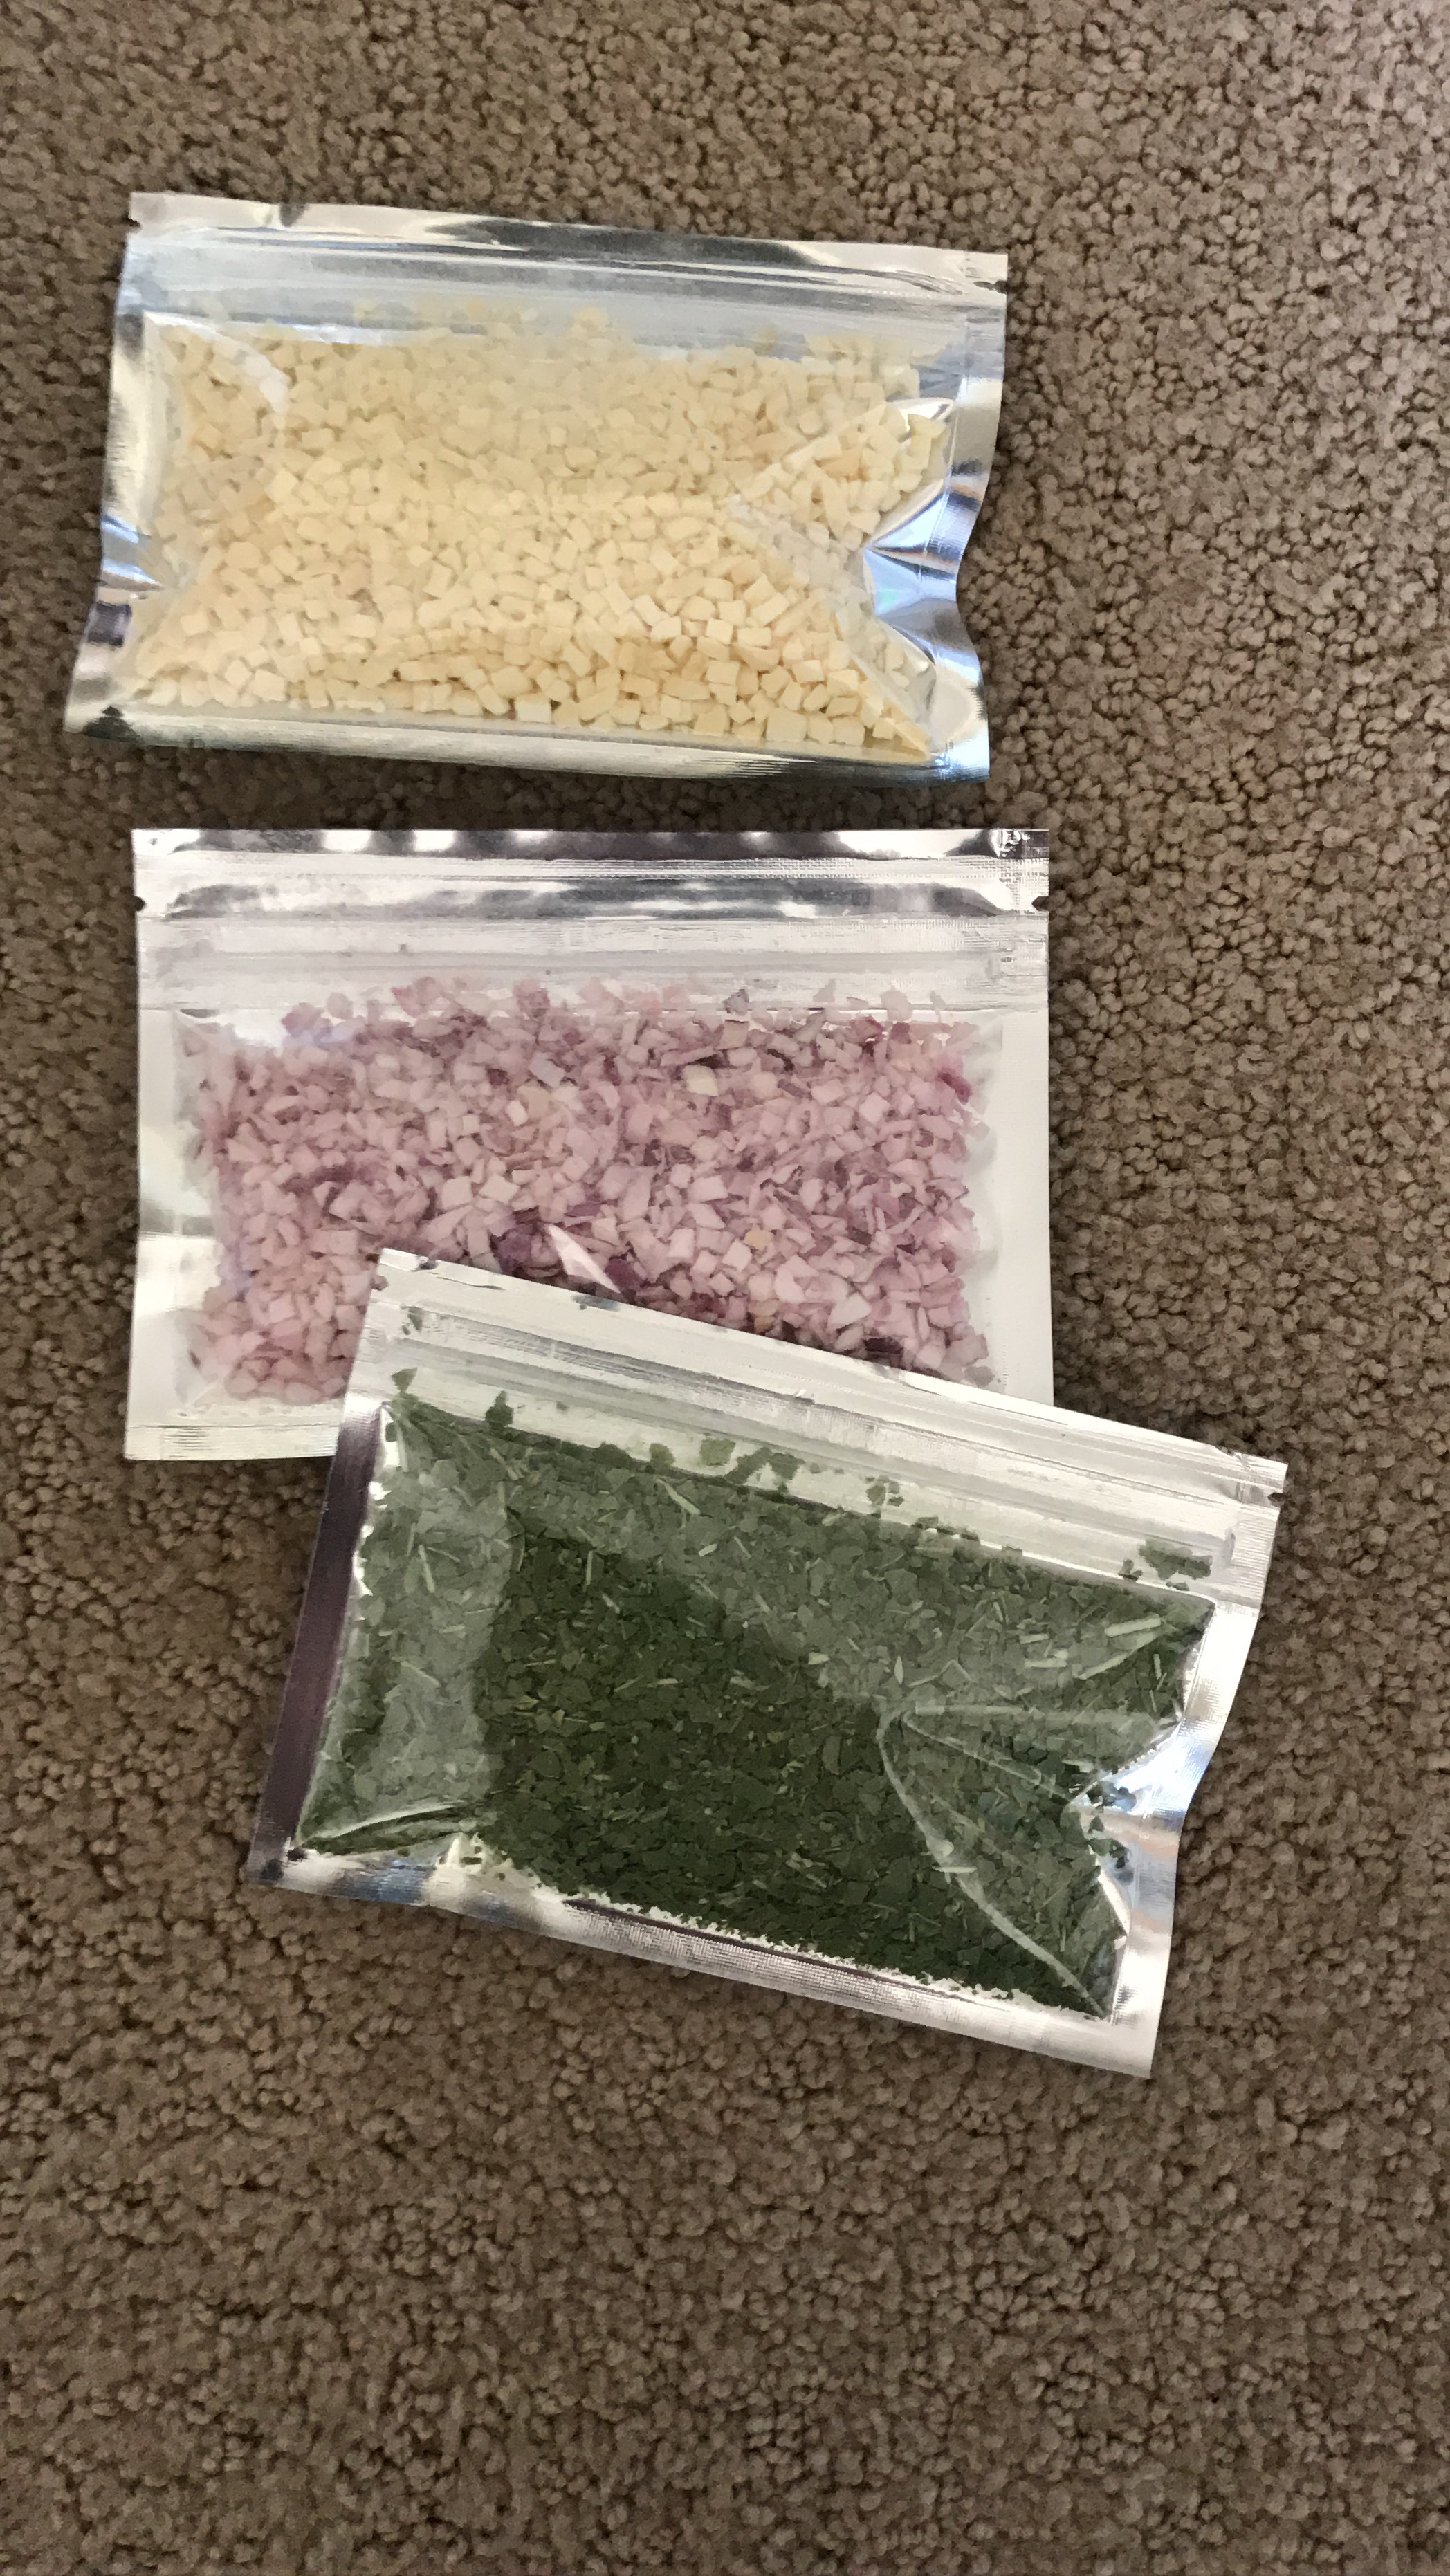
Some of my homemade spice kit: garlic, red onions, and basil.
Modifications and Ideas That Did Not Work
- I made a ground cloth out of Tyvek, which worked great, but initially I cut my Tyvek to be exact size of the ground cloth for my tent. I ended up cowboy camping most nights and quickly found that I would have preferred a slightly larger, less tailored piece of Tyvek. If I needed to make it smaller, I could fold it.
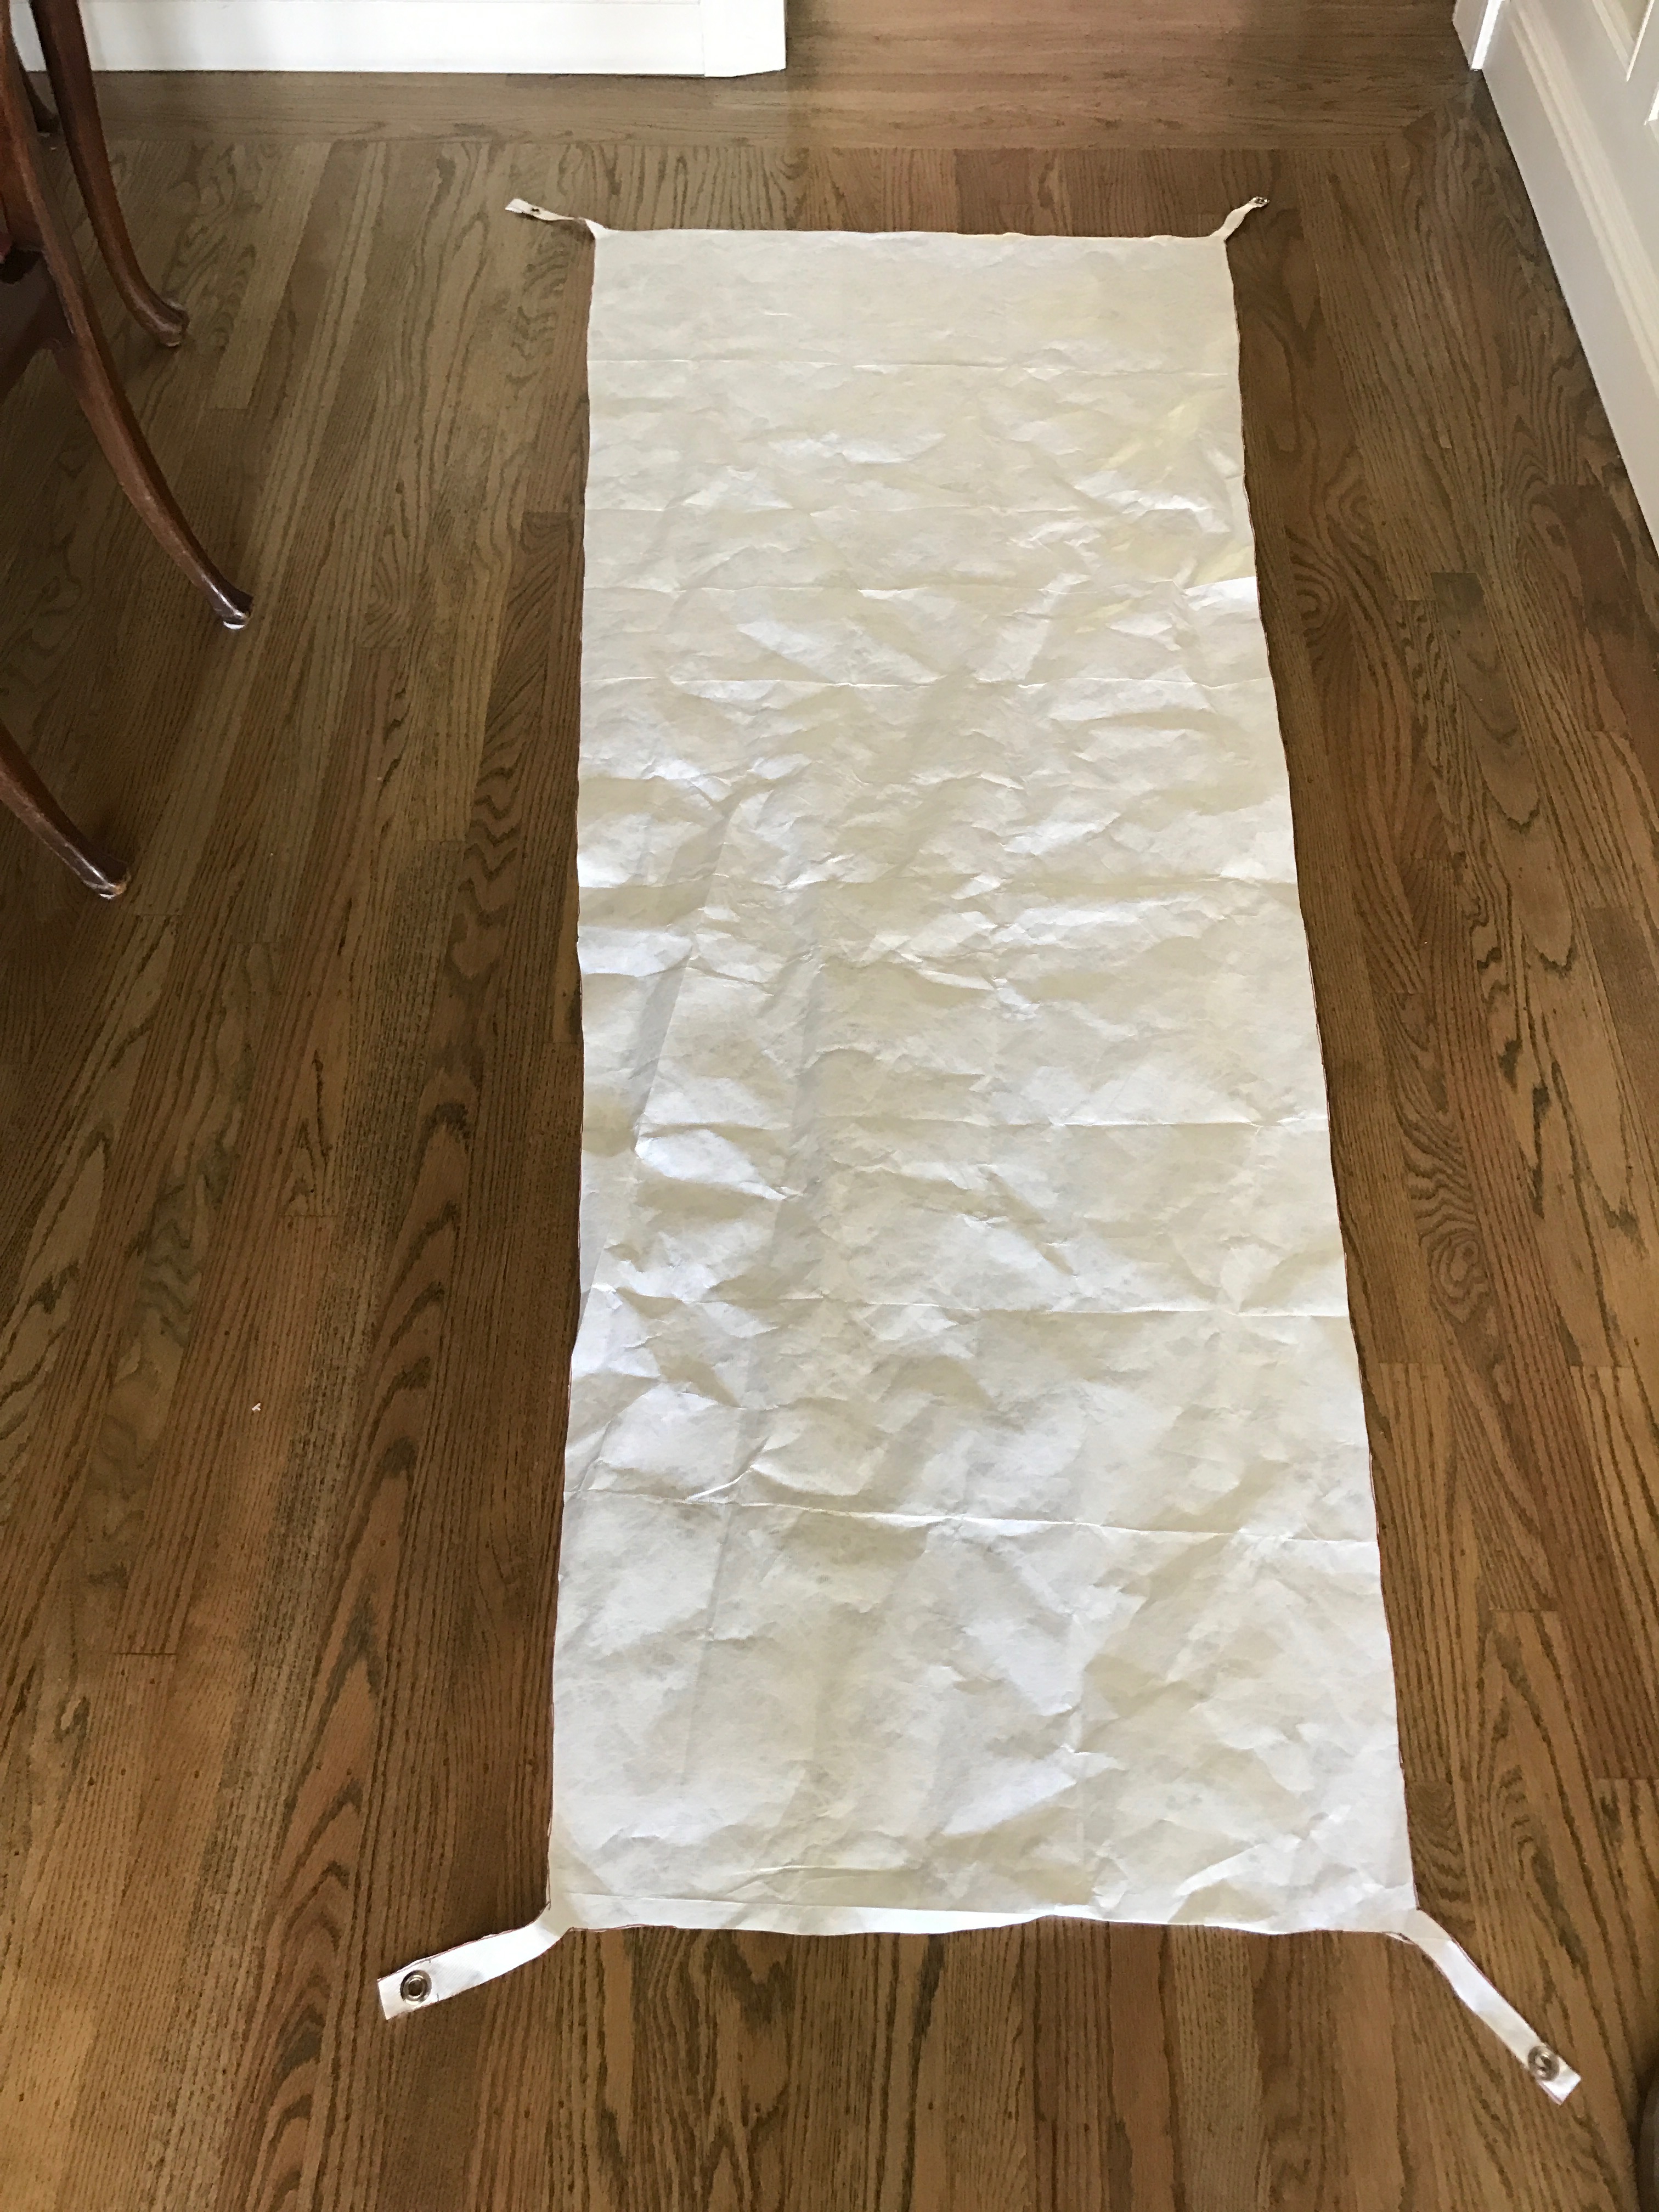
My original Tyvek groundcloth complete with unnecessary grommets.
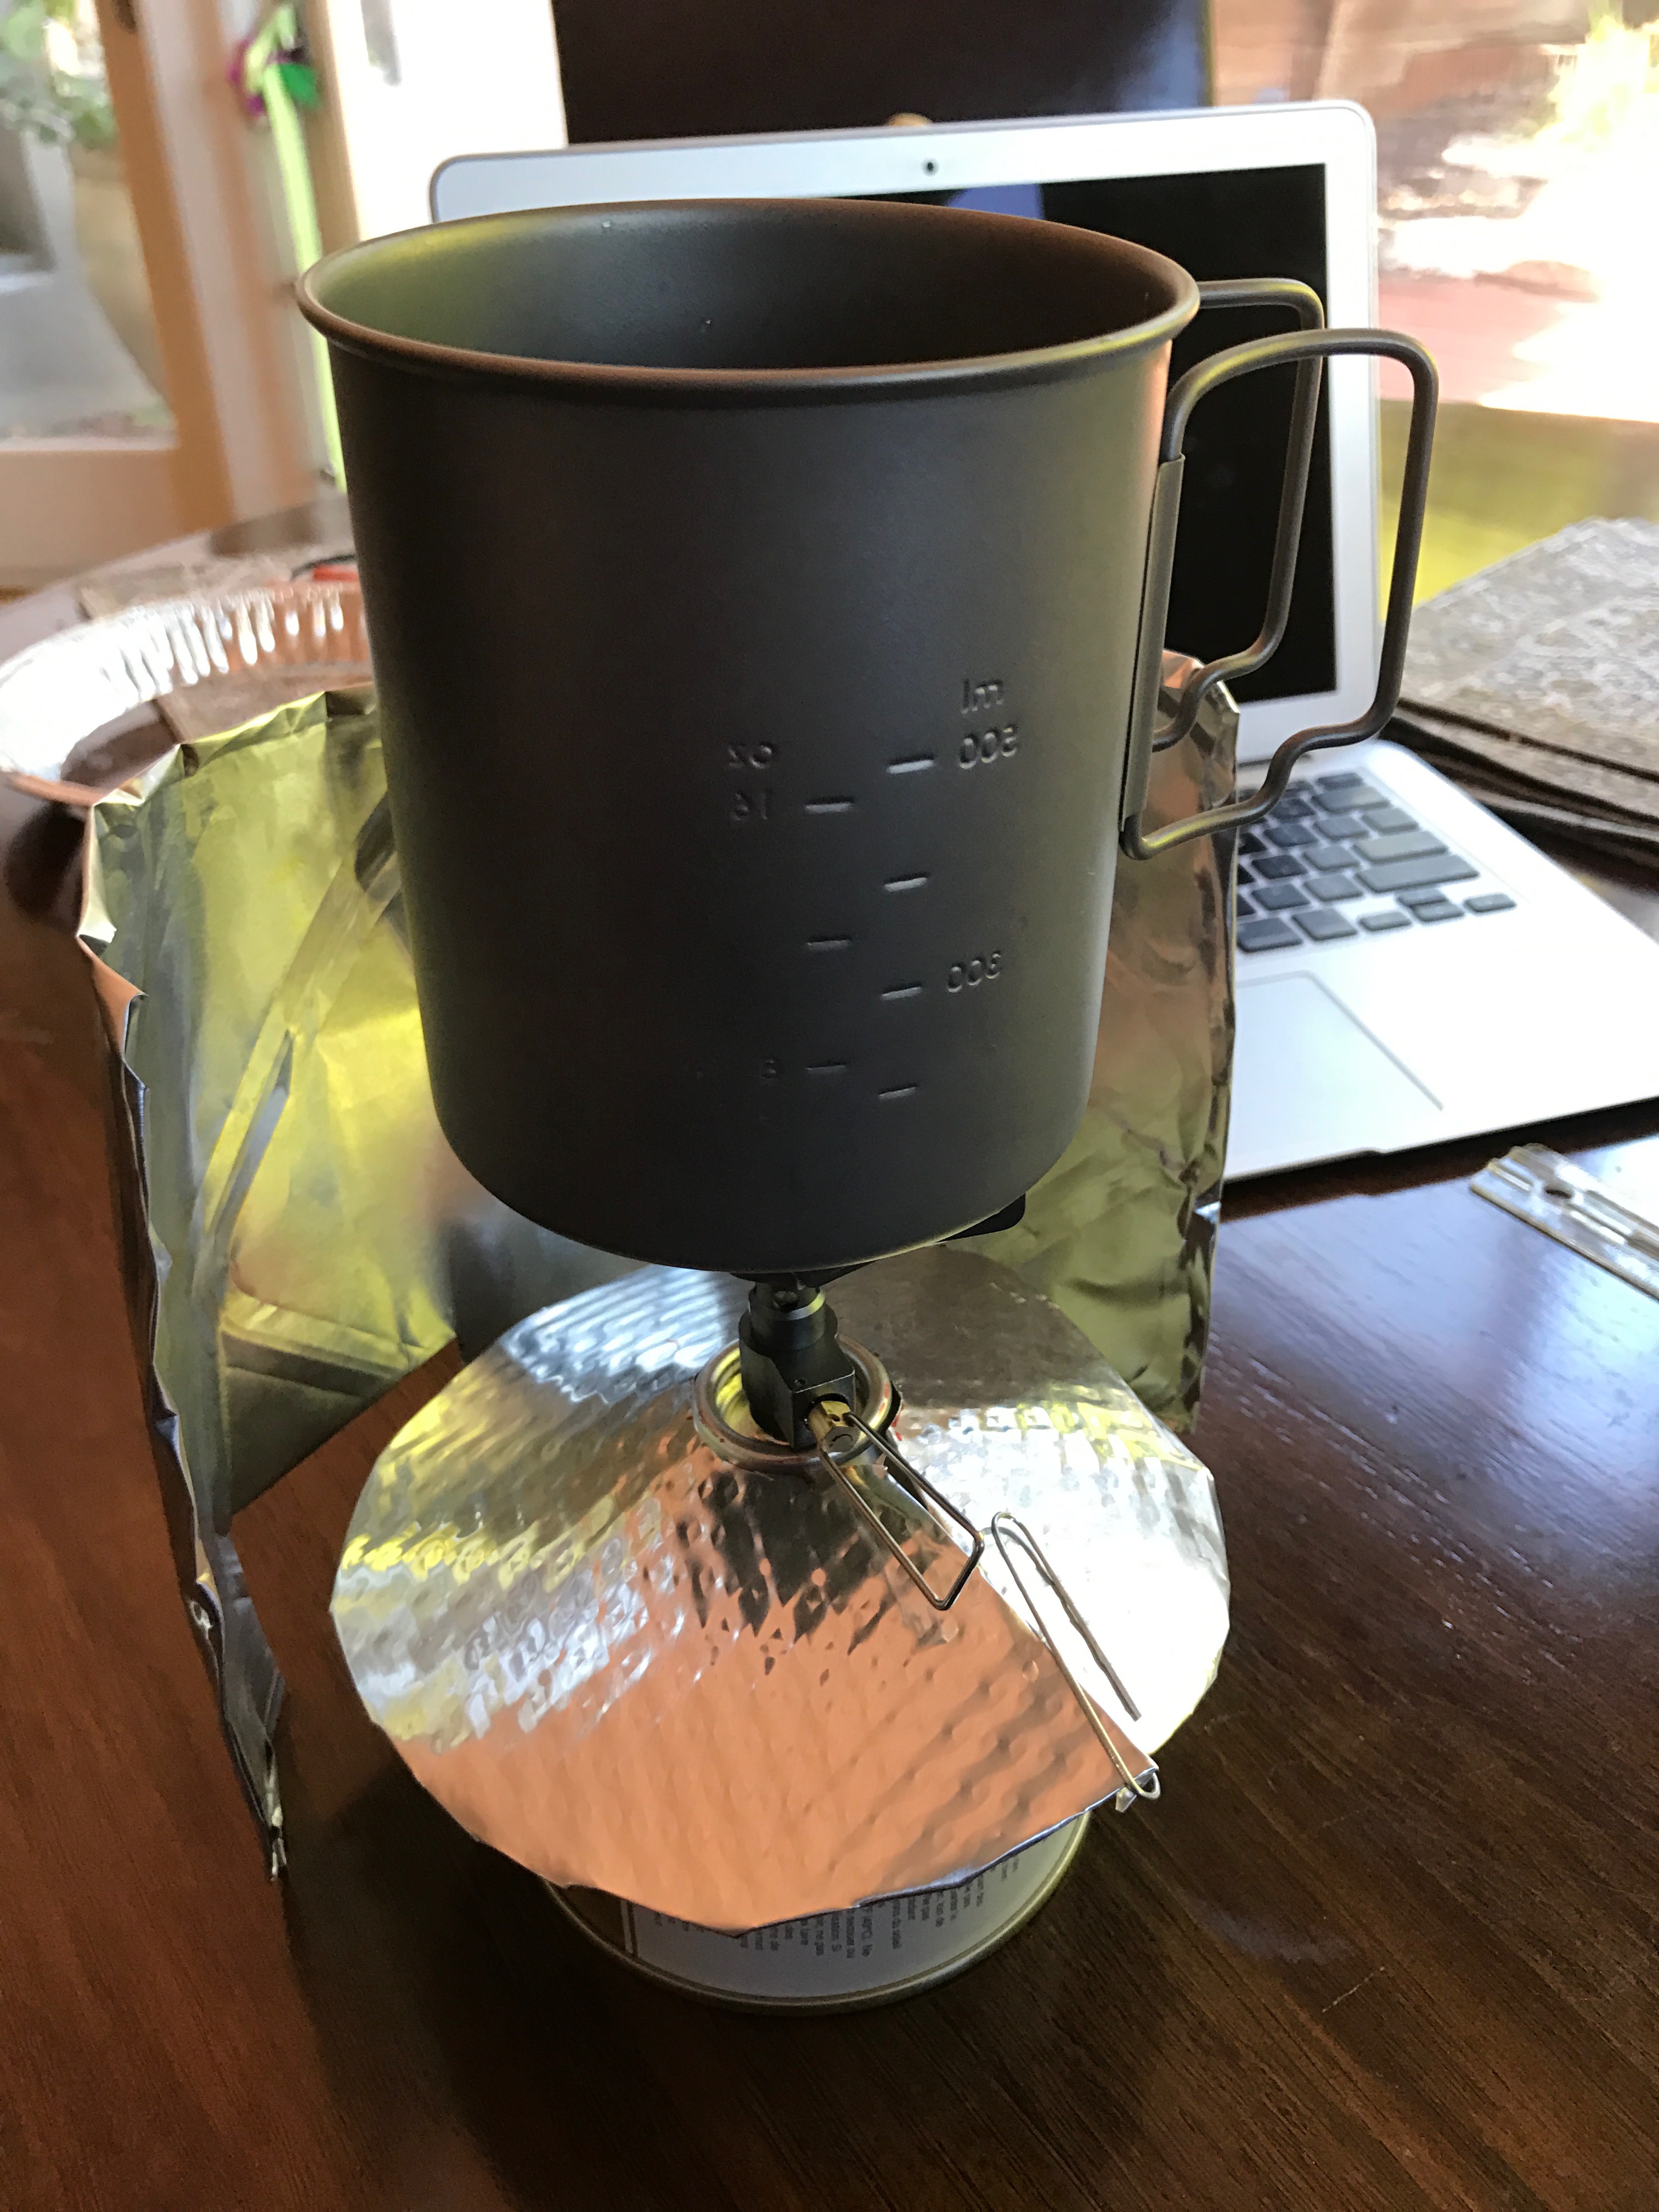
- Homemade windshield.
- I made a windshield for my stove and never ended up bringing it, using it, needing it or missing it.
- I cut pack towels into smaller pieces with the idea of having each smaller towel serve a different cleaning purpose. I did not end up using this system at all
and went back to one pack towel or none. - I definitely sent too many resupply boxes from home. In the future, I would send fewer boxes and resupply in towns along the way. For
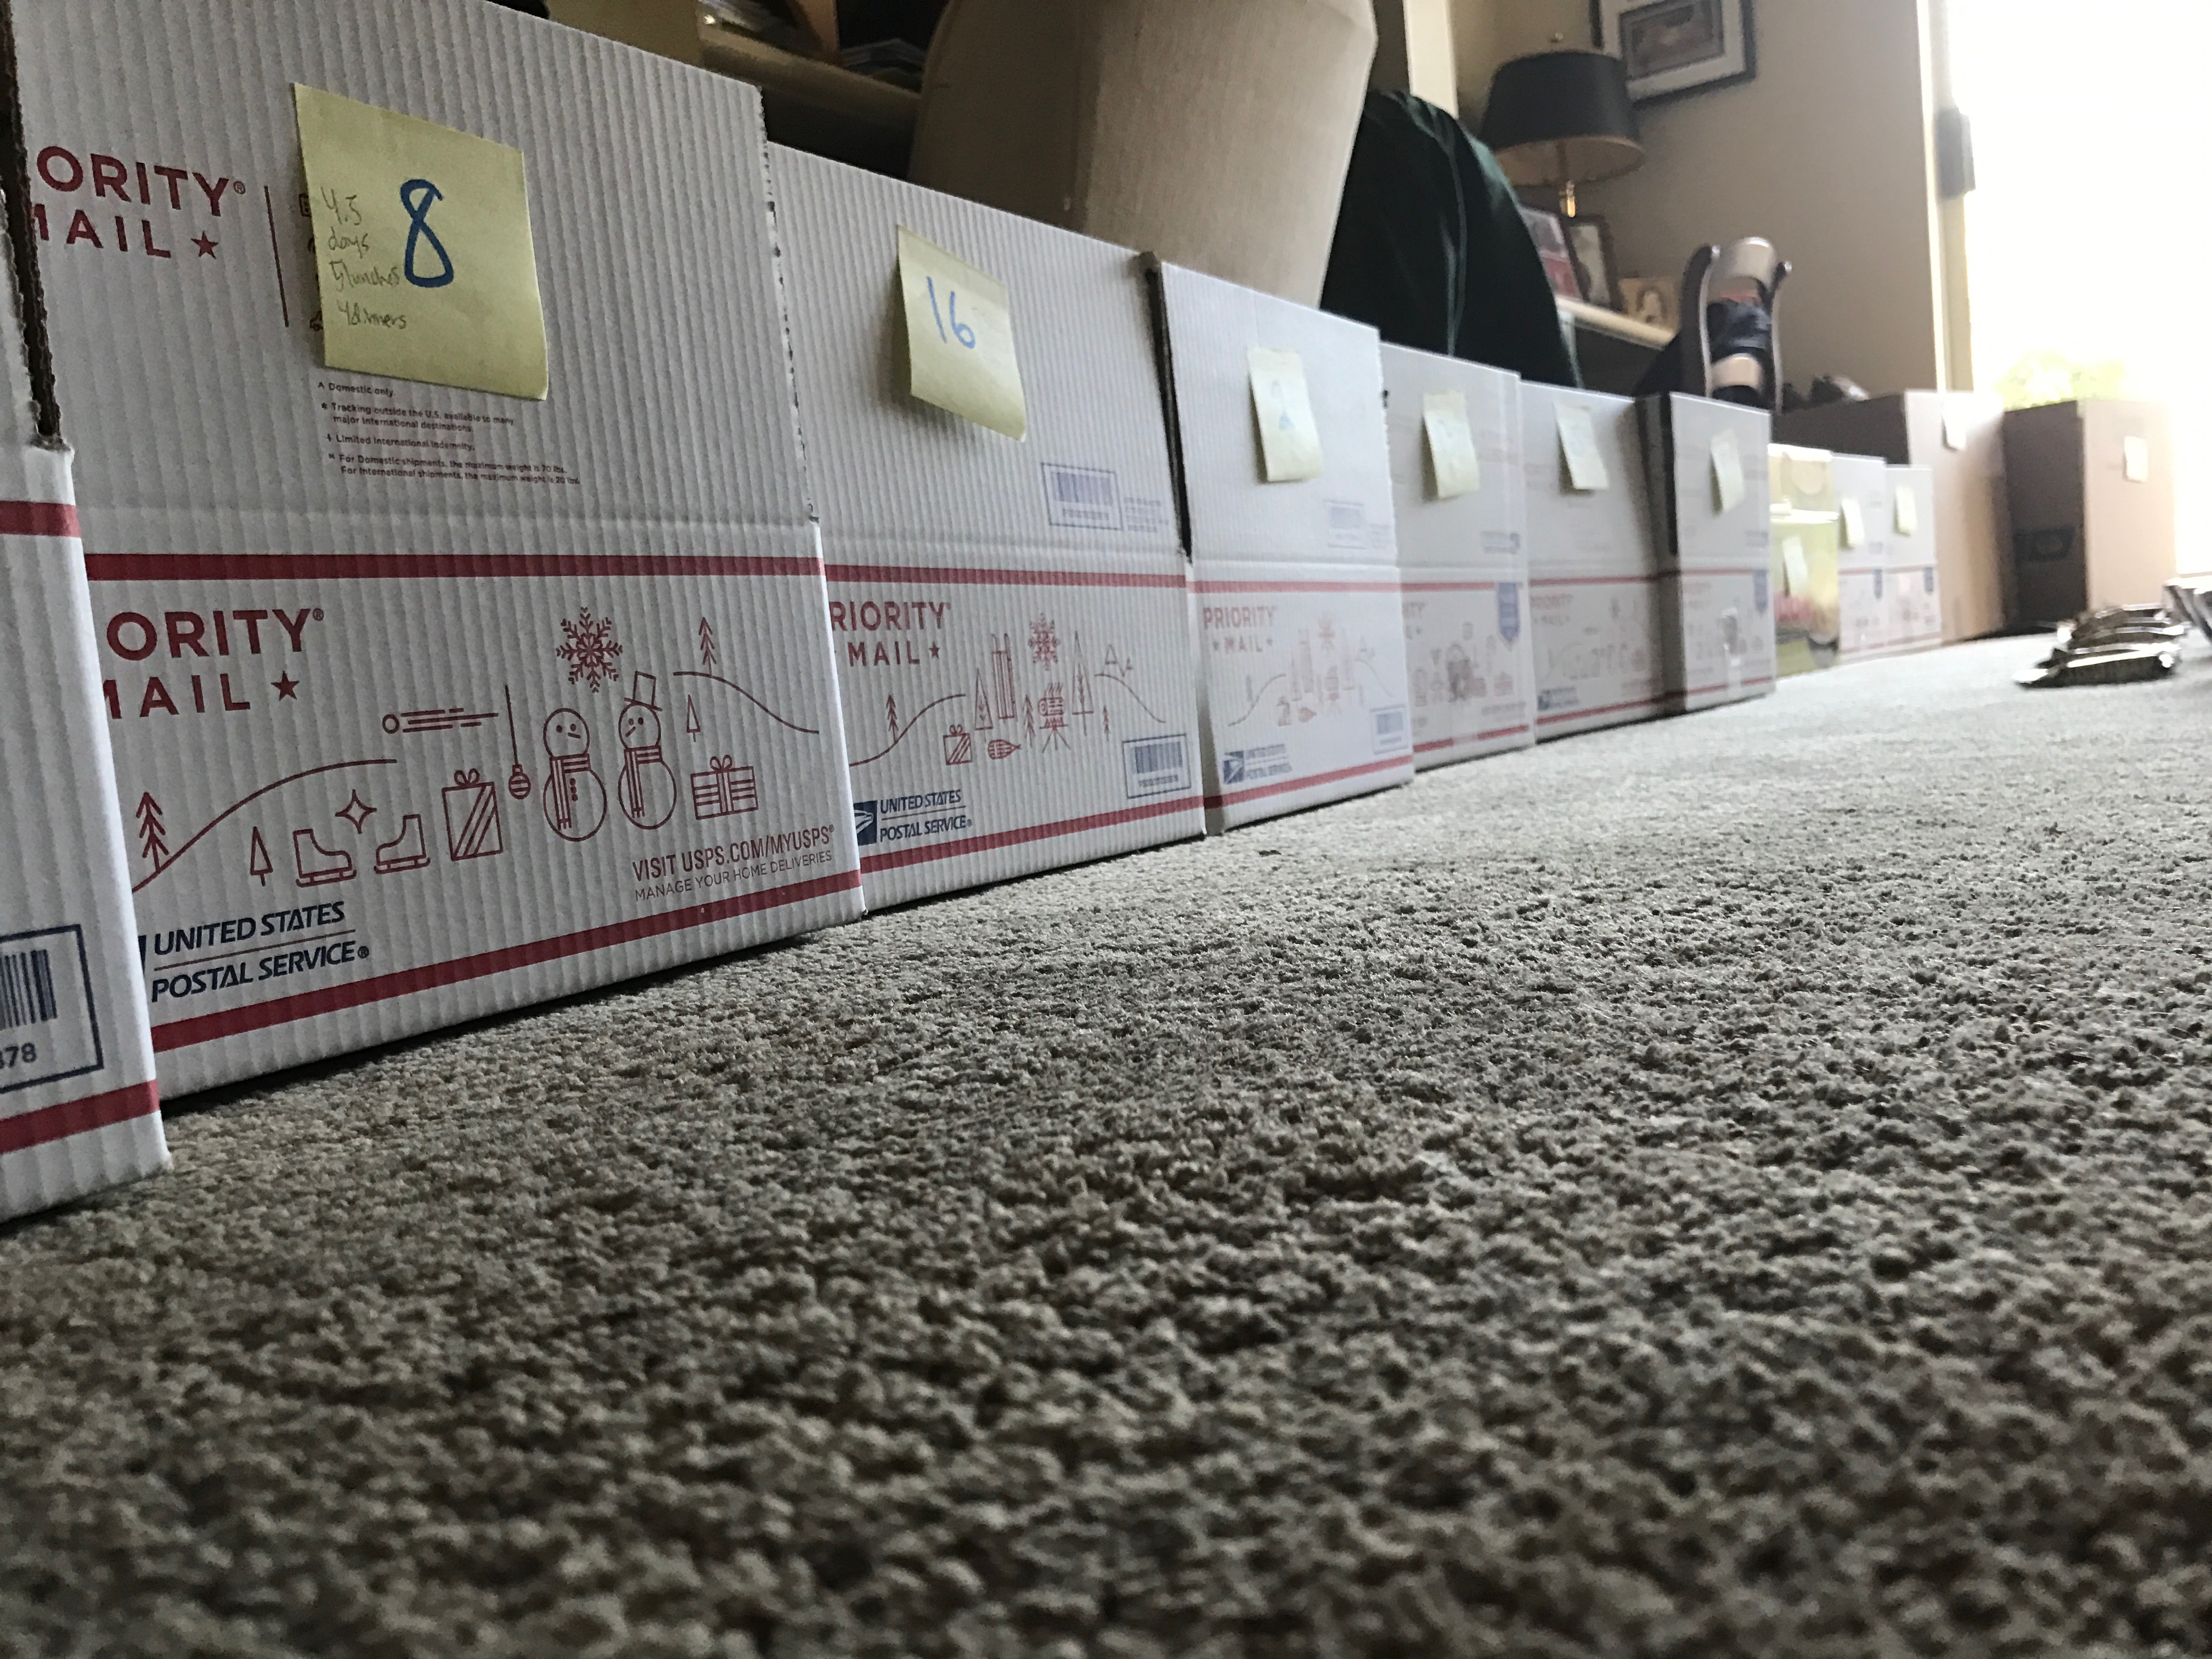
- Never-ending line of resupply boxes at home before I left.
places where sending a box is necessary, I would make most of them from larger towns along the way and send them ahead to myself instead of doing all the planning from home before I left.
Hope this helped and that you learned something new.

This website contains affiliate links, which means The Trek may receive a percentage of any product or service you purchase using the links in the articles or advertisements. The buyer pays the same price as they would otherwise, and your purchase helps to support The Trek's ongoing goal to serve you quality backpacking advice and information. Thanks for your support!
To learn more, please visit the About This Site page.

Comments 4
That Oring in the sawyer squeeze loves to fall out. I lost two on the AT but luckily a SOBO had some from a hardware store and they worked perfectly. I was also able to pick one up from an outfitter. I found it odd that they stocked the o-ring. You would think sawyer would put a design constraint to keep these from straight up falling out.
So true! I think I lost two as well…luckily found someone else’s lost O-ring lying in the middle of the trail at one point.
Instead of the standard o-ring on the Sawyer, I’ve started using some for garden hoses that come with a metal filter attached…helps keep the bigger stuff out of the inside of the Sawyer.
Very cool idea! Maybe I will test that out next time I need to replace an O-ring!!